The toilet shut off valve, also called an angle stop or supply stop, is the small valve screwed onto the water supply pipe coming out of the wall or floor behind your toilet. Its job is simple: let you cut the water to one fixture without shutting off the whole house. Every toilet repair that involves the tank or supply line starts with closing this valve. When it fails, that simple first step becomes the whole problem.
Old multi-turn compression stops were the standard for decades. They require five to ten full rotations to close, and after years of sitting untouched, the rubber washer hardens, the packing dries out, and the handle either refuses to move or breaks off in your hand. A valve that seizes at the wrong moment turns a $10 fill valve swap into a flooded bathroom and a call to the main shutoff in the basement. Modern quarter-turn ball valves fixed the design entirely: one 90-degree handle flip goes from fully open to fully closed, there is no rubber washer to harden, and they do not seize after years of disuse. If your shutoff is an old compression stop and it does not spin freely and close completely, replacing it is a repair worth doing before any other toilet work, not after.
This guide follows the same research methodology we apply across the site. We compare published specifications, valve mechanisms, connection types, lead-free certifications, and patterns across aggregated owner reviews rather than bench-testing parts in a lab. The plumbing code context, tool list, and step-by-step sequence below reflect how a competent DIYer and most plumbers approach this repair. It connects to our guides on the best toilet fill valves of 2026, the best toilet flappers of 2026, and the broader guide to the best flushing toilets, since those repairs all start at the shut off valve.
Before you start. Turn the valve handle clockwise and watch what happens. If it spins freely and water flow to the toilet stops completely within a turn or two, your valve still works and you may only need to replace the supply line or a tank component. If the handle is stiff, keeps spinning without closing, snaps, or the valve body weeps from the stem, you need to replace the shut off valve before anything else.
What Is a Toilet Shut Off Valve and How Does It Fail?
A toilet shut off valve is the angle-stop valve on the water supply pipe behind the toilet that lets you cut flow to only that fixture. The most common failures are a multi-turn compression stop that seizes or weeps from the stem packing after years of disuse, a cracked valve body caused by overtightening, and a seized handle that snaps under force. Modern quarter-turn ball valves do not seize and are the recommended replacement for any failed or aging compression stop.
There are two main valve designs you will encounter behind a toilet. The old standard is a multi-turn compression stop, which has a round or oval handle and a threaded stem that you turn many times to drive a rubber washer against a seat. These work fine when new, but sitting open for years causes the packing washer on the stem to dry and harden, the brass seat to pit, and the handle to either seize or spin freely without closing. The more serious failure is a weeping stem: a slow drip from the handle area that signals the packing is shot. You can sometimes stop a stem drip by tightening the packing nut below the handle half a turn, but if the valve will not fully close even when it spins freely, the seat is worn and the valve needs replacing.
Recommended toilets in this guide
A quarter-turn ball valve uses a chrome or stainless ball with a hole through its center. When the handle is parallel to the pipe, the hole is aligned and water flows. When you rotate it 90 degrees perpendicular to the pipe, the solid ball face blocks the flow. There is no rubber washer to harden, no packing to dry out, and the ball seats against PTFE seats that last for decades. These valves close cleanly and reliably even after sitting untouched for ten years, which is exactly what you need from a valve you only reach for in an emergency.
A third type, the push-to-connect stop from brands like SharkBite, uses a plastic collet and O-ring to grip copper, PEX, or CPVC pipe without any soldering or compression nut. These are fully code-legal in most jurisdictions, fast to install, and use a quarter-turn ball internally. Their main limitation is that the collet grip is slightly less permanent than a sweat or compression joint, so they are best in accessible locations, which a toilet shut off always is.
What Tools and Parts Do You Need to Replace a Toilet Shut Off Valve?
To replace a toilet shut off valve you need an adjustable wrench or two, a bucket and towels, PTFE thread tape or plumber's pipe dope for threaded connections, a braided steel supply line, and the replacement valve matched to your pipe type and inlet size. If the existing valve is a sweat-soldered copper fitting, you will also need a propane torch, solder, and flux, or you can avoid all of that by using a push-to-connect replacement valve.
Gather everything before you shut off the main water supply, because once the house water is off you want to work quickly. The connection type on your existing valve determines what you need.
Inlet sizes: the vast majority of toilet supply pipes in North American homes have a 1/2 in. nominal stub-out. Confirm yours with a quick measurement before you buy. The outlet side is almost always 3/8 in. compression, which is the standard size that braided toilet supply lines use. A standard angle stop is sold as 1/2 in. inlet x 3/8 in. outlet, which fits nearly every toilet installation.
If your existing valve is soldered (sweat) onto copper pipe, you have two options. You can solder a new sweat-style valve in place, which requires a propane torch, flux, solder, and practice on a dry pipe. Or you can cut the old valve off cleanly with a pipe cutter and install a SharkBite-style push-to-connect angle stop, which slides onto the cleaned cut end of the copper pipe without any heat. Most DIYers prefer the push-fit option for exactly this reason.
How Do You Replace a Toilet Shut Off Valve Step by Step?
Replace a toilet shut off valve by shutting off the house main water supply, opening the old valve to drain the line, and disconnecting the supply line from both the valve and the toilet tank. Remove the old valve from the pipe stub-out by unthreading or cutting it free, prepare the pipe end, install the new quarter-turn valve, reconnect the supply line, and slowly restore the main water supply while checking for leaks. The job takes about 45 minutes for a compression-to-compression swap, longer if soldering is involved.
Work in order. Rushing ahead of the sequence, especially before the water is fully off and the line is fully drained, is the main cause of a wet floor on this repair.
Step 1: Shut off the house main water supply
Because the toilet shut off valve may not close fully or may be what you are replacing due to a failure, do not rely on it to shut off the water. Go to the main shutoff for the house, usually at the water meter near the street, in the basement, or in a utility room, and close it fully. Turn it clockwise to close for a multi-turn gate valve, or 90 degrees for a quarter-turn ball valve. Open a faucet elsewhere in the house to relieve pressure and confirm flow has stopped. Now you are safe to work.
Know your main shutoff location before you start. Find it and confirm it closes before you begin this repair. If the main is also a rusted-out multi-turn gate valve that refuses to fully close, contact your water utility to close the curb stop at the property line, or call a plumber. Working with live water pressure on a toilet shut off valve swap is not manageable without a helper and extremely fast hands.
Step 2: Open the old shut off valve and drain the line
With the main off, open the toilet shut off valve fully and flush the toilet. This drains residual pressure and water from the supply line between the main and the toilet. Then disconnect the supply line at the toilet tank end first: hold the fill valve shank inside the tank with one hand and loosen the coupling nut at the bottom of the tank with the other, turning counterclockwise. Let any water drain into your bucket. Then place the bucket under the angle stop and loosen the supply line's lower nut at the valve outlet, also counterclockwise. A half cup to a pint of water will run out. Remove the supply line completely and set it aside. If it is old, plan to replace it with a braided steel line.
Step 3: Identify your existing valve connection type
Before you touch the old valve, identify how it connects to the pipe stub-out coming from the wall or floor. Look at where the valve body meets the pipe. If there is a compression nut and a ferrule (a small brass ring) visible on the pipe, it is a compression stop. If the valve appears to be seamlessly connected to a copper pipe with no nut, it is soldered (sweat). If it has a threaded female inlet with wrench flats, it screws onto a male-threaded pipe fitting. This determines how you remove it and what replacement you install. Take a photo on your phone before you touch anything.
Step 4: Remove the old valve
For a compression stop, use two wrenches: grip the pipe stub-out or the fitting behind the valve firmly with one wrench to prevent it from rotating, and loosen the compression nut on the valve inlet counterclockwise with the other. Once the nut is off, the valve pulls free from the pipe. The old brass or copper compression ferrule may stay on the pipe; if it is seated securely and not corroded, you can leave it in place for the new valve, since many compression valves include a new ferrule anyway. If the ferrule is crushed, corroded, or badly deformed, slide it off the pipe and replace it with the new one that comes with your valve.
For a threaded stop, hold the pipe or adapter firmly and unthread the valve counterclockwise. For a soldered stop, cut the pipe 1 to 2 inches above the old valve using a tube cutter, leaving a clean end of copper to accept a push-to-connect valve. Let any water drain from the cut pipe into your bucket. Sand the cut pipe end lightly to remove any burrs, then wipe it clean.
Protect the pipe stub-out. The single most important thing on this step is using a backup wrench on the pipe or fitting behind the valve. Without it, the torque of loosening the valve nut can twist the stub-out inside the wall, breaking the solder joint or cracking the fitting inside the wall, which turns a surface repair into a wall-opening job. Always use two wrenches, one to hold and one to turn.
Step 5: Prepare the pipe and install the new valve
For a compression valve, slide the new compression nut onto the pipe stub-out first (threaded end facing outward), then slide the new ferrule onto the pipe. Offer up the new valve body and thread the compression nut onto the valve inlet finger-tight. Hold the valve body firmly with one wrench and tighten the compression nut with the other, about one and a quarter to one and a half turns past hand-tight. The ferrule compresses against the pipe and creates the seal. Do not overtighten: a compression joint seals at about 1.25 turns past hand-tight, and going further can split the ferrule or crack the nut.
For a push-to-connect valve, clean the cut end of the copper pipe with emery cloth or a deburring tool until it is smooth and shiny. Check that the pipe end is square. Push the SharkBite or equivalent valve firmly onto the pipe until it stops, usually about 1 inch of pipe insertion. You will feel a slight click as the collet grips the pipe. Give the valve a firm tug to confirm it is seated; it should not pull off. No tools, tape, or dope needed at the push-fit connection.
For a threaded stop, wrap the male pipe threads with PTFE tape three to four times in the clockwise direction, then thread the valve on by hand until snug and tighten with a wrench to about two turns past hand-tight. Do not overtighten threaded connections on brass fittings.
In all cases, once the valve is installed, confirm the new quarter-turn handle is in the open position (handle parallel to the pipe) before you restore the main water supply.
Step 6: Reconnect the supply line and restore the water
Connect a new braided steel supply line between the valve outlet (3/8 in. compression) and the underside of the toilet tank. Thread the lower coupling nut onto the valve outlet by hand and tighten it about one turn past hand-tight with pliers, and do the same at the tank inlet. Do not use PTFE tape on supply line compression fittings; they seal with the internal rubber gasket. Go slowly with the wrench at the tank end: plastic lock nut overtightening cracks tank inlets. Then go to the house main and slowly open it. Watch the new angle stop and both supply line connections closely for any drips. Dry the area with a towel first so you can see a seep clearly. A slow drip at the compression nut usually responds to a quarter turn tighter; a drip at the valve body indicates a misaligned ferrule or a defective valve and the water should go back off.
Step 7: Test the new valve and check for leaks
Once the main is on and the system is pressurized, turn the new shut off valve clockwise to close it (handle perpendicular to the pipe) and watch whether the supply to the toilet stops. You should hear the tank stop filling immediately. Then open it again (handle parallel to the pipe) and let the tank refill. Flush once and watch all connections through the refill. Check behind the toilet again ten minutes later; slow seeps sometimes only appear once the fittings are fully pressurized and the house settles into normal use. A clean, dry installation after ten minutes means the job is done.
Expert Take
The single highest-return habit on this repair is replacing the braided supply line at the same time as the shut off valve, even if the existing line looks fine. Old rigid chrome lines and vinyl braided lines fail most often at the fittings, and a small seep at a supply line fitting behind a toilet goes unnoticed for months. Replacing it while the water is already off costs two minutes and removes the most likely source of a future slow drip or burst. A stainless-jacketed braided line rated for 125 PSI burst is the correct choice for any toilet supply application.
What Are the Best Replacement Toilet Shut Off Valves?
The best replacement toilet shut off valve for most homes is the BrassCraft G2CR19X C, a quarter-turn ball valve with a lead-free brass body, 1/2 in. compression inlet, and 3/8 in. compression outlet that fits standard toilet supply lines. For a no-solder replacement on any pipe type, the SharkBite 23036-0000LFA push-to-connect angle stop installs without tools in seconds and carries full code approval. For the best value, the Eastman 10872LF delivers the same quarter-turn reliability and lead-free brass at a lower price point.
These three covers every installation scenario. Each one is a true quarter-turn ball valve, not a multi-turn compression stop, and each uses a lead-free brass body that meets NSF 372 and modern plumbing code requirements.
Best Overall
BrassCraft G2CR19X C
Standard compression install
A quarter-turn ball valve with a lead-free forged brass body, standard 1/2 in. compression inlet, and 3/8 in. compression outlet that fits the vast majority of North American toilet supply setups and closes cleanly with one flip of the chrome handle.
Check price on Amazon
No Solder
SharkBite 23036-0000LFA
Push-fit on copper, PEX, CPVC
A push-to-connect angle stop that slides onto copper, PEX, or CPVC without soldering, tools, or compression nuts, making it the fastest legitimate replacement for a sweat-soldered stop where torch work is not practical.
Check price on Amazon
Best Value
Eastman 10872LF
Budget-friendly quarter-turn
A lead-free quarter-turn ball valve at a noticeably lower price than the BrassCraft, with the same standard 1/2 in. x 3/8 in. compression configuration and a consistent leak-free track record across a large number of verified installs.
Check price on Amazon
How Do the Replacement Options Compare on Specs?
The table below compares the three picks and two additional alternatives on the specifications that matter most for a toilet angle stop. The BrassCraft is the winner for overall fit and reliability together, but connection type is the primary filter: choose based on what your pipe requires.
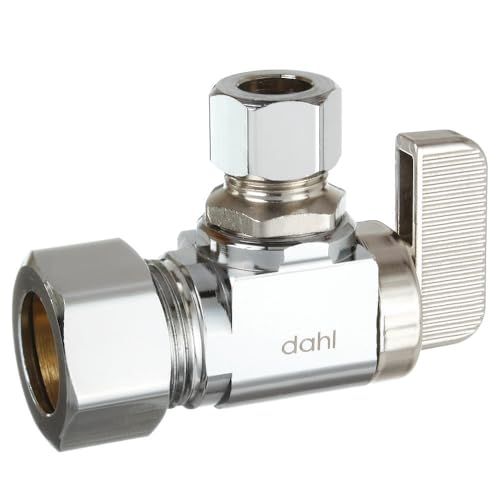
All five are quarter-turn ball valves and all five are lead-free brass, which are the two non-negotiable criteria. The SharkBite stands apart for connection type; every other valve on this list assumes a compression or threaded pipe end. The Dahl mini-ball is worth knowing if your toilet cabinet or alcove is unusually cramped, since its compact body fits in spaces where a standard-sized angle stop handle cannot swing fully.
When Should You Call a Plumber Instead of DIYing This?
Call a plumber instead of attempting a DIY shut off valve replacement when the house main water supply also cannot fully close, when the pipe stub-out behind the valve is corroded copper or galvanized steel that crumbles when you apply wrench force, when the stub-out is soldered inside the wall and you cannot safely use a torch in the space, or when water is actively leaking from a crack in the existing valve body and pressure is still live in the line. These scenarios require professional tools and experience to avoid a larger flood or wall repair.
The toilet shut off valve replacement is a legitimate DIY repair for a confident home fixer, but there are four conditions that change the calculation.
The first is a failed main shutoff. If you go to close the house main and it also refuses to fully close or is a corroded old gate valve, you cannot safely work on the toilet stop until the main is addressed. In that case, call the water utility to close the curb stop or hire a plumber to replace the main shutoff first.
The second is a corroded stub-out. Old galvanized or heavily corroded copper pipe can crack when you apply the lateral force of loosening a compression nut. If you see heavy rust scale, greenish corrosion, or a pipe that flexes visibly, the stub-out may need to be replaced before the valve, which involves either soldering or cutting back into the wall. That is a plumber job.
The third is a torch-required sweat connection in a very confined or combustible space. Soldering a valve inside a tight cabinet with no clearance from wood framing is a fire risk. A push-to-connect valve eliminates that entirely, but if the cabinet is so tight you cannot swing the SharkBite into position, call a plumber with a right-angle torch setup.
The fourth is an active leak with live pressure. If the valve body is cracked and water is actively running, you cannot work on it without the main off. If the main also will not close, call the utility or a plumber with emergency availability rather than attempting to work under active pressure.
Expert Take
When a toilet's shut off valve needs replacing, this is also the right moment to evaluate whether the toilet itself is worth maintaining. An aging single-flush toilet with a MaP score below 500 grams and a 1.6 GPF rating is working harder and using more water than a current high-efficiency toilet needs to. Brands like TOTO, Kohler, and American Standard now offer 1.28 GPF models rated above 800 grams on MaP testing that use EPA WaterSense-certified levels of water and flush reliably. If you are already shutting off the water and disconnecting lines, and your toilet is more than 15 years old, replacing the whole toilet at that point instead of just the valve is worth a serious look. Our guide to the best flushing toilets covers the current top-performers by category.
What to Do if the New Valve Still Drips After Installation
If a newly installed compression angle stop drips at the inlet nut, tighten the compression nut a quarter turn at a time while holding the valve body still; a properly seated ferrule seals with about 1.25 turns past hand-tight. If it drips at the valve body or outlet, check that the supply line coupling nut is snug and the internal rubber washer is seated. A drip at a push-to-connect fitting after a firm push usually means the pipe end was not fully deburred or inserted to the stop mark, and the valve should come off, the pipe end cleaned, and reinstalled. Do not overtighten any fitting trying to stop a drip; diagnose the root cause first.
Post-installation drips follow a pattern. At the compression inlet, a slow seep usually means the ferrule is not fully compressed, and a quarter to half turn more on the nut with a backup wrench on the valve body will stop it. Give each small tightening increment ten minutes to confirm it sealed before adding more, and stop before you reach two full turns past hand-tight. At the supply line connections at either end, drips are almost always a misaligned rubber gasket inside the coupling nut; remove the nut, reseat the gasket straight, and reconnect. At the valve outlet or body, a drip with the supply on and the valve open suggests a cracked valve body, which requires a new valve. Do not confuse condensation on the cold valve body with a real seep in humid weather; dry the area with a towel and watch for a minute before concluding there is a leak.
A useful companion here is our guide on best toilet fill valves of 2026 if the valve replacement reveals that the fill valve inside the tank also needs attention. It often makes sense to replace both on the same water-off session. Similarly, if the toilet has been running, checking the best toilet flappers of 2026 and the best toilet wax rings of 2026 while the toilet is accessible may save a repeat repair visit.
How Long Does a Toilet Shut Off Valve Last and When Should You Replace It Proactively?
A quality quarter-turn brass ball valve toilet shut off lasts 10 to 20 years or more in normal residential use. Old multi-turn compression stops typically last 5 to 10 years before the packing dries and the seat wears. Signs to replace proactively, before a failure, include any stem drip, a handle that is stiff or will not move freely, a valve that takes more than two turns to close, or a body that shows white mineral scale or green corrosion indicating the brass is degrading. Proactive replacement before you need the valve in an emergency is always preferable to a forced repair under pressure.
Water chemistry plays a significant role in valve lifespan. Hard water with high mineral content deposits scale inside compression valves faster than soft or treated water, accelerating seat wear. Homes on well water, particularly with high iron content, tend to see shorter valve lifespans and more seized stems. If your home is on hard well water, EPA WaterSense guidance on water efficiency applies to more than just the toilet: it is worth considering a whole-house water treatment system if valve failures are recurring across multiple fixtures. For the toilet itself, the fill valve is often the first tank component to show the effects of mineral buildup. Our guide to best toilet fill valves covers models with improved mineral resistance for hard-water homes.
The strongest argument for proactive replacement is timing. A shut off valve that seizes at 11 PM on a Sunday, when a fill valve overflow is soaking the floor, costs far more in water damage and emergency plumber rates than the valve itself costs to replace on a routine basis. Modern homes where the original builder-grade compression stops are still in place after 15 or more years are reasonable candidates for proactive valve replacement at the next toilet maintenance visit, even if the existing valve still opens and closes. Adding a new quarter-turn ball valve is cheap insurance.
FAQ
Frequently asked questions
? How long does it take to replace a toilet shut off valve?
A compression-to-compression swap on an accessible stub-out typically takes 30 to 45 minutes for a careful first-timer. That includes shutting off the main, draining the line, removing the old valve, installing the new one, connecting a new supply line, and checking for leaks. A push-to-connect replacement on a sweat-style stub-out can be faster, often under 30 minutes, because there is no soldering involved. Add time if the old valve is corroded and stubborn to remove.
? Do I need to turn off the whole house water to replace a toilet shut off valve?
Yes. Because the toilet shut off valve itself may be the component that is failing, you cannot rely on it to stop the water. Always shut off the house main before replacing it. If you are installing a new quarter-turn valve and the existing valve closes cleanly, you could theoretically turn off the toilet stop and work with just the downstream section dry, but this is not recommended because the main needs to be off anyway to replace the valve body securely.
? What type of shut off valve should I install as a replacement?
Install a quarter-turn ball valve with a lead-free brass body, not a multi-turn compression stop. Quarter-turn ball valves do not seize after years of disuse and close reliably with one handle flip. The mechanism that determines most shut off valve failures is the old multi-turn design, and replacing with another multi-turn stop simply restarts the clock on the same failure mode. Quarter-turn ball valves are widely available at every hardware store and home center.
? What size shut off valve do I need for a toilet?
The vast majority of North American toilet installations use a 1/2 in. nominal inlet (the supply pipe side) and a 3/8 in. compression outlet (the supply line side). The standard angle stop sold for toilet installations is marked as 1/2 in. x 3/8 in. and fits nearly every standard toilet supply configuration. If your pipe stub-out is 3/8 in. rather than 1/2 in., measure it before buying. You can confirm inlet size by measuring the outside diameter of the copper pipe stub-out: 1/2 in. nominal copper pipe has an OD of about 5/8 in.
? Can I replace a toilet shut off valve myself without a plumber?
Yes, for most installations. A compression-to-compression swap or a push-to-connect installation requires no soldering and only basic tools. The main skill required is using a backup wrench to prevent the supply stub-out from twisting inside the wall while you loosen the valve. If your existing valve is a sweat (solder) joint and you do not have torch experience, a push-to-connect SharkBite-style replacement valve eliminates all soldering and is fully code-legal in most jurisdictions.
? How tight should I make the compression nut on the new valve?
About one and a quarter turns past hand-tight, with a backup wrench holding the valve body still. Compression fittings seal by compressing a soft brass ferrule against the pipe, and this happens in the first turn and a quarter. Going further risks splitting the ferrule, cracking the nut, or distorting the pipe, all of which cause leaks rather than stopping them. If a small drip appears after restoring pressure, add a quarter turn at a time and wait 10 minutes between each to confirm whether it has sealed.
? Is PTFE tape needed when installing a compression angle stop?
Not at the compression inlet connection. Compression fittings seal mechanically through the compressed ferrule, not with thread sealant. PTFE tape is needed only at threaded connections, specifically a female-threaded (FIP) valve inlet that screws onto a male-threaded pipe fitting. At the supply line coupling nuts, which use rubber internal gaskets, no tape is needed either. Using tape where it is not appropriate can actually prevent proper seating of the ferrule or gasket.
? Can I use a SharkBite push-to-connect angle stop on a toilet?
Yes. SharkBite and similar push-to-connect angle stops are fully code-approved in most North American jurisdictions, including for use on copper, PEX, and CPVC pipe. They are designed for accessible locations, which a toilet shut off always is, and they meet NSF 61 and NSF 372 (lead-free) requirements. The push-fit connection is permanent under normal use and can be removed with a disconnect clip tool if needed for a future repair.
? What does it mean if the shut off valve handle spins freely but the toilet still fills?
A handle that spins freely with no resistance and no change in water flow is a failed multi-turn compression stop. The stem has stripped, the rubber washer has deteriorated completely, or the connection between the handle and the stem has broken. The valve is not closing the water at all. This is a failure mode that requires replacing the valve. In the meantime, shut off the house main water supply until the new valve is installed.
? Why is my shut off valve dripping from the handle area?
A drip from the stem area just below the handle on a multi-turn compression stop means the packing is worn. On some older valves you can stop a stem drip temporarily by tightening the packing nut, the hex nut just below the handle, about a half turn clockwise while the valve is closed. But on a valve that is old enough for the packing to be failing, the seat and washer are likely worn too, and replacing the whole valve is the more reliable repair than re-packing a worn stop.
? Should I replace the supply line when I replace the shut off valve?
Yes, always. With the main already off and the supply line already disconnected, replacing it costs two minutes and removes the most likely source of a future slow seep or burst at the supply end. Old rigid chrome supply lines and plastic-jacketed vinyl braided lines fail at the fittings over time. A new 12-inch stainless braided line rated for at least 125 PSI is the correct replacement for any toilet installation and costs very little.
? How do I know if the shut off valve or the supply line is causing a leak behind the toilet?
Dry the area completely with a towel. With the main on and the system pressurized, watch closely. A drip at the oval or round valve body or stem is the shut off valve. A drip at either end of the hose is the supply line coupling nut, which often responds to a quarter turn tighter. A drip from the underside of the tank itself is a different problem, either the tank bolts, the ballcock washer, or the wax ring if the base is also wet.
? Is it hard to replace a shut off valve on a wall stub-out versus a floor stub-out?
The procedure is the same; the difference is access. A floor stub-out (coming up from the floor) gives you more room to work because you are looking down at it and the pipe does not disappear into drywall immediately behind the valve. A wall stub-out can be tighter because the valve sits closer to the wall surface. In either case, the backup wrench rule is critical: always hold the stub-out still while turning the valve nut to avoid stressing the connection inside the wall or floor.
? Do toilet shut off valves need to be lead-free?
Yes. Since 2014, the federal Reduction of Lead in Drinking Water Act requires all plumbing fittings in contact with potable water to be lead-free, defined as less than 0.25 percent lead content. All the valves recommended here meet NSF 372 (lead-free) certification. When buying a replacement valve at a hardware store, look for the cUPC listing, NSF 61, and NSF 372 markings on the packaging. Avoid unmarked or unbranded valves that may not meet current code requirements.
? Can I replace a toilet shut off valve without turning off the main, using just the toilet stop?
Only if the existing toilet shut off valve closes fully and reliably, which means it is not the valve you are replacing. If the toilet stop closes the water completely, you could in theory work on just the downstream supply line or tank without touching the main. But since the whole point of replacing the shut off valve is usually that it does not close reliably, you need the house main off for this repair. Do not attempt to work on a live valve under pressure.
? What do I do if the shut off valve nut is completely seized and will not move?
Apply a penetrating lubricant such as WD-40 or PB Blaster to the compression nut and let it soak for 15 to 30 minutes. Try again with two wrenches. If it still will not break free, a strap wrench can give more surface grip without rounding the nut. If the nut is brass and soft, a pipe wrench with maximum grip can work. If nothing moves the nut and the pipe is copper, carefully cut the valve body off with a reciprocating saw or hacksaw blade, then install a push-to-connect replacement on the cut pipe end. Do not apply extreme force to a seized nut on a brittle old pipe without a backup plan.
? What happens after replacing the shut off valve when the toilet makes a banging noise?
A banging or thudding noise when the fill valve shuts off, sometimes called water hammer, is caused by the sudden stop of fast-moving water and is common in homes with high water pressure after plumbing work disturbs airlocks. The fix is a water hammer arrestor installed on the supply line, a small device with a sealed air chamber that absorbs the pressure spike. The noise is not caused by the shut off valve itself and does not indicate a problem with the new valve installation.
? How do I pick the right replacement valve if my toilet is a TOTO, Kohler, or American Standard?
The toilet brand does not affect the shut off valve choice. The shut off valve connects to the house plumbing stub-out on one side and the supply line on the other; it has no physical connection to the toilet itself. A BrassCraft or Eastman quarter-turn angle stop works identically behind a TOTO Drake, a Kohler Cimarron, an American Standard Cadet 3, a Woodbridge T-0001, or a Gerber Viper. Choose the valve based on your pipe type and inlet size, not the toilet brand.
? Should I also check the toilet plunger while I have the water off?
That is a good moment to check the overall condition of your toilet maintenance kit. With the water off and the toilet accessible, confirming you have a working plunger nearby is straightforward, and our guide to the best toilet plungers of 2026 covers the designs that actually clear clogs reliably. A flange plunger with a flanged extension fits the toilet drain properly; a basic cup plunger does not create adequate seal in a toilet bowl drain.
Sources
- EPA WaterSense, epa.gov/watersense
- MaP (Maximum Performance) flush testing, map-testing.com
- Manufacturer published specifications (TOTO, Kohler, American Standard)
- NSF International, NSF 61 and NSF 372 (lead-free plumbing fittings), nsf.org
- International Plumbing Code, Section 606 (shutoff valves), iapmo.org
- BrassCraft, SharkBite, Eastman, and Watts published valve specifications
Our Verdict
Replacing a toilet shut off valve is a 45-minute repair that permanently solves the seizing, weeping, and will-not-close failures that plague old multi-turn compression stops. Shut off the house main, drain the line, remove the old valve with backup-wrench technique, and install a quarter-turn ball valve such as the BrassCraft G2CR19X C for a compression stub-out or the SharkBite 23036-0000LFA for a no-solder push-fit installation. Always replace the braided supply line at the same time. The result is a valve that closes cleanly and reliably with one handle flip for the next decade, which is exactly what you need when something goes wrong with the toilet at the worst possible moment.
Keep reading
Related guides