A toilet install is one of the most approachable plumbing jobs in the house because the connections are few and forgiving. There is no soldering, no glue and no permit drama for a straight swap. The two things that go wrong are almost always the same: a base that leaks because the wax ring was crushed, doubled or set on a dirty flange, and a hairline crack in the porcelain from over-tightening the floor bolts. Avoid those two mistakes and the rest is lifting, leveling and connecting a water line. Work the steps below in order and a confident first-timer finishes in under two hours.
We do not install fixtures in a workshop of our own. Everything here is built from manufacturer published installation specifications, EPA WaterSense and MaP (Maximum Performance) flush-test records, and the consistent failure patterns that surface across thousands of aggregated owner reviews and contractor write-ups. That is enough to give you honest, careful guidance without guesswork. If you are still picking the fixture, our roundup of the best flushing toilets ranks the strongest performers, and our How to Choose a Toilet: the complete 2026 guide walks the buying decisions in order. Brands referenced throughout include TOTO, Kohler, American Standard, Woodbridge, Swiss Madison and Gerber.
Before you start
Confirm the rough-in and the parts in the box
Two checks save the whole afternoon. First, confirm your rough-in matches the toilet: measure from the finished wall to the center of the closet bolts, which is almost always 12 inches but is 10 or 14 inches in some older homes. Second, open the box and confirm what shipped. Many two-piece models like the TOTO Drake and Drake II sell the seat separately, and a wax ring, bolts and supply line are not always included. Buy any missing pieces before you pull the old toilet.
Tools and materials you need
Gather everything before you shut the water off, because a half-installed toilet is not something you want to leave while you run to the hardware store. The tool list is short and most are already in a basic kit. The consumables, especially a fresh wax ring and new closet bolts, are inexpensive and should never be reused from the old install.
Skip plumber's putty around the base for now, since a smooth bead of caulk goes on at the end after the dye test confirms the seal. Keep a roll of paper towels and a trash bag within reach, because the old wax ring is messy and the trapped water in the old bowl will dribble as you carry it out.
Step 1: Shut off the water and drain the old toilet
Turn the shutoff valve on the wall behind the toilet clockwise until it stops. If the valve is seized or missing, shut off the main water supply to the house instead. Flush the toilet and hold the handle down to push as much water out of the tank and bowl as possible. What remains gets sponged or vacuumed out, because every cup you leave behind is a cup that ends up on your floor.
Disconnect the supply line from the bottom of the tank with the adjustable wrench. Have the bucket and towels ready, since residual water always drips. Sponge the tank and bowl dry. A bone-dry old unit is far cleaner and lighter to carry out, and it prevents the lingering smell of trapped bowl water in the room while you work.
Quick tip
Test the shutoff before you commit
After closing the valve, flush once and confirm the tank does not refill. A valve that still seeps means it is not fully closed or is worn out. It is far easier to replace a leaking shutoff valve now, with the toilet already off, than to discover it slowly filling the room mid-install. A quarter-turn ball valve is a cheap, reliable upgrade while you are in there.
Step 2: Remove the old toilet and scrape the flange
Pry the caps off the floor bolts and remove the nuts. If the nuts are rusted solid, a hacksaw blade through the bolt is faster than fighting them. Rock the bowl gently side to side to break the wax seal, then lift straight up and carry the unit out. Lay it on a towel or old sheet, because the bottom is coated in old wax and any water you missed will run out.
Now scrape the closet flange completely clean. Remove every trace of the old wax ring with the putty knife until you see bare metal or plastic. Stuff a rag into the open drain pipe to block sewer gas and to stop anything from falling in. Inspect the flange: it should sit level with or slightly above the finished floor and be free of cracks. A cracked or sunken flange is the single most common cause of a toilet that rocks and leaks, so address it before going further.
If the flange is damaged or below the floor
A flange that sits below the finished floor (common after new tile is added) will not let the wax ring seal, leading to a slow leak that rots the subfloor. The fix is a flange extender ring or a stack of flange spacers, set with silicone, to bring it flush with the floor. If the flange itself is cracked, a stainless repair ring screwed over it restores a solid bolt anchor. Do not install a toilet on a broken flange and hope the bolts hold, because they will not.
Step 3: Set the new closet bolts and wax ring
Drop the new closet bolts into the slots on the flange, one on each side, and rotate them so the heads catch under the slot and the threaded ends point straight up. Many flanges have a keyhole slot, so slide the bolts to the narrow end where they cannot pull out. If the kit includes plastic retainer washers, push them down to hold the bolts upright, which makes lining up the bowl far easier when you are lowering it blind.
Now choose your seal. A traditional wax ring is cheapest and reliable, but you get one attempt: if you set the bowl crooked and lift it, the wax is compromised and must be replaced. A waxless rubber or foam seal (such as a Fluidmaster or Korky-style gasket) is more forgiving, repositionable and a better choice for first-timers or for installs over a heated floor where wax can soften. Press the seal onto the flange (or onto the bottom of the bowl, per the maker's instructions), centered over the drain.
Worth knowing
One wax ring, never two stacked
If the flange sits low, the instinct to stack two wax rings is a frequent mistake that leads to a squishy, unreliable seal. Use a single extra-thick wax ring (often sold with a plastic horn) or a proper flange extender instead. A doubled ring can shift, weep and fail months later, long after you have forgotten it was the cause of the smell.
Step 4: Set the bowl and tighten it correctly
This is the step where a steady, patient approach matters most. Lift the bowl, line up the two holes in the base with the upturned closet bolts, and lower it straight down in one smooth motion. Do not set it at an angle and slide it, because that smears or tears a wax ring. Once it touches, press down firmly with your weight and rock it just slightly to compress the seal evenly. The bowl should feel like it has settled and stopped sinking.
Thread a washer and nut onto each bolt and hand-tighten, then bring them down with a wrench in small, alternating quarter turns, side to side, the same way you torque a car wheel. Check a level across the bowl as you go and shim any gap with plastic toilet shims if the floor is uneven. Stop the moment the bowl is snug and no longer rocks. Cranking past that point is exactly how the porcelain cracks, and a cracked base is a ruined toilet, not a fixable one.
Expert Take
The torque on those two floor bolts is the make-or-break of the whole job, and almost everyone over-tightens out of fear of a leak. The seal comes from the compressed wax, not from clamping the porcelain to the floor. Snug, level and rock-free is the target, full stop. If the bowl still rocks after the nuts bottom out, the answer is a shim under the low side, never another half-turn on the wrench. Heavy one-piece units like the TOTO UltraMax II and Kohler Santa Rosa add their own weight to the seal, so they need even less bolt force.
Step 5: Install the tank (two-piece) and connect water
If you bought a two-piece toilet, the tank installs onto the bowl now. Set the spud washer (the large rubber gasket) over the flush valve opening on the bowl, then drop the tank bolts through from inside the tank, with rubber washers seated against the tank to prevent weeping. Lower the tank so the bolts pass through the bowl holes, and hand-tighten the nuts underneath in alternating turns until the tank sits level and firm. Keep this snug rather than gorilla-tight, since the tank is porcelain too and cracks the same way the bowl does.
Connect the new braided supply line from the wall shutoff to the threaded fill valve under the tank, hand-tight plus a gentle quarter turn with the wrench. Open the shutoff slowly and let the tank fill. Watch the bolt holes and the spud connection for any drips as the water rises. One-piece units like the TOTO UltraMax II skip this entire step, which is part of why a one-piece is faster to set even though it is heavier to lift.
Step 6: Test for leaks before you caulk
Resist the urge to caulk the base right away, because a smooth bead of caulk hides exactly the leak you most need to find. With the tank full, flush several times and watch two places. First, the supply and tank connections, looking for any bead of water forming on the nuts or fittings. Second, and more important, the base of the bowl where it meets the floor.
The reliable confirmation is a dye test: drop a few drops of dark food coloring into the bowl water, wait ten to fifteen minutes, then wipe a white paper towel around the base of the toilet on the floor. Colored water on the towel means the wax seal is leaking and the bowl must come up to reset the ring. A clean, dry towel means the seal is good and you can move on with confidence. This five-minute check is the difference between a job done and a slow leak rotting the subfloor unseen.
Don't forget
Cut the bolts, cap them, then caulk
Once the dye test passes, trim the closet bolts with a hacksaw so the decorative caps snap on flush. Then run a thin bead of white silicone caulk around the base, leaving a small gap at the very back. That rear gap is intentional: it lets any future leak escape and warn you instead of pooling hidden under the toilet. A fully sealed base can trap a leak for months before you notice the floor is soft.
Installing a wall-hung or smart toilet is different
The steps above cover a standard floor-mounted toilet, which is the vast majority of installs. Two situations change the job. A wall-hung toilet mounts to an in-wall carrier frame and concealed tank that must be installed before drywall, so it is a remodel-stage project, not a weekend swap, and is best left to a plumber if the frame is not already in place. A smart toilet or bidet seat needs a nearby GFCI electrical outlet, and many like the TOTO smart lines and Swiss Madison models require a dedicated water connection for the wash function. Confirm power and water access before buying, because retrofitting an outlet behind the toilet is the costly surprise.
Make it easy
Top recommendations for an easy install
Three proven models that are forgiving to set and widely stocked, so any plumber can service them later. Each pairs a strong MaP flush with efficient 1.28 GPF water use.
Easiest Two-Piece
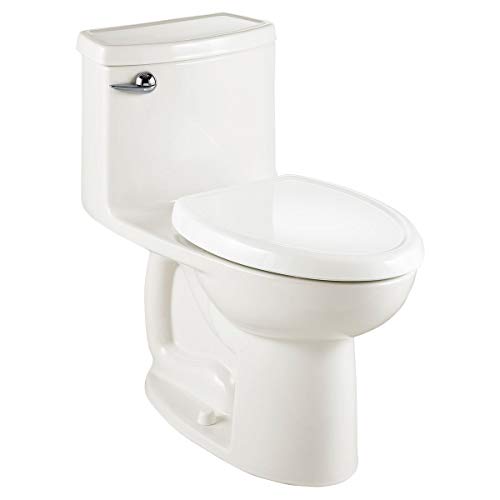
TOTO Drake
Light bowl, sets solo
A two-piece design means the lighter bowl sets onto the bolts without help, then the tank bolts on after. A 1000 g MaP flush at 1.28 GPF rewards the easy install. Buy the seat separately.
Check price on Amazon
Best Value Swap
American Standard Cadet 3
Simple budget replacement
A straightforward two-piece swap with a 1000 g MaP flush, 1.28 GPF water use and the stain-resistant EverClean surface. The value pick when you just need a clean, reliable replacement.
Check price on Amazon
Seamless One-Piece
TOTO UltraMax II
No tank to assemble
A one-piece unit with no tank to bolt on, so there is one fewer leak point to seal. Heavier to lift, but the extra weight helps seat the wax ring. A 1000 g flush at 1.28 GPF.
Check price on Amazon
Common questions
How Long Does It Take to Install a Toilet?
A straight toilet replacement takes a confident do-it-yourselfer about one to two hours, including draining the old unit, scraping the flange and running a leak test. A first-time install or one that needs a flange repair can run three to four hours. A plumber typically completes a standard swap in under an hour, since the connections are few and require no soldering or glue.
Do You Need a Wax Ring to Install a Toilet?
You need a seal between the bowl and the closet flange, but it does not have to be wax. A traditional wax ring is cheapest and reliable but allows only one set attempt. A waxless rubber or foam gasket is more forgiving, repositionable and a better choice for first-timers or heated floors, since wax can soften and shift over warm subfloors.
How Tight Should Toilet Floor Bolts Be?
Tighten the floor bolts only until the bowl is snug, level and no longer rocks, using small alternating quarter turns side to side. The watertight seal comes from the compressed wax ring, not from clamping the porcelain down. Over-tightening is the leading cause of a cracked toilet base, so use shims under any gap rather than more force on the wrench.
Why Does My New Toilet Still Rock?
A toilet rocks when the floor is uneven or the closet flange sits below the finished floor. The fix is plastic toilet shims under the low side until the bowl is solid, then a bead of caulk to lock them. Never tighten the bolts harder to stop a rock, because that cracks the porcelain without fixing the underlying gap.
Can You Install a Toilet Yourself?
Yes. A standard floor-mounted toilet is a manageable do-it-yourself job for anyone comfortable with a wrench and a level, since there is no soldering, gluing or permit for a straight swap. The two skills that matter are setting the bowl straight onto the wax ring in one motion and hand-tightening the bolts without cracking the base. Wall-hung and smart toilets are better left to a plumber.
Common install mistakes and how to avoid them
Almost every failed toilet install traces back to a short list of avoidable errors. Setting the bowl on a flange that still has old wax or debris is the first, since any high spot prevents an even seal. Lowering the bowl crooked and then sliding it into place is the second, because it smears the wax ring before it ever compresses. Stacking two wax rings to reach a low flange is the third, and it leads to a soft seal that weeps months later.
The most damaging mistake is over-tightening the floor bolts. Porcelain has no give, and a crack that starts at a bolt hole will spider out and condemn the entire fixture. Tighten in alternating quarter turns, stop the instant the bowl is solid, and shim rather than crank. The final error is skipping the dye test and caulking the base immediately, which seals a slow leak inside where it quietly rots the subfloor. Five minutes with food coloring and a paper towel prevents the most expensive failure of all.
Expert Take
If you do only two things differently from your last install, make them these: switch to a waxless rubber seal and leave the rear of the base uncaulked. The rubber gasket forgives a crooked set and a second attempt, which removes the single biggest source of beginner leaks. The open rear gap turns a future hidden leak into a visible warning before it reaches the joists. Together they convert the riskiest part of the job into the most controlled. A lighter two-piece like the TOTO Drake or American Standard Cadet 3 makes the whole set even easier to manage solo.
FAQ
Frequently asked questions
? What tools do I need to install a toilet?
You need an adjustable wrench, a putty knife to scrape the old wax, a level, a hacksaw to trim bolts, and a bucket with a sponge and towels. For materials, buy a fresh wax ring or rubber seal, new brass closet bolts, a new braided supply line and a tube of white silicone caulk. Most tools are already in a basic home kit.
? How long does it take to install a toilet?
A confident do-it-yourselfer finishes a straight swap in one to two hours. A first-time install or one needing a flange repair can take three to four hours. A professional plumber usually completes a standard replacement in under an hour, since the job involves no soldering or glue.
? Should I use a wax ring or a rubber seal?
Both work. A wax ring is cheapest and reliable but allows only one set attempt before it must be replaced. A waxless rubber or foam gasket is repositionable, forgiving of a crooked set and better over heated floors where wax can soften. For a first install, the rubber seal removes the most common beginner mistake.
? Can I reuse the old wax ring?
No. A wax ring compresses once and cannot reseal after the bowl is lifted. Always install a fresh ring, and replace the closet bolts too if they are rusted. A reused or compromised seal is the most common cause of a base leak that appears weeks after the install.
? How tight should the floor bolts be?
Snug only, in small alternating quarter turns, until the bowl is level and no longer rocks. The seal comes from the compressed wax ring, not from clamping the bowl down. Over-tightening cracks the porcelain, so use shims under any gap rather than forcing the wrench further.
? Why does my toilet rock after installing it?
The floor is uneven or the flange sits below the finished floor. Slide plastic toilet shims under the low side until the bowl is solid, then caulk to lock them. Tightening the bolts harder to stop the rock will crack the base without curing the gap.
? How do I know if my toilet is leaking at the base?
Run a dye test. Drop dark food coloring into the bowl, wait ten to fifteen minutes, then wipe a white paper towel around the base on the floor. Colored water on the towel means the wax seal is leaking and the bowl must be reset. A clean, dry towel confirms a good seal.
? What is a closet flange and why does it matter?
The closet flange is the ring that anchors the toilet to the drain pipe and floor. It should sit level with or slightly above the finished floor and be free of cracks. A sunken or broken flange prevents the wax ring from sealing and is the top cause of a toilet that rocks and leaks.
? Can I stack two wax rings if the flange is too low?
Avoid it. Two stacked rings make a soft, shifting seal that often weeps months later. Instead, use a single extra-thick wax ring with a plastic horn, or install a flange extender or spacer to bring the flange up flush with the floor before setting the bowl.
? Do I caulk around the base of a toilet?
Yes, after the dye test passes. Run a thin bead of white silicone around the base but leave a small gap at the very back. That rear gap lets any future leak escape and warn you, instead of trapping water hidden under the toilet where it can rot the subfloor.
? How do I measure my rough-in before buying?
Measure from the finished wall behind the toilet to the center of the closet bolts, ignoring the baseboard. Most homes are 12 inches, while some older houses use 10 or 14 inches. A toilet built for one rough-in will not seat correctly on another, so confirm the match before you buy.
? Does a toilet seat come with the toilet?
Often not. Many premium two-piece models, including the TOTO Drake and Drake II, sell the seat separately. Always read the listing, and if the seat is not included, add a soft-close seat that matches your bowl shape so it is ready on install day.
? How do I shut off the water to install a toilet?
Turn the shutoff valve on the wall behind the toilet clockwise until it stops, then flush to confirm the tank does not refill. If the valve is seized or missing, shut off the main water supply to the house instead, and consider replacing the old valve while the toilet is off.
? Is a one-piece or two-piece toilet easier to install?
A two-piece is easier to lift, since the lighter bowl sets first and the tank bolts on after. A one-piece has no tank to assemble and one fewer leak point, but it is heavier to maneuver onto the flange. Both follow the same wax-ring and bolt steps. See our breakdown of one piece vs two piece toilets for the full trade-offs.
? What if my closet flange is cracked?
Do not install over a broken flange. A stainless steel repair ring screwed over the existing flange restores a solid bolt anchor, while a flange extender corrects one that sits too low. A toilet bolted to a cracked flange will loosen, rock and leak, so repair it before setting the bowl.
? Do I need a permit to replace a toilet?
A straight like-for-like swap usually needs no permit in most areas, since you are not moving the drain or supply lines. Moving the rough-in location, adding a new bathroom or altering plumbing typically does require one. Check your local code, but a basic replacement is generally permit-free.
? Can I install a smart toilet or bidet myself?
Only if a GFCI electrical outlet and the required water connection are already near the toilet. Smart toilets and bidet seats from TOTO, Kohler and Swiss Madison need power for heating and washing, and retrofitting an outlet behind the toilet is a job for an electrician. Confirm both before buying.
? How do I dispose of the old toilet?
Drain it completely, then check with your local waste service, since many require it bagged or scheduled as a bulky-item pickup. Some home centers and recycling centers accept porcelain fixtures. Draining and sponging the bowl dry first keeps the removal clean and lighter to carry.