People hesitate to pull a toilet because the fixture is heavy, the floor seal feels permanent, and the open drain underneath seems like an invitation to flood the bathroom. In practice removal is one of the most forgiving jobs in the house, because every connection is mechanical and visible, nothing is glued or soldered, and you control the water at every step. The skills that matter are not strength or a plumbing license, they are patience and order: drain the water completely before you lift, break a seized bolt cleanly rather than fighting it, lift with your legs and a helper if the unit is one piece, and plug the drain the instant the bowl is off the floor. Get those four things right and the removal is clean and quick. Rush any of them and you get the gallon of cold water on the floor, the cracked tank, or the sewer-gas smell that fill owner-review threads.
We do not run a fixture shop of our own. Everything below is built from manufacturer removal and installation instructions, plumbing-code guidance, EPA WaterSense fixture data and the consistent patterns that surface across thousands of aggregated owner reviews about what goes wrong on removal day. If you are pulling the toilet to put in a stronger model, our roundup of the best flushing toilets ranks the highest-MaP fixtures, and once the old unit is out the companion guide to replacing a toilet walks setting the new one leak free. Models referenced throughout include the TOTO Drake, Drake II and UltraMax II, Kohler Highline, Cimarron and Santa Rosa, American Standard Cadet 3 and Champion 4, Woodbridge T-0001, Swiss Madison St. Tropez and Gerber Viper.
Before you start
Decide whether you are reinstalling the same toilet
How carefully you handle removal depends on what happens next. If you are reusing the same toilet after a tile or flooring job, set it gently on cardboard, keep the tank-to-bowl gasket intact and protect the porcelain from chips. If the toilet is going to the curb, you can be rougher with the bowl but still need to drain it fully so it does not slosh waste water as you carry it. Either way you always replace the wax ring and closet bolts on reinstall, since both are one-shot parts. If the removal is the start of an upgrade, our guide on how to choose a toilet walks height, shape and flush before you buy.
Tools and materials you need to remove a toilet
The job needs almost nothing specialized. An adjustable wrench, a pair of slip-joint pliers, a small hacksaw or mini bolt cutter for seized bolts, a putty knife or paint scraper, a sponge and a bucket cover all the mechanics. Add a screwdriver, a pair of rubber gloves and an old towel or flattened cardboard box to set the toilet on. Penetrating oil is worth keeping nearby for rusted nuts, and a shop vacuum that can handle water makes draining the bowl far faster than a sponge if you own one.
Stock a few cheap parts before you start so the removal flows into a clean reinstall. A fresh wax ring or a forgiving waxless rubber seal, a new pair of brass closet bolts and a new braided stainless supply line are the parts you will reuse or replace on reinstall, and buying them ahead means you are not stuck mid-job with the water off. If the supply shutoff valve is old and stiff, add a new quarter-turn valve to the pile, because removal day is the easiest time to swap it while the tank is already empty and out of the way.
Step 1: Shut off the water supply
Find the supply shutoff valve on the wall behind or beside the toilet and turn it fully clockwise to close it. This is the single most important step, because everything that follows depends on no fresh water reaching the tank. If the valve is the older multi-turn type, keep turning until it stops; if it is a quarter-turn lever, rotate it so the handle sits across the line. Test that it is fully off by flushing in the next step and confirming the tank does not refill.
If the shutoff valve will not fully close, weeps when you turn it, or there is no valve at all, you have two choices. Either replace the valve now, which is the ideal moment since the tank is about to be empty, or shut off the main water supply to the whole house and plan to install a proper quarter-turn valve as part of the job. Do not start unbolting a toilet that is still connected to live, uncontrolled water, since a slip means a flood you cannot stop.
Step 2: Drain the tank and bowl completely
With the water off, flush the toilet and hold the lever or button down to let as much water as possible leave the tank. Most of the tank will empty, but a residual inch always stays behind in both the tank and the bowl. Use a sponge to soak up the remaining tank water and wring it into a bucket, or use a wet-capable shop vacuum to suck it out fast. The goal is a tank and bowl as dry as you can get them, because every ounce left behind is an ounce that ends up on the floor when you lift.
For the bowl, you can either sponge it dry or force the standing water down the trap by pouring a bucket of water in quickly, which pushes the bowl water through the trapway and lowers the level. A turkey baster or a cup works for the last stubborn water in the trap. Owner reports consistently show that the number-one removal complaint, water all over the floor, comes from skipping this step and lifting a bowl that still holds half a gallon in its trap. Take the extra five minutes here.
Quick tip
A shop vacuum makes draining nearly mess free
A wet-dry shop vacuum is the fastest way to empty a toilet for removal. Vacuum the tank dry, then put the nozzle into the bowl and pull the trap water out through the bottom of the bowl until it runs dry. This removes the gallon that a sponge struggles to reach and is the difference between a clean lift and a puddle on the floor. If you do this kind of work more than once, a small wet-dry vacuum pays for itself the first time.
Step 3: Disconnect the water supply line
Place your bucket under the supply connection to catch the trickle that always remains. Use your wrench to loosen the nut where the flexible supply line meets the bottom of the tank fill-valve shank, then unthread it by hand. A little water will run out; that is normal. Once the line is free of the tank, you can also disconnect its other end from the shutoff valve if you plan to replace the line, which you should, since a fresh braided stainless line is cheap and far more reliable than an old one.
If the fill-valve nut is plastic and will not budge, do not force it with maximum torque, because cracking the plastic shank turns a simple removal into a tank-rebuild. Steady the valve from inside the tank with one hand and turn gently. Old supply lines sometimes weld themselves to the connection with mineral buildup; a few drops of penetrating oil and a moment of patience free them without breaking anything. With the line off, the tank is ready to come off the bowl.
Step 4: Remove the tank from the bowl (two-piece toilets)
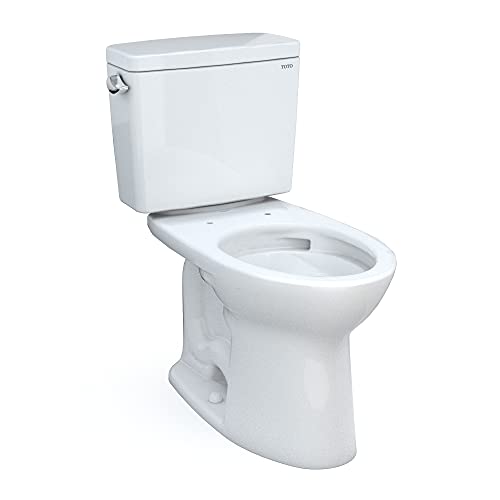
If you have a two-piece toilet such as the TOTO Drake II, Kohler Cimarron or American Standard Cadet 3, lightening the load by removing the tank first makes the bowl far easier to lift and protects the porcelain. Reach inside the tank and find the two or three tank-to-bowl bolts that pass through the bottom of the tank into the back of the bowl. Hold each bolt head still inside the tank with a screwdriver while you loosen the nut underneath with a wrench. Removing the tank as a separate piece nearly halves the weight you carry.
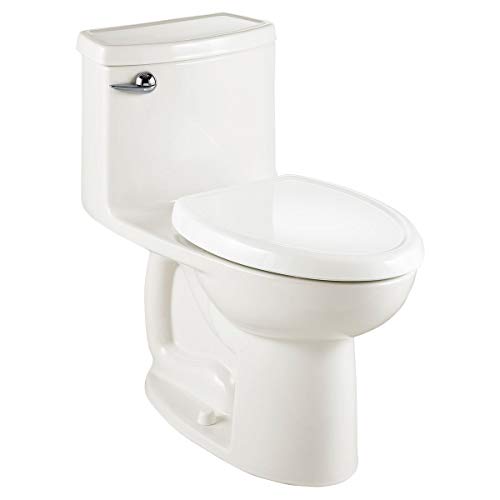
Once the nuts are off, lift the tank straight up off the bowl and set it aside on a towel or cardboard. The large rubber tank-to-bowl gasket usually comes away with the tank. If you are reinstalling the same toilet, keep that gasket and the bolts together so you can rebuild it; if you are scrapping the toilet, they go with it. One-piece toilets like the TOTO UltraMax II or Kohler Santa Rosa skip this step entirely, since the tank and bowl are a single molded unit, but that also means you lift a much heavier object in one go and should recruit a helper.
Worth knowing
One-piece toilets are heavy, get a helper
A one-piece toilet such as the TOTO UltraMax II or Swiss Madison St. Tropez can weigh over 100 pounds because the tank and bowl are molded together and cannot be separated for removal. Lifting that much awkward porcelain alone risks a dropped, cracked fixture or a back injury. Recruit a second person, lift with your legs, and move the unit straight up and onto cardboard rather than twisting. The weight is the main reason removal of a one-piece is genuinely harder than a two-piece.
Step 5: Remove the floor bolt nuts
At the base of the bowl, pop off the two plastic caps covering the floor bolts, which usually pry up with a flathead screwdriver or fingernail. Underneath sits a nut threaded onto each closet bolt. Use your wrench to turn the nuts counterclockwise and remove them. On a newer toilet they spin off easily. On an older one, decades of moisture often rust the steel nuts to the bolts, and this is the single most common place a removal stalls.
If a nut is seized, do not keep cranking until you round it off or snap the bolt with the bolt anchored awkwardly in the flange. Instead, spray penetrating oil and wait a few minutes, or cut the bolt cleanly. A mini hacksaw blade or an oscillating tool slid between the bowl base and the nut cuts through the bolt in seconds, freeing the bowl without a fight. Because you replace the closet bolts with fresh brass ones on reinstall anyway, cutting the old corroded bolt is the smart, fast move rather than a defeat.
Step 6: Break the wax seal and lift the bowl out
With the nuts off, the bowl is held to the floor only by the sticky wax seal beneath it. Straddle the bowl, grip it firmly by the bowl rim or the sides, and rock it gently side to side and front to back to break the suction of the old wax. You will feel it release. Once it is free, lift the bowl straight up off the closet bolts, keeping it level so any residual trap water does not pour out, and carry it to your cardboard or towel and set it down.
Lift with your legs, not your back, and take your time. A two-piece bowl with the tank already removed is manageable for one person; a one-piece unit needs a helper. If the bowl feels glued down even after the nuts are off, the wax is simply gripping hard, so keep rocking rather than yanking. Tilt the bowl slightly as you carry it toward you so the last of the trap water stays inside rather than dripping a trail across the bathroom floor.
Step 7: Plug the drain and scrape the old wax
The instant the bowl is off the floor, stuff a clean rag firmly into the open drain pipe. This does two jobs at once: it blocks sewer gas from filling the bathroom, and it stops a dropped bolt, scraper or chunk of wax from falling into the drain and becoming an unreachable clog. Do not skip this and do not delay it. An open, unplugged drain is the one genuine hazard of a toilet removal, and a rag solves it completely.
Next, scrape the old wax off the closet flange, the round fitting that anchored the toilet, until the metal or plastic is clean and bare. Also wipe the wax residue off the bottom of the bowl horn if you are reinstalling the same toilet. A fully clean flange is essential for the next install, since old wax left behind prevents a new ring from sealing and causes the slow base leak that shows up weeks later. Removal and flange prep are really one continuous task, so do them together while everything is open.
Editorial Take
If you do only two things right on a removal, make them draining the toilet completely before you lift and plugging the drain the moment the bowl is off. Those two steps account for the overwhelming majority of removal-day complaints in owner reports: a flooded floor from a bowl that still held trap water, and a sewer smell or dropped bolt from an open drain left unplugged. Both fixes cost nothing and take seconds. The third habit worth building is treating a seized bolt as a thing to cut, not fight, because you replace those bolts with brass on reinstall anyway, so sawing through a rusted one is the fast, correct move rather than rounding off nuts for twenty minutes.
Inspect the flange and subfloor while the toilet is out
A removed toilet is a rare chance to see what has been hidden under the fixture for years, so spend a few minutes inspecting before you move on. Check the closet flange for cracks, broken bolt slots or a flange sitting below the finished floor, all of which must be repaired before any toilet goes back, since no wax ring compensates for a damaged or sunken flange. A cracked flange needs a repair ring, and a sunken one needs a spacer or extender to bring it to floor level.
Press on the subfloor around the drain to feel for soft, spongy spots that signal a slow leak from the old wax seal has been rotting the wood. Discoloration, a musty smell or a spongy floor means water damage that should be addressed before reinstalling, otherwise the new toilet sits on a weak base. Catching this now, while the area is open, is exactly when a hidden leak from the previous install finally reveals itself, and fixing it is far cheaper than discovering a collapsed floor later.
How long removing a toilet takes and when to call a pro
A straightforward removal, draining and unbolting a toilet whose hardware is in good shape, takes most people 30 to 45 minutes. Add 20 to 40 minutes if you fight seized bolts, replace the shutoff valve or have to drain a stubborn one-piece unit. The work is well within reach for anyone comfortable with a wrench, and it is identical whether you are pulling a TOTO Drake, a Kohler Highline or an American Standard Champion 4, since all use the same closet-bolt and wax-seal system.
Call a professional when the floor bolts are rusted into a flange set in concrete, when the flange or drain pipe is cracked, when the subfloor is clearly rotted, or when a heavy one-piece toilet cannot be lifted safely. A plumber is inexpensive insurance against a damaged drain or an injury, and if you are removing the old toilet to upgrade, pairing the swap with a strong fixture from our list of strongest flushing toilets gets you a unit that flushes far better than whatever you pulled out. If the toilet you are removing has been giving you trouble, our guide on why your toilet keeps clogging may explain whether the fixture or the drain is the real problem.
Make it easy
Top recommendations
If you are removing the old toilet to upgrade, these three proven models pair a strong MaP flush with efficient 1.28 GPF water use and a standard, parts-everywhere install on the bare flange you just exposed.
Best Overall
TOTO Drake II
The safe default upgrade
A perfect 1000 g MaP flush at 1.28 GPF with a glazed CeFiONtect trapway. A two-piece design means you lift the tank and bowl separately on reinstall, with widely stocked seats and seals.
Check price on Amazon
Best Value
American Standard Cadet 3
Strong flush, easy to handle
A 1000 g MaP rating, 1.28 GPF flush and the stain-resistant EverClean surface. A light two-piece bowl that one person can lift and set on the flange without a helper.
Check price on Amazon
Best One-Piece
TOTO UltraMax II
Seamless, fewer leak points
A one-piece body with a 1000 g MaP flush at 1.28 GPF. Heavier to lift in one piece, so plan a helper, but no tank bolts means one fewer connection to leak after install.
Check price on Amazon
Common questions
How Do You Drain a Toilet Before Removing It?
Shut off the supply valve, then flush and hold the lever down to empty most of the tank. Sponge or vacuum the residual water from both the tank and the bowl, and force the trap water down by pouring in a bucket of water quickly. Draining the toilet fully is the single step that prevents water spilling onto the floor when you lift the bowl.
How Long Does It Take to Remove a Toilet?
A standard toilet removal takes most do-it-yourselfers 30 to 45 minutes when the bolts and shutoff valve are in good condition. Add 20 to 40 minutes if you have to cut seized bolts, replace the shutoff valve or drain a heavy one-piece unit. Most of the time goes into draining the water fully and freeing rusted floor nuts.
What If the Toilet Bolts Are Rusted and Will Not Come Off?
Spray the seized nut with penetrating oil and wait a few minutes, then try again. If it still will not turn, cut the bolt with a mini hacksaw or an oscillating tool slid between the bowl base and the nut. Since you replace closet bolts with fresh brass ones on reinstall, cutting a corroded bolt is the fast, correct move rather than rounding off the nut.
Do You Need to Cap the Drain After Removing a Toilet?
Yes. The moment the bowl is off the floor, stuff a clean rag firmly into the open drain pipe. This blocks sewer gas from filling the bathroom and stops dropped bolts or debris from falling into the drain and causing an unreachable clog. Remove the rag only at the moment you set the next toilet, never sooner.
Can You Reuse a Toilet After Removing It?
Yes, a sound toilet can be removed and reinstalled, which is common for tile and flooring jobs. Set it gently on cardboard, keep the tank gasket and protect the porcelain from chips. On reinstall you must always fit a fresh wax ring and new brass closet bolts, since both are one-shot parts that cannot seal a second time once compressed or corroded.
Putting the whole removal together
Work the seven steps in order and removal becomes routine. Shut off the water, flush and drain the tank and bowl completely, disconnect the supply line, lift the tank off a two-piece unit, remove the floor bolt nuts or cut them if seized, rock the bowl to break the wax seal and lift it straight out, then plug the drain and scrape the flange clean. The two failure points to respect are a bowl that still holds water and an open, unplugged drain. Avoid both and the removal is clean, dry and safe, whether the toilet is a TOTO, Kohler, American Standard, Woodbridge, Swiss Madison or Gerber. With the old unit out and the flange bare, the reinstall is the easy second half, covered step by step in our guide to replacing a toilet.
Editorial Take
The mindset shift that makes removal painless is treating it as a controlled, reversible job rather than a demolition. You are never racing the water, because you shut it off and drained the fixture first; you are never fighting a bolt, because you cut a seized one and replace it anyway; and you are never risking the room, because you plug the drain the moment the bowl is lifted. Buy a new quarter-turn shutoff valve, a fresh braided supply line and a waxless seal before you start, so removal flows straight into a clean reinstall. If a toilet has been clogging or flushing weakly, removal day is also the perfect moment to upgrade to a high-MaP fixture like the TOTO Drake II rather than putting the same underperforming unit back down.
FAQ
Frequently asked questions
? Can I remove a toilet myself?
Yes. Removing a toilet is a manageable do-it-yourself job for anyone comfortable with basic hand tools. Every connection is mechanical and visible, nothing is glued or soldered, and you control the water at each step. Draining the toilet fully and plugging the drain afterward are what keep the job clean and safe.
? What tools do I need to remove a toilet?
You need an adjustable wrench, slip-joint pliers, a putty knife or scraper, a sponge and a bucket, and a small hacksaw or bolt cutter for seized bolts. A screwdriver, rubber gloves, penetrating oil and an old towel or cardboard to set the toilet on round out a clean removal.
? How do I drain a toilet before removing it?
Shut off the supply valve, then flush and hold the lever to empty the tank. Sponge or vacuum out the residual tank and bowl water, and force the trap water down by pouring in a bucket of water quickly. A wet-dry shop vacuum makes this nearly mess free and reaches water a sponge cannot.
? Do I have to turn off the water to remove a toilet?
Yes, always. Turn the supply shutoff valve fully clockwise, then flush to confirm the tank does not refill. If the valve will not fully close or there is no valve, shut off the main water to the house. Never unbolt a toilet that is still connected to live, uncontrolled water.
? How long does removing a toilet take?
Most people finish a standard removal in 30 to 45 minutes when the hardware is in good shape. Cutting seized bolts, replacing the shutoff valve or draining a heavy one-piece toilet can add 20 to 40 minutes. Most of the time goes into draining the water fully and freeing rusted nuts.
? What if the floor bolts are rusted and will not turn?
Spray penetrating oil and wait a few minutes, then try again. If the nut still will not move, cut the bolt with a mini hacksaw blade or an oscillating tool slid between the bowl base and the nut. You replace these bolts with brass on reinstall anyway, so cutting a corroded one is the smart move.
? How do I break the wax seal under the toilet?
With the floor nuts off, straddle the bowl, grip it firmly and rock it gently side to side and front to back. This breaks the suction of the old wax. Keep rocking rather than yanking if it feels stuck, then lift the bowl straight up off the closet bolts once it releases.
? Should I remove the tank before lifting the bowl?
On a two-piece toilet, yes. Disconnecting the tank by undoing the tank-to-bowl bolts nearly halves the weight you carry and protects the porcelain. One-piece toilets cannot be separated, so the tank and bowl come off together as one heavy unit, which is why a helper is recommended for them.
? Why is my toilet so heavy to lift?
One-piece toilets like the TOTO UltraMax II or Swiss Madison St. Tropez can exceed 100 pounds because the tank and bowl are molded together. A two-piece bowl alone is much lighter once the tank is removed. Lift with your legs, recruit a helper for one-piece units, and set the fixture on cardboard.
? Do I need to plug the drain after removing the toilet?
Yes, immediately. Stuff a clean rag firmly into the open drain pipe the moment the bowl is off. This blocks sewer gas from filling the room and stops dropped bolts or debris from falling into the drain. Remove the rag only when you are ready to set the next toilet.
? How do I stop water from spilling when I lift the toilet?
Drain the bowl and tank as completely as possible first, since spilled water is almost always trap water that was not removed. Sponge or vacuum the bowl dry, force the trap water down with a quick bucket pour, then tilt the bowl toward you slightly as you carry it so the last drops stay inside.
? Can I reuse the toilet after I remove it?
Yes, a sound toilet can be reinstalled, which is common for flooring jobs. Set it gently on cardboard and keep the tank gasket. On reinstall you must always use a fresh wax ring and new brass closet bolts, since wax and steel bolts are one-shot parts that will not seal or hold a second time.
? Can I reuse the old wax ring after removal?
No. A traditional wax ring is a one-shot part. Once it has been compressed under a bowl it cannot seal again, so scrape it off and discard it, and fit a fresh ring on reinstall. A waxless rubber seal is the resettable alternative if you expect to lift and set the bowl more than once.
? What should I inspect while the toilet is out?
Check the closet flange for cracks, broken slots or a flange sitting below the floor, all of which need repair before reinstall. Press the subfloor around the drain for soft, spongy spots that signal a hidden leak rotting the wood. A removed toilet is the only time you can see these problems.
? What is a closet flange?
The closet flange is the round fitting that anchors the toilet to the drain pipe and the floor. The closet bolts that hold the bowl down lock into its slots, and the wax ring seals the bowl to it. After removal you scrape it clean and inspect it, since a damaged flange must be fixed before any toilet goes back.
? Should I replace the shutoff valve while the toilet is removed?
Yes, if the old valve will not fully close, weeps when turned, or is an outdated multi-turn type. Removal day, with the tank already drained, is the easiest time to swap in a new quarter-turn valve. A reliable shutoff is the foundation of a clean reinstall and far harder to fit once the new toilet is set.
? Is it safe to leave a drain open after removing a toilet?
Only if it is plugged. An unplugged open drain lets sewer gas, which can contain methane and hydrogen sulfide, into the bathroom and risks dropped objects clogging the line. A rag pushed firmly into the pipe seals it completely and is a non-negotiable step the moment the toilet is off.
? Why does my floor smell after removing the toilet?
A sewer smell after removal means the open drain pipe is venting gas into the room. Plug it with a rag right away. If the smell persists with the drain plugged, you may have a damaged or dried-out trap, or a subfloor that was soaked and rotted by a slow leak from the old seal.
? Do I need a permit to remove a toilet?
For a simple removal and reinstall in the same spot, most areas do not require a permit, since you are not altering the drain or supply lines. Permits typically apply when you move plumbing, change the drain location or do a larger remodel. Check your local building department if you are unsure.
? Is removing a toilet the same for every brand?
Yes, essentially. A TOTO Drake, Kohler Highline, American Standard Champion 4, Woodbridge T-0001 and Gerber Viper all use the same closet-bolt and wax-seal system, so the removal steps are identical. The only real difference is weight, since one-piece models are heavier to lift than two-piece ones.