A failing toilet handle is one of the most visible faults in a bathroom and, fortunately, one of the easiest to cure. The handle, also called the flush lever or trip lever, is simply a chrome or plastic arm that pivots when you press it, lifting a chain that raises the flapper to start the flush. Because the whole mechanism is a lever and a chain, the things that go wrong are mechanical and obvious once the lid is off: the chain has slipped its hook, the arm has corroded and snapped, or the nut that holds the handle to the tank has worked loose. None of it requires a plumber, and almost none of it requires more than a fresh part and a few minutes.
This guide follows the way we research everything on this site. Rather than tearing toilets apart in a lab, we compare how they are engineered, the published specs and certifications that predict reliability, and the repair patterns that show up consistently across aggregated owner reviews and plumbing resources. We start with the free reconnection and tightening fixes that solve most cases, move to the cheap handle swap that handles the rest, and finish with the upgrade path for when the toilet itself has simply worn out. If you want the wider context on flush mechanics, our guide to the best flushing toilets covers the engineering behind a strong, reliable flush.
Start here. Take the tank lid off and set it flat on a towel so it cannot fall. Press the handle slowly and watch what happens inside. Does the arm lift the chain and the flapper? Is the chain attached at both ends? Does the handle flop with no resistance, or stick in the down position? That single ten-second observation tells you which of the four common faults you have and points you straight to the right fix below.
Why is my toilet handle loose or not working?
A toilet handle stops working for one of four reasons: the lift chain has come unhooked or is too long or short, the mounting nut behind the handle has loosened so the lever spins freely, the handle arm has corroded or cracked, or the flapper is stuck. A disconnected or misadjusted chain is the most common cause by a wide margin, behind the majority of handles that feel loose or fail to flush.
Understanding those four causes tells you exactly where to look. The lift chain connects the end of the handle arm to the flapper; if it unhooks, tangles, or sits at the wrong length, pressing the handle does nothing or only partly lifts the flapper. The mounting nut is a large plastic or metal nut on the inside of the tank, directly behind the handle, and it threads in reverse, meaning it loosens clockwise. When it backs off, the whole handle wobbles and the lever loses its leverage. The handle arm itself is metal or plastic, and after years in a humid tank it can corrode, crack, or snap, especially on older brass arms. Finally, a flapper that is swollen or stuck can make a perfectly good handle feel like it is failing because nothing flushes. Every one of these is visible inside the tank, and every one is inexpensive to fix.
How do you diagnose a broken toilet handle?
Diagnose a toilet handle by removing the tank lid and pressing the lever while watching the chain and flapper. If the handle flops with no resistance, the mounting nut is loose or the arm is broken. If the handle moves but nothing flushes, the chain is disconnected or too long. If the handle sticks down, the nut is overtightened or the arm is hitting the tank.
Work through the symptoms in order. A handle that spins or flops freely with no tension almost always means the mounting nut behind it has loosened, or the arm has cracked where it joins the handle stem. A handle that presses normally but produces a weak partial flush or no flush points to the chain: it has either unhooked at the lever end, snagged on the overflow tube, or grown so long that pressing the handle cannot lift the flapper far enough to release a full tank. A handle that stays stuck in the down position after you press it usually means the nut is cranked too tight, the arm is rubbing the inside of the tank wall, or the chain is so short it holds the flapper open. Matching the symptom to the cause this way saves you from replacing a part that was never the problem, which is exactly how a plumber works the diagnosis before opening any toolbox.
Tip. Before you buy anything, note which side of the tank the handle sits on. Most toilets use a front-left mount, but corner toilets, some one-piece designs, and certain dual-flush models use front-right, side, or top-button actuators. Universal replacement handles come in both left and right reverse-thread versions, and buying the wrong orientation is the single most common mistake on this repair. A quick photo of your handle and arm angle at the store prevents a second trip.
The step by step fix for a toilet handle
These steps are ordered from the most common cause to the least, which is also roughly the order from free adjustment to cheap part swap. Most handle problems are solved by the time you finish step two. Work through them in sequence and stop as soon as the handle flushes cleanly.
Step 1: Reconnect and adjust the lift chain
Start here, because a chain problem is free to fix and accounts for most handles that move but will not flush. The chain hangs from a small hole near the end of the handle arm and clips to the top of the flapper. Lift the lid and check both ends. If the chain has unhooked at the lever, rehook it. If it is tangled around itself or snagged on the overflow tube, free it. Then check the length: with the flapper closed there should be about a half inch of slack, just enough that pressing the handle lifts the flapper fully without the chain holding it open.
Adjust the length by moving the hook to a different link on the arm, and clip off excess chain so a loose tail cannot fall under the flapper and prop it open. Too much slack means the handle has to travel its full arc before the flapper even lifts, which feels like a weak or dead handle. Too little slack holds the flapper cracked open and causes the tank to leak and run. Press the handle a few times and confirm the flapper rises fully and drops flat. If a clean, correctly slack chain still does not solve the problem, move to the mounting nut.
Step 2: Tighten the mounting nut behind the handle
If the handle flops loosely or spins without driving the lever, the mounting nut on the inside of the tank has worked loose. This nut is the large hex nut directly behind the handle where it passes through the tank wall. The critical detail that trips people up is that toilet handle nuts are reverse-threaded, so you tighten them by turning counterclockwise when viewed from inside the tank, and loosen them clockwise. This reverse thread exists so that the normal downward press of flushing does not gradually loosen the nut.
Reach behind the handle, grip the nut, and turn it counterclockwise to snug it. You can usually do this by hand or with a pair of pliers or an adjustable wrench. Tighten it firmly but not with full force, because the nut and the tank are often plastic and overtightening can crack the tank or strip the threads. Once the nut is snug, the handle should sit firm and press with a clean, springy action. If the handle still feels loose after tightening, or if the nut spins endlessly without grabbing, the threads or the arm are damaged and you move to replacement.
Avoid this mistake. Do not crank the mounting nut the normal clockwise direction expecting it to tighten. On almost every toilet handle the thread is reversed, so clockwise loosens it and you will end up backing the handle right out of the tank. If your wrench seems to be making the handle looser, you are turning the correct direction but on a reverse thread, so reverse your motion. When in doubt, hold the handle still on the outside and watch which way the nut snugs against the tank wall.
Step 3: Replace a corroded or broken handle and arm
If the arm is cracked, snapped, badly corroded, or the threads on the stem are stripped so the nut will not hold, replace the whole handle assembly. This is an inexpensive universal part and the swap takes only a few minutes with no need to shut off the water. Buy a replacement that matches your mount side, since left and right versions are not interchangeable, and choose metal over plastic if you want it to outlast the toilet, because solid brass and stainless arms resist the corrosion that destroys cheaper handles in humid tanks.
To install it, unhook the chain from the old arm, hold the handle steady on the outside, and spin the reverse-thread nut clockwise to remove it. Pull the old handle out, slide the new one through the same hole, and thread the new nut on counterclockwise until snug, taking care not to overtighten plastic. Reconnect the chain to the new arm with a half inch of slack, press the handle a few times, and confirm a clean full flush. Wipe the new chrome with a soft cloth to keep tank moisture from etching it. A fresh handle restores the crisp, positive flush action the toilet had when it was new.
Step 4: Free a stuck handle or sticking lever
A handle that sticks in the down position, or stays depressed after you flush, is usually mechanical interference rather than a worn part. The most common cause is an overtightened mounting nut binding the arm, or the arm rubbing against the inside tank wall or the fill valve as it pivots. Less often, mineral scale and grime build up around the handle stem where it passes through the tank, gumming the pivot so it no longer springs back.
Loosen the mounting nut a quarter turn to relieve binding, then press the handle and watch the arm swing freely without scraping the tank or valve. If the arm is bent so it contacts the tank, gently straighten it. If the pivot is gummed with scale, remove the handle and clean the stem and the hole with white vinegar and an old toothbrush, then reinstall. A handle that springs back crisply and lets the flapper drop flat is working correctly. If it still sticks after cleaning and adjustment, the arm is warped or the internal spring is gone, and a replacement handle is the lasting fix.
Step 5: Rule out a stuck flapper masquerading as a handle problem
Sometimes the handle is fine and the flapper is the real culprit. A flapper that is swollen, warped, or stuck to the flush valve seat will not lift cleanly, so pressing the handle produces a weak flush or nothing at all, which feels like a handle fault. Likewise, a flapper that fails to drop and seal makes the toilet run, which people sometimes blame on the handle sticking. Press the handle, watch the flapper rise and fall, and confirm it lifts fully and seats flat.
If the flapper is stiff, chalky, or no longer seals, replace it, since it is a cheap consumable that wears out in three to five years. Because the handle, chain, and flapper all work as one mechanism, a full toilet repair kit that bundles a new handle, chain, flapper, and gaskets refreshes the entire flush system at once for a small cost. If your weak or incomplete flush traces back to a tired flapper rather than the handle, our guide on how to improve toilet flush power covers the seal and seat checks in detail.
Editorial Take
The single highest-return habit on this repair is checking the chain and the nut before buying anything, because the large majority of handle complaints are a slipped chain or a loosened reverse-thread nut, both free to fix in under a minute. We see owners replace an entire handle, then discover the new one flops too because the real issue was a stripped tank hole or a long chain. When you do replace the handle, spend the extra dollar or two on a solid metal arm rather than the cheapest plastic one. Plastic arms crack at the stem within a few years in a humid tank, while a brass or stainless lever typically outlasts the toilet and never needs touching again.
A quick fix-it order to follow
Working in the right order saves time and avoids buying parts you did not need. Here is the sequence that resolves the large majority of toilet handle problems, from free adjustment to part replacement. The chain step is marked as the most likely fix.
If the handle keeps failing after a fresh part, the trouble is usually a cracked tank hole or a worn-out tank that has needed repeated repairs, and replacement becomes the lasting answer. A related symptom is a button-style flush that jams; our guide on a stuck toilet flush button covers dual-flush actuators, and if your toilet also will not flush completely, see toilet not flushing properly and how to fix it.
Why does my toilet handle have to be held down to flush?
A toilet handle that must be held down to complete the flush almost always has too much slack in the lift chain, so the handle uses up its travel before the flapper lifts far enough to release a full tank. Shorten the chain to about a half inch of slack so a normal press lifts the flapper fully and the flush completes on its own.
This is one of the most common handle complaints and one of the quickest to fix. When the chain is too long, pressing the handle partway only lifts the flapper a little, and the flapper drops and reseals before the tank fully empties, so you instinctively hold the handle down to keep the flapper open through the whole flush. Shortening the chain by a link or two, until there is roughly a half inch of slack with the flapper closed, lets one clean press lift the flapper fully and trigger a complete flush with no holding. If shortening the chain does not fix it, the flapper may be too small for the flush valve or the tank water level may be set too low, both of which reduce the flush volume. For the water level side of that, our guide on how to adjust toilet water level walks through the float setting.
Which toilet handle parts wear out first?
The lift chain and the handle arm wear out first on a toilet flush mechanism. Chains corrode, kink, or break their links within a few years, and plastic handle arms crack at the stem where they take the most stress. The flush valve, overflow tube, and bowl outlast everything, which is why a failed handle is almost always a cheap parts fix rather than a reason to replace the toilet.
Knowing the wear order helps you decide whether to repair or replace. The chain and handle are consumables on most toilets, and a handle that fails is usually telling you a few-dollar part has reached the end of its life, not that the toilet is finished. A single toilet repair kit that bundles a fresh handle, chain, flapper, and gaskets refreshes the entire flush mechanism for a small cost and a few minutes of work. The bowl and trapway, which determine flush strength, are essentially permanent. That is why a broken handle is rarely a reason to buy a new toilet; the only time replacement wins is when the tank itself has cracked or the bowl performance has also failed.
When should you replace a toilet instead of fixing the handle?
Replace the toilet rather than the handle when the tank is cracked around the handle hole, when repeated repairs have not produced a reliable flush, or when the toilet is an old low-efficiency model that wastes water on every flush. In most other cases a new handle or repair kit fixes the flush action for a few dollars and the toilet is worth keeping.
The repair-versus-replace line comes down to where the failure is. The handle, chain, and flapper are always worth replacing because they are cheap and tool-light. A cracked tank, a stripped handle hole that will not hold a nut, or a worn-out tank that has needed repeated repairs is a different situation, and if your toilet is also an older 3.5 GPF or first-generation 1.6 GPF model with a weak flush, that is the moment to upgrade to a modern WaterSense toilet. A new high-MaP toilet uses less water, flushes harder, and starts its life with a fresh, sturdy handle and reliable tank parts. For the common companion problem of poor flushing, see our guide on why your toilet keeps clogging and how to fix it, which often shares the same tired-tank root causes.
Top recommendations if you decide to replace
If a cracked tank or repeated failures point to a worn-out toilet, these three models pair sturdy, easy-to-service handles and tank hardware with high independent MaP scores and efficient water use, which makes them safe upgrades. Each one suits a different priority, and all three carry EPA WaterSense certification.
Most Reliable
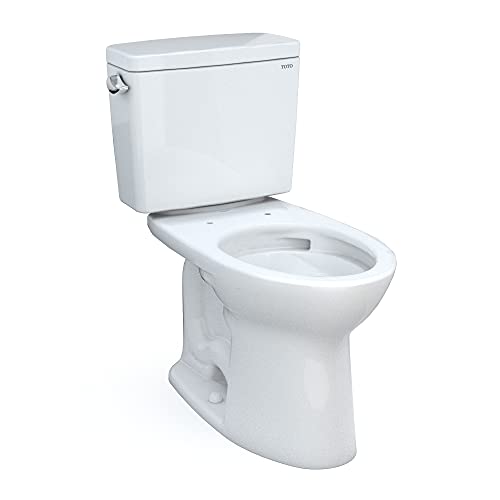
TOTO Drake
Sturdy chrome lever, parts-friendly tank
A solid metal trip lever, a 1,000 gram MaP score, and a 3-inch flush valve with widely available replacement parts make the Drake a low-maintenance two-piece whose handle action stays crisp at 1.28 GPF.
Check price on Amazon
Best Build Quality
Kohler Cimarron
Durable metal lever and canister valve
Kohler pairs a solid metal handle with a canister flush valve that lifts straight up instead of through a chain, removing the most common chain-slack handle complaint, alongside a strong Class Five flush at 1.28 GPF.
Check price on Amazon
Best Value Upgrade
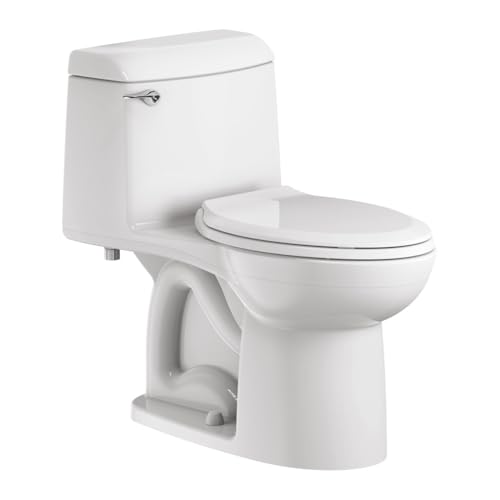
American Standard Cadet 3
Affordable, dependable everyday toilet
The Cadet 3 uses a sturdy chrome lever, a wide easy-seating flapper, and a reliable tank, giving dependable, quiet flush action at an accessible price with a 1.28 GPF WaterSense rating.
Check price on Amazon
How do you replace a toilet flush lever step by step?
Replace a toilet flush lever by unhooking the chain, holding the handle still on the outside, and unscrewing the reverse-thread nut clockwise. Pull the old handle out, slide the matching left or right replacement through the same hole, thread the new nut counterclockwise until snug, and reconnect the chain with a half inch of slack. The whole job takes about five minutes with no need to shut off the water.
The replacement is genuinely one of the easiest toilet repairs there is. You do not need to drain the tank or turn off the supply, because the handle sits above the water line. The only parts you touch are the chain hook, the reverse-thread nut, and the handle stem. Match the new handle to your mount side and, if possible, your tank brand for the cleanest fit, though universal handles fit the large majority of toilets. After installing, press it several times to confirm a full flush and check that the chain has the correct slack so the flapper lifts fully and drops flat. If you want a deeper walkthrough of the whole tank mechanism while you are in there, our toilet flapper guide covers the matching seal.
Editorial Take
Our honest advice on the repair-versus-replace question is to keep the toilet and refresh the handle and tank parts if the bowl flushes well, and to upgrade only if the toilet is also an old, weak flusher or the tank is cracked. A full toilet repair kit renews the handle, chain, and flapper at once, so you are not back at the hardware store in six months for the next worn part. But if the tank hole is stripped or cracked, or you have already rebuilt a pre-2000 low-flow toilet that still flushes poorly, stop spending on a tired fixture. A high-MaP 1.28 GPF replacement like the TOTO Drake or Kohler Cimarron gives you a sturdy lever, a crisp flush, and a lower water bill at the same time.
Putting it all together
Fixing a toilet handle is a process of elimination, and the order matters. Take off the lid and press the lever while watching the chain and flapper, then work the fixes in sequence: reconnect and adjust the chain to a half inch of slack, tighten the reverse-thread mounting nut counterclockwise, replace a corroded or cracked handle, free a sticking lever, and rule out a worn flapper. Those steps restore a crisp, full flush for free or a few dollars in under ten minutes. If a cracked tank or a worn-out old toilet is the real culprit, a modern high-MaP toilet from TOTO, Kohler, American Standard, Woodbridge, Swiss Madison, or Gerber is the lasting fix.
Keep reading
Related guides
FAQ
Frequently asked questions
? Why is my toilet handle loose and floppy?
A floppy handle almost always means the mounting nut behind it has loosened, so the lever spins without driving anything. Reach into the tank and tighten the nut by turning it counterclockwise, since toilet handle nuts are reverse-threaded. If the nut spins without grabbing or the arm is cracked, replace the handle assembly, which is an inexpensive universal part that installs in a few minutes.
? Which way does a toilet handle nut turn to tighten?
Counterclockwise, when viewed from inside the tank. Toilet handle mounting nuts are reverse-threaded so the normal downward press of flushing does not gradually loosen them. This catches many people out, because turning clockwise, the usual tightening direction, actually backs the handle out. Turn the nut counterclockwise to snug it, and stop when it is firm so you do not crack a plastic tank.
? Why do I have to hold the handle down to flush?
The lift chain is too long, so a normal press uses up the handle travel before the flapper lifts far enough to release a full tank. Shorten the chain by a link or two until there is about a half inch of slack with the flapper closed. One clean press should then lift the flapper fully and complete the flush on its own without you holding the handle.
? My toilet handle works but nothing flushes, why?
The lift chain has come unhooked, tangled, or grown too long, so pressing the handle does not raise the flapper. Lift the lid, reconnect the chain at both ends, free any tangle, and set about a half inch of slack. If the chain is fine and the flapper is swollen or stuck, replace the flapper, since a worn one will not lift cleanly even with a good handle.
? How do I replace a toilet flush handle?
Unhook the chain, hold the handle still on the outside, and unscrew the reverse-thread nut clockwise to remove it. Pull the old handle out, slide the matching left or right replacement through the same hole, thread the new nut on counterclockwise until snug, and reconnect the chain with a half inch of slack. No tools beyond pliers and no water shutoff are needed, and the job takes about five minutes.
? Do toilet handles come in different sizes or sides?
Yes. Handles are made for front-left, front-right, side, and angled mounts, and the reverse-thread nut differs by side. Front-left is most common, but corner toilets, one-piece designs, and dual-flush models often differ. Before buying, note your mount side and arm angle, since installing the wrong orientation is the most common mistake on this repair. A universal handle covers the large majority of standard toilets.
? Why does my toilet handle stick in the down position?
A sticking handle is usually an overtightened mounting nut binding the arm, the arm rubbing the tank wall or fill valve, or scale gumming the pivot where the stem passes through the tank. Loosen the nut a quarter turn, make sure the arm swings freely, and clean the stem with white vinegar. If it still sticks, the internal spring is gone and a new handle is the lasting fix.
? Can I fix a toilet handle without turning off the water?
Yes. The handle sits above the tank water line, so you do not need to shut off the supply or drain the tank to adjust the chain, tighten the nut, or replace the handle. You only need to shut off the water if you also replace the flapper or work on the flush valve below the water line, which is a separate repair.
? What chain slack should a toilet handle have?
About a half inch of slack with the flapper closed. That is enough for a single press to lift the flapper fully without the chain holding it cracked open. Too much slack means you have to hold the handle down to flush; too little keeps the flapper open and makes the toilet run. Clip off any excess so a loose tail cannot fall under the flapper.
? Should I buy a metal or plastic toilet handle?
Choose a solid metal arm, ideally brass or stainless, if you want it to last. Plastic handle arms crack at the stem where they take the most stress, often within a few years in a humid tank. A metal lever costs only a dollar or two more and typically outlasts the toilet, so it is the better value despite the small upfront difference.
? How much does it cost to fix a toilet handle?
If you do it yourself, a replacement handle is an inexpensive universal part and adjusting the chain or tightening the nut is free. A full toilet repair kit that bundles a handle, chain, and flapper is still a low cost and refreshes the whole flush mechanism. Calling a plumber costs far more, which is why a handle is one of the best DIY repairs to learn.
? Why did my new toilet handle break so quickly?
Cheap plastic arms crack at the stem under repeated flushing stress, and in-tank chlorine cleaning tablets accelerate the failure by degrading plastic and corroding metal. Replace it with a solid metal handle and switch to bowl-only cleaners. If the nut would not hold the new handle either, the tank hole may be stripped or cracked, which a handle alone cannot fix.
? Can a toilet handle cause the toilet to run?
Yes. If the chain is too short or tangled, it holds the flapper slightly open after each flush, letting tank water leak into the bowl so the fill valve cycles continuously. A sticking handle that does not return fully has the same effect. Adjust the chain to a half inch of slack and make sure the handle springs back so the flapper can seat flat.
? What do I do if the toilet handle nut is corroded and stuck?
Apply penetrating oil or white vinegar to the nut, wait several minutes, and try again with pliers, holding the handle still on the outside. If the nut or arm is too corroded to move, the handle is failing anyway, so cutting it off and installing a fresh assembly is the practical answer. A new metal handle avoids the same corrosion in the future.
? Do dual-flush toilets have a different handle repair?
Yes. Most dual-flush toilets use a top-mounted push button rather than a side lever, and the actuator and seal differ by brand. Instead of a chain and arm you typically have a button assembly that presses a cartridge valve. If a dual-flush button sticks or fails, the fix is the button actuator or the flush valve cartridge, covered in our guide on a stuck toilet flush button.
? Why does my toilet handle squeak or feel gritty?
Mineral scale and grime have built up around the handle stem where it passes through the tank, gumming the pivot. Remove the handle, clean the stem and the tank hole with white vinegar and an old toothbrush to dissolve the scale, then reinstall. A drop of plumber-safe lubricant on the pivot restores a smooth, quiet action without replacing the part.
? When should I replace the whole toilet instead of the handle?
Replace the toilet when the tank is cracked around the handle hole, when the hole is stripped so no nut will hold, or when it is an old low-efficiency model that also flushes weakly. In those cases a modern WaterSense 1.28 GPF toilet from TOTO, Kohler, or American Standard gives a sturdy lever, a stronger flush, and lower water use, which outweighs another repair on a tired fixture.
? Which toilets have the most reliable flush handles?
Toilets with solid metal levers and canister flush valves, such as the Kohler Cimarron, avoid the chain-slack complaints that plague older designs because the valve lifts straight up. TOTO and American Standard models with sturdy chrome handles and parts-friendly tanks also hold up well, and all carry replacement handles that are easy to source when a part eventually wears.
Sources
- EPA WaterSense, epa.gov/watersense
- MaP (Maximum Performance) flush testing, map-testing.com
- Manufacturer published specifications (TOTO, Kohler, American Standard)
Our Verdict
Most toilet handle problems are fixed for free or a few dollars in under ten minutes. Press the lever with the lid off, then work the steps in order: reconnect and adjust the chain to a half inch of slack, tighten the reverse-thread mounting nut counterclockwise, replace a corroded or cracked handle, free a sticking lever, and rule out a worn flapper. A slipped chain or a loose nut is the answer most of the time. If a cracked tank or a worn-out old toilet is the real cause, a high-MaP upgrade like the TOTO Drake at 1,000 grams and 1.28 GPF gives you a sturdy lever and a stronger flush while cutting water use. Confirm the rough-in matches yours and check the current price on Amazon before you order.