Common Bidets Problems and How to Fix Them (2026)
Bidets4.6
Step-by-step fixes for the bidet problems reported most often, from a unit that won't spray and weak water pressure to a seat…
Read the guideA plain-language walkthrough covering water supply connections, electrical rough-in, seat mounting, and the two most common failure points that cause leaks after day one.
Most bidet toilet combos install in two to four hours using only a adjustable wrench and screwdriver. The critical steps are shutting off the water supply, connecting a T-valve at the fill line, routing a GFCI-protected outlet within reach, and torquing the seat mounting bolts evenly to prevent cracking the porcelain.
A bidet toilet combo (also called an integrated bidet or washlet-integrated toilet) is a one-piece or two-piece toilet with bidet wash functions built directly into the seat and bowl rather than added as an afterthought attachment. Installation differs from a standard toilet because these units almost always require both a plumbing water feed and a nearby GFCI-protected electrical outlet, adding roughly 30 to 60 minutes of prep time compared to a plain toilet swap.
Standalone bidet seats retrofit onto existing toilets and share the same basic wiring and water-feed requirements, but a true bidet toilet combo ships as a matched set with a purpose-designed trapway, rimless bowl geometry, and a seat rail precisely engineered to the bowl contour. Brands such as TOTO, Kohler, American Standard, Woodbridge, and Swiss Madison all publish model-specific rough-in dimensions and wiring diagrams you must read before cutting any supply line.
The most popular integrated units in 2026 pull between 1.0 GPF and 1.28 GPF, well within EPA WaterSense territory (any toilet at or below 1.28 GPF qualifies). TOTO's Washlet+ lineup, which pairs toilets like the TOTO Drake II or TOTO UltraMax II with a compatible washlet seat, and Kohler's Veil Intelligent Toilet are the benchmark products most plumbers reference when estimating job scope.
Per the plumbing trade's guidance documented in the Uniform Plumbing Code (UPC) and International Plumbing Code (IPC), the T-valve (also called a T-adapter or fill-line splitter) connecting the bidet water supply must be brass or reinforced braided stainless steel. Plastic T-valves are a documented source of slow leaks that only appear weeks after install when the fitting creep-deforms under household water pressure.
The core toolkit is a 12-inch adjustable wrench, a Phillips and flat-head screwdriver, a bucket and rags for residual water, a level, and a drill with a 3/8-inch bit if you are adding a new outlet. Materials include a braided stainless-steel fill hose (minimum 12 inches), a brass T-valve rated to your home's water pressure, Teflon tape (PTFE), and a foam wax ring if you are also swapping the base toilet.
Here is a full pre-install checklist broken out by category:
| Category | Item | Why It Matters | Notes |
|---|---|---|---|
| Plumbing | Brass T-valve (3/8" compression) | Splits cold supply to tank and bidet | Brass only; plastic fails under pressure |
| Plumbing | Braided stainless hose 12" | Bidet water feed from T-valve | Match thread size to unit (usually 7/8" or 3/8") |
| Plumbing | Wax ring (if replacing toilet) | Seals bowl to floor flange | Use wax-free if floor is uneven |
| Electrical | GFCI outlet within 4 feet | Required by NEC 210.8 for wet locations | Hire electrician if none exists |
| Electrical | 15A or 20A dedicated circuit | Avoids tripping shared bathroom circuit | Check unit's draw spec; most are 7-15A |
| Hand tools | Adjustable wrench (12") | T-valve and supply connections | Do not overtighten porcelain bolts |
| Hand tools | Level (4") | Bowl must sit level for even seat pressure | Shim with plastic toilet shims, not wood |
| Sealing | Teflon tape (PTFE) | Thread sealant on all male pipe threads | 3-4 wraps minimum |
| Safety | Bucket (2 gallon) + rags | Capture residual tank and bowl water | Empty tank fully before disconnecting |
If your bathroom has zero outlets near the toilet (common in homes built before 1990), budget for a licensed electrician before scheduling the install. National Electrical Code (NEC) Article 210.8 requires GFCI protection on all bathroom receptacles, and virtually every bidet toilet combo manufacturer voids the warranty if the unit is plugged into a non-GFCI outlet.
Turn off the shutoff valve behind or below the toilet, flush to empty the tank, and disconnect the supply line. Sponge out remaining water, then unscrew the two floor bolts (closet bolts) at the toilet base, rock the bowl gently to break the wax seal, and lift straight up. Scrape the old wax from the floor flange with a putty knife and inspect the flange for cracks before proceeding.
Step-by-step removal in detail:
A cracked floor flange is the single most common cause of call-backs after toilet installation. Documented repair costs average $150 to $400 for flange replacement versus the $15 repair ring that handles 80% of cases. Always photograph the flange before and after cleaning so you have a baseline if a leak develops later.
Set new closet bolts into the floor flange slots, position the wax ring (wax side down) on the flange, lower the bowl straight down over the bolts without rocking, and press firmly to seat the wax. Hand-tighten the mounting nuts, alternate sides to seat evenly, and stop when snug -- overtightening cracks porcelain. Connect the T-valve at the shutoff, then run separate hoses to the tank and bidet inlet.
Follow this sequence for the base installation:
Now connect the water supply using the T-valve approach required by virtually every bidet toilet combo:
Bidet toilet combos plug into a standard 120V GFCI outlet using the manufacturer's supplied cord -- there is no hardwiring required for consumer units. The outlet must be GFCI-protected per NEC 210.8, within reach of the unit's power cord (typically 4 to 6 feet), and should ideally be on a dedicated 15A or 20A circuit to avoid sharing load with hair dryers and other high-draw bathroom appliances.
Electrical installation considerations by scenario:
Scenario A: Existing GFCI outlet within reach. This is the simplest case. Plug in the bidet cord, verify the outlet tests correctly with a GFCI tester ($10 at any hardware store), and proceed to commissioning. No electrician needed.
Scenario B: Standard outlet, no GFCI. Replace the existing outlet with a GFCI receptacle. This is a $25 part and a 20-minute job for anyone comfortable with basic wiring. Turn off the circuit breaker, confirm no voltage with a non-contact tester, swap the receptacle, test, and restore power. This meets NEC code.
Scenario C: No outlet within reach. Hire a licensed electrician to add a dedicated bathroom circuit. This typically costs $200 to $500 depending on panel distance and local labor rates. TOTO's installation documentation for the Washlet+ system specifically calls out this scenario and recommends a dedicated 20A circuit for future-proofing. Do not use extension cords -- most bidet manufacturers explicitly prohibit extension cord use in warranty terms.
Before energizing the unit, check that the power cord is routed away from the water supply hoses and is not pinched between the toilet and wall. TOTO, Kohler, and American Standard all route the cord through a channel on the right or left side of the unit; consult your model's guide for the correct routing direction.
Bidet toilet combos draw between 7 and 15 amps during the heating cycle for the seat warmer and water heater. Units with instantaneous water heating (such as several Woodbridge models) spike briefly to their maximum rated draw when wash begins. On a shared bathroom circuit carrying a hair dryer, this combination can trip a 15A breaker repeatedly. A dedicated circuit eliminates this issue entirely and is the recommended configuration in published installation guides from TOTO, Kohler, and Swiss Madison.
The two most common post-install failures are a plastic T-valve that weeps slowly at the compression fitting under sustained household water pressure, and a supply hose seated at a slight angle on the bidet inlet -- both leaks typically appear 24 to 72 hours after install when the fitting fully pressurizes. A third common error is over-compressing the wax ring by rocking the bowl during placement, which creates a partial seal that leaks at the floor over months.
Here is a structured checklist of failure modes and their prevention:
| Failure Mode | Root Cause | Prevention | How to Detect |
|---|---|---|---|
| T-valve weep | Plastic fittings, insufficient tape | Use brass T-valve; 4 wraps PTFE tape | Dry the joint, check after 24 hours |
| Bidet inlet drip | Cross-threaded or under-torqued hose | Hand-thread first, then quarter-turn wrench | Paper towel test at all connections |
| Wax seal failure | Lateral movement during bowl placement | Lower bowl straight down; no rocking | Water at base when flushing |
| Cracked porcelain base | Overtightened closet bolt nuts | Snug only; stop when bowl is stable | Hairline crack visible at bolt area |
| GFCI tripping | Shared circuit overload; ground fault | Dedicated circuit; proper cord routing | Unit loses power after first use |
| Seat misalignment | Mounting bolts not centered on bowl | Follow template; secure both bolt sides equally | Seat shifts during use |
| Low water pressure to bidet | Kinked supply hose | Use minimum 12" hose; no sharp bends | Weak spray even at max setting |
After turning the supply valve back on and restoring power, perform what plumbers call the paper towel test: wrap a single layer of paper towel around each threaded connection (T-valve, both supply hoses, tank fill valve) and leave it for 30 minutes while running the bidet through its wash cycles. Any moisture will wick into the paper towel and reveal the leak source immediately, before water damage can occur to the subfloor.
Once all connections are confirmed dry, use the manufacturer's remote or side panel to cycle through each wash mode -- posterior wash, frontal wash, dryer, seat heater -- and confirm normal operation. TOTO Washlet+ units typically require a 15-minute warm-up period for the instant ceramic water heater on first power-up. Kohler's Veil and American Standard's Spalet both use a tank water heater that takes 5 to 10 minutes to reach set temperature.
For a deeper look at how flushing performance compares across these brands, see our guide to the best flushing toilets which includes MaP flush-test scores for the base bowls used in bidet combo configurations.
Bidet toilet combos ship with a mounting plate that attaches to the bowl using two bolts at the rear of the rim. Common errors here include: tightening one bolt much more than the other (causes a rocking seat), not centering the plate front-to-back before tightening (causes poor wash aim), and using the wrong sized mounting bumpers from the hardware bag (units typically include bumpers in two or three sizes to accommodate different rim profiles). Woodbridge T-0001 units are particularly specific about this: the installation manual includes a torque spec of 4 to 5 Newton-meters for the seat mounting bolts and warns that exceeding this cracks the lid hinge bosses.
Also see our guides on bidet seat vs combo toilet and best bidet toilet combos for buying guidance before you select a model to install.
Most bidet toilet combos require between 15 PSI and 80 PSI of supply water pressure at the inlet. The optimal operating range is 40 to 60 PSI, which is normal residential pressure. If your home's water pressure exceeds 80 PSI (verifiable with a $15 gauge at any hardware store), you need to install a pressure reducing valve (PRV) upstream of the bathroom -- high pressure is the leading cause of solenoid valve failure inside bidet units and is explicitly excluded from warranty coverage by TOTO, Kohler, and American Standard.
Low pressure situations (below 20 PSI, common in rural properties on well systems) can result in insufficient wash spray. Swiss Madison and Gerber both publish minimum inlet pressure specifications in their bidet combo installation sheets -- check your model before purchase if you know your home has low pressure.
Per manufacturer service guidance aggregated across TOTO, Kohler, and American Standard documentation:
For more on keeping your toilet system in peak condition, see our toilet maintenance guide and hard water toilet cleaning tips.
Most homeowners with basic DIY experience can handle the plumbing portion themselves -- it involves only shutoff valves and compression fittings, not soldered pipe joints. However, if you need to add a new electrical outlet or replace a damaged floor flange, hiring a licensed electrician or plumber for those specific tasks is strongly advisable.
A dedicated circuit is not strictly required by code, but it is strongly recommended by all major manufacturers including TOTO, Kohler, and Woodbridge. Sharing a circuit with hair dryers or space heaters often causes nuisance GFCI tripping when the bidet's heater cycles on at the same moment as another appliance.
Use a brass T-valve with 3/8-inch compression fittings on all ports. Plastic T-valves are widely available but are not recommended for permanent under-toilet installations because they are documented to develop slow leaks as the plastic deforms under sustained line pressure. Brass fittings are typically $8 to $15 more and last the life of the installation.
Yes, if the shutoff valve behind your toilet functions correctly. Turn it fully clockwise to close it, then flush the toilet to verify the tank does not refill. If water continues to enter the tank, the shutoff valve is failing and you must shut off the main supply or replace the valve first.
For a replacement install where an outlet already exists, expect two to four hours for someone with basic DIY skills. Adding a new GFCI outlet adds one to two hours if you are doing it yourself, or you wait for a licensed electrician. Professionals typically complete the full job, including toilet swap and bidet setup, in under two hours.
Standard US rough-in is 12 inches from the finished wall to the center of the drain. A small number of homes have 10-inch or 14-inch rough-ins. TOTO, Kohler, American Standard, and Woodbridge all offer models in 12-inch configurations; only some offer 10-inch or 14-inch variants, so measure before purchasing. Rough-in is measured from the wall, not the baseboard.
They can, but well water often has higher iron content, sediment, and pressure variability that accelerates wear on nozzle solenoids and ceramic disc valves inside the unit. A sediment pre-filter at the supply connection is recommended by several manufacturers including Swiss Madison and Gerber when installing on a well system. Water softeners help with calcium buildup on heating elements.
Most bidet toilet combos specify 15 to 80 PSI at the inlet, with optimal performance at 40 to 60 PSI. Pressures above 80 PSI risk solenoid damage and typically void the warranty. A whole-house pressure reducing valve (PRV) corrects high-pressure situations for all plumbing simultaneously.
No. A wax ring is a single-use seal. Once compressed and then disturbed, it no longer creates a reliable seal. Always install a fresh wax ring every time a toilet bowl is removed and reinstalled, regardless of how briefly it was lifted.
Yes. The TOTO Drake II is one of the most widely documented base toilets in the TOTO Washlet+ compatibility system. TOTO publishes a specific Drake II plus Washlet+ S500e and S550e pairing guide with exact connector locations and cord routing diagrams. The Drake II has a MaP flush score of 1,000 grams at 1.28 GPF and is EPA WaterSense certified.
The Woodbridge T-0001 is a one-piece unit that ships with a detailed illustrated installation guide. Owner reviews across multiple retailers consistently rate the installation difficulty as moderate for a DIYer. The main challenge cited is the unit's weight (approximately 97 pounds including the seat), which requires two people for the bowl-lowering step. All plumbing connections use standard 3/8-inch compression fittings.
Use the self-cleaning cycle if your unit has one -- this is a built-in forward flush of the nozzle with clean water. For manual cleaning, use a soft cloth with water and mild soap per the manufacturer's instructions. Avoid bleach-based cleaners on brass or chromed nozzle assemblies, as they corrode the finish. For hard water buildup, white vinegar applied with a small brush and then rinsed is the widely recommended method.
After removing the old wax, inspect for cracks in the cast iron or PVC collar, broken or missing bolt ears, or a flange that sits more than 1/4 inch below the finished floor level. Cracks through the collar require full replacement. Broken bolt ears can be repaired with a stainless steel repair ring slid under the existing flange. A flange below floor level needs extension collars to achieve proper wax ring seal height.
Yes. Concrete floors have cast-iron or PVC floor flanges embedded in them, the same as wood subfloors. The installation procedure is identical. If the flange needs replacement on a concrete floor, cutting and re-setting it requires a rotary hammer and concrete anchors, which is typically a professional job.
Yes. Many water utilities offer rebates of $50 to $200 for replacing a 1.6 GPF toilet with an EPA WaterSense certified model (1.28 GPF or lower). TOTO's Washlet+ combos, Kohler's Veil, and American Standard's Spalet all offer EPA WaterSense certified base toilet configurations. Check the EPA WaterSense rebate finder at epa.gov/watersense for programs in your zip code.
A washlet is TOTO's brand name for an electronic bidet seat that mounts on an existing toilet. A bidet toilet combo (or integrated bidet toilet) is a complete unit where the toilet bowl, tank, and bidet functions are designed and sold together as one product. Combos typically offer better aesthetics and optimized wash positioning; washlets offer lower cost and retrofit convenience.
This is a function of the water heating technology. Tank-type heaters (found in many Kohler and entry-level Woodbridge models) maintain a reservoir of warm water and deliver warm spray immediately but use slightly more standby electricity. Instantaneous ceramic heaters (used in TOTO's Washlet+ S-series) heat water on demand and may have a brief 1 to 2 second cold lead-in. Adjusting the temperature setting to the highest level at which you're comfortable reduces the perception of the transition.
Published real estate data from the National Association of Realtors' Home Renovation Impact Report and aggregated agent surveys indicate that bathroom upgrades broadly yield positive returns, and bidet combos are increasingly cited as a desirable feature in home listings. There is no definitive cost-versus-value study specific to bidet combos as of 2026, but several real estate agents quoted in trade publications describe them as a neutral-to-positive feature for buyers over 35 and a strong positive for luxury home buyers.
You can install the toilet base without any outlet, but the bidet functions require 120V power and will not operate without it. A half bath installation requires either adding an outlet (requiring an electrician) or accepting that only the toilet function will work. Some owners install the full combo in a half bath with plans to add an outlet later -- this is viable as long as the power cord is safely stored until then.
Overtightening the nuts that secure the toilet bowl to the floor can crack the porcelain base of the bowl. This type of crack is typically not visible immediately -- it may not widen into a visible fracture until water pressure from use works into the micro-crack. Manufacturers generally specify snug-tight only, meaning stop tightening when the bowl no longer rocks. If you feel resistance but the bowl still rocks slightly, use plastic shims at the base before tightening further rather than torquing the nuts harder.
Installing a bidet toilet combo is a realistic weekend project for a DIYer with basic plumbing comfort. The keys to a leak-free, long-lived installation are: using a brass T-valve with Teflon-taped threads, lowering the bowl straight onto the wax ring without lateral movement, stopping closet bolt tightening before the porcelain is stressed, and plugging into a GFCI outlet on a circuit that can handle the bidet's heating load. Performing the paper towel test at every connection after pressurizing and waiting 24 hours before declaring the job complete will catch the vast majority of problems before they become water damage claims.
Step-by-step fixes for the bidet problems reported most often, from a unit that won't spray and weak water pressure to a seat…
Read the guideA step-by-step framework for picking the right bidet type, features, and fit based on your toilet, your bathroom's electrical access, and how…
Read the guide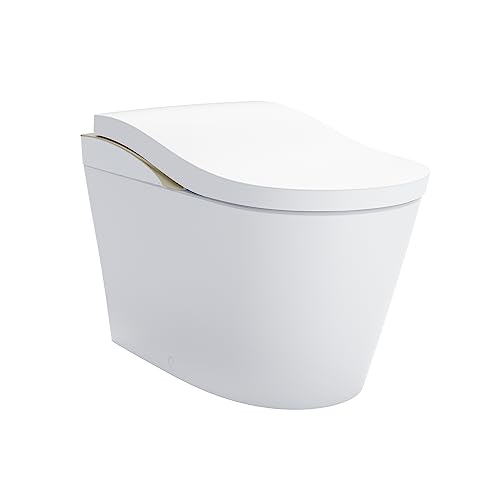
A luxury bidet is judged on a different set of criteria than a standard seat: automatic lid function, a full remote-controlled preset…
Read the guide