Bathroom Vanity Soft-Close Not Working: How to Fix
Bathroom Remodeling4.6
A vanity door or drawer that slams shut instead of easing closed almost never means the whole hinge or slide has failed.…
Read the guideA sagging, squeaking, or broken vanity door hinge is one of the simplest cabinet repairs, as long as you correctly identify the hinge type and bore size before ordering a replacement. Here is the full process from diagnosis to final adjustment.
Research updated July 2026.
Most bathroom vanity doors use one of two hinge types: concealed European-style cup hinges hidden inside the door, or exposed hinges visible on the door face or edge. Identify which type you have and the cup bore size (35mm is the most common on concealed hinges) before buying a replacement. Many sagging-door complaints are solved without any new parts at all, just by adjusting the existing hinge's built-in screws.
Vanity door hinges take a steady beating in a bathroom: humidity swings, repeated opening and closing, and the weight of a solid door pulling on the same few screws day after day. Eventually a hinge sags, squeaks, or fails outright, letting a door hang crooked or drop off the cabinet. Replacing a hinge is genuinely one of the easier cabinet repairs, but getting the wrong part because of a mismatched bore size or mounting style is the most common way this simple job goes wrong.
This guide covers identifying your current hinge type, adjusting before replacing, and the full replacement process for both concealed and exposed hinge styles.
Concealed hinges, sometimes called European hinges or cup hinges, are almost entirely hidden when the door is closed. Open the door and look at its inside face near the top and bottom edges; if you see a round metal cup recessed into the wood with an arm extending to a mounting plate on the cabinet frame, that is a concealed hinge. These are standard on most vanities made in the last two decades, including frameless (full-overlay) cabinet styles.
Exposed hinges are visible from the front of the cabinet, mounted with visible screws either on the door's face (surface-mount, common on older or traditional-style vanities) or along the door's edge (butt hinges, common on inset door styles where the door sits flush within the frame rather than overlapping it).
| Symptom | Likely Cause | Fix | Difficulty |
|---|---|---|---|
| Door sags or hangs low | Loose mounting screws or worn hinge spring | Adjust screws first, then replace hinge | Easy |
| Door squeaks when opened | Dry pivot point on hinge arm | Lubricate pivot with dry lubricant | Very easy |
| Door will not stay closed | Worn-out spring tension in hinge | Replace hinge cup and arm | Moderate |
| Door does not sit flush, gap visible | Hinge adjustment screws out of alignment | Adjust the three-way screws | Easy |
| Hinge arm cracked or broken | Metal fatigue or overtightened mounting | Full hinge replacement | Moderate |
| Screw holes stripped, hinge plate loose | Particleboard or MDF screw wear | Wood filler plug and re-drive, or relocate plate | Moderate |
Concealed European hinges are built with three adjustment screws specifically so installers, and later, homeowners, can fine-tune door alignment without replacing anything. Most sagging or misaligned doors can be corrected this way rather than requiring a new hinge at all.
If adjustment alone does not fix a sagging door, and the hinge feels loose or the spring no longer holds the door open or closed with proper tension, replacement is the next step.
Cabinetmakers commonly see homeowners replace a hinge that only needed adjustment, and just as often see the reverse: someone keeps adjusting a hinge whose spring tension has already failed, which no adjustment screw can fix. If you have turned the height, depth, and side adjustment screws and the door still will not hold its position or sags again within a day, the hinge mechanism itself has worn out and adjustment will not solve it.
The bore is the round recessed hole cut into the door where the hinge cup sits. Concealed hinges are manufactured to fit specific bore diameters, and 35mm is by far the most common size on residential cabinetry, including most bathroom vanities. Smaller bore sizes exist on some furniture-grade or imported cabinets, so measuring rather than assuming is worth the extra minute.
Measure the bore's diameter directly with a tape measure or calipers across the widest point of the recessed hole, not the visible cup's outer rim. If you are replacing a hinge that has failed completely and the cup has come out, measure the hole itself. If the existing hinge is still in place, you can often find the size stamped directly on the hinge cup or arm.
Beyond bore size, concealed hinges are made for a specific overlay, meaning how much the door covers the cabinet frame edge. The three common types are full overlay (door mostly covers the frame, typical on modern frameless vanities), half overlay (used when two doors share one frame opening), and inset (door sits flush within the frame, using a different hinge style entirely). Buying a full-overlay hinge for a half-overlay application, or vice versa, results in a door that either binds against its neighbor or leaves an oversized gap.
| Hinge Type | Best For | Bore Size | Notes | Check Price |
|---|---|---|---|---|
| Blum CLIP Top 35mm Concealed Hinge | Full-overlay vanity doors | 35mm | Soft-close option available | Check price |
| Amerock 35mm Face-Frame Hinge | Face-frame cabinets, half overlay | 35mm | Common on mid-range vanities | Check price |
| Liberty Hardware Self-Closing Hinge | Budget replacement, standard overlay | 35mm | Widely stocked at hardware stores | Check price |
| National Hardware Exposed Butt Hinge | Inset door vanities | N/A, surface mount | Available in multiple finishes | Check price |
Replacing a concealed hinge is straightforward once you have the correct bore size and overlay type in hand. Support the door's weight while working, since a heavier vanity door can twist or drop suddenly once the last screw is removed.
Stripped screw holes are the most common complication in a hinge replacement, especially on particleboard or MDF cabinet frames where the original screws have been removed and reinstalled multiple times. Fill the stripped hole with a wood glue-coated toothpick or wooden matchstick, let the glue set for several minutes, then reinsert the screw into the same spot for a fresh grip. For a hole that is too far gone to hold even with this method, relocate the mounting plate slightly and drill a new pilot hole in solid material nearby, understanding this may require a small adjustment to the hinge's alignment afterward.
Occasionally a hinge fails not because the hinge itself wore out, but because the door has become too heavy for it, often from swelling due to water exposure, or because the cabinet frame it is mounted to has softened or swollen. Replacing the hinge in that case only delays the same failure. Press on the cabinet frame around the hinge mounting area; if it feels soft or spongy rather than solid, address that underlying material issue before installing new hardware.
If the frame shows swelling consistent with water exposure, see our guide on bathroom vanity water damage repair to determine whether that section needs replacing before the new hinge goes in. If the swelling is concentrated at the cabinet base rather than at the hinge itself, our guide to bathroom vanity cabinet swelling causes and fixes covers tracing that separately.
Most vanity hinge problems are fixable with either a simple screw adjustment or a straightforward hinge swap, as long as you correctly identify whether the hinge is concealed or exposed and, for concealed hinges, confirm the bore size and overlay type before ordering a replacement. This is one of the few cabinet repairs where getting the diagnosis right makes the actual fix almost trivial, usually a fifteen to thirty minute job with a screwdriver and the correct part in hand.
Look for a size marking stamped on the hinge cup or arm, which most manufacturers include. If no marking is visible, measure the diameter of the recessed hole in the door directly with a tape measure or calipers across the widest point of the bore, not the visible metal cup.
Replacing just the failed hinge is fine mechanically, since hinges function independently. Many owners replace both anyway for a matched appearance and because the second hinge, having endured the same use and age, is often close to failing as well.
Overlay type is the most commonly missed factor. A hinge for a full-overlay application will not mount correctly on a half-overlay or inset door setup even with a matching bore size. Confirm overlay type in addition to bore diameter before purchasing.
Yes, this typically indicates worn spring tension inside a concealed hinge, which normally holds the door in either the open or closed position with a slight resistance. Once that tension fails, the door swings freely and can drop under its own weight. This is a replacement, not an adjustment, issue.
Bathroom humidity accelerates wear on hinge springs and can promote light corrosion on lower-quality metal hinges faster than in a typically drier kitchen environment. Vanity doors near the sink also open and close more frequently relative to their size, adding to cumulative wear.
Soft-close hinges have an added hydraulic damper that can fail independently of the main spring mechanism. A failing damper usually shows up as a door that closes with a bang instead of easing shut, while the hinge otherwise still holds and supports the door normally.
Technically possible but not simple, since it requires boring a new cup hole in the door and mounting plate holes on the frame, plus patching the old exposed hinge screw holes. This is a bigger project than a standard hinge swap and is usually only worth it as part of a broader door refinishing project.
If hinge adjustment does not resolve the gap, check whether the cabinet frame itself is square and level, since a racked frame can make even a properly adjusted hinge unable to seat the door flush. A door and drawer alignment issue on the same cabinet often points to a frame-level problem rather than hardware.
Standard-duty concealed hinges are rated for typical vanity door sizes and weights, while heavy-duty versions exist for larger or denser doors such as solid wood or glass-front cabinets. If a standard door feels unusually heavy or a standard hinge fails repeatedly, check the manufacturer's weight rating and consider a heavy-duty replacement.
Not necessarily, but if the failed hinge is several years old and matches the age of the others, replacing all of them at once can be more efficient than doing repeat repairs individually as each one fails on its own schedule over the following months.
How we rank & our data sources
We do not run physical lab tests. Rankings are built from published, verifiable data and real owner feedback, never paid placement.
Researched by admin · Last updated July 9, 2026 · Our review method
A vanity door or drawer that slams shut instead of easing closed almost never means the whole hinge or slide has failed.…
Read the guide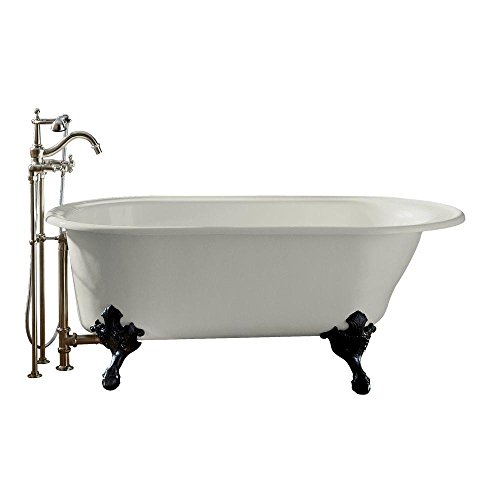
French-style bathtubs lean on freestanding clawfoot and slipper silhouettes, cast iron or acrylic construction with a rolled rim, and polished brass or…
Read the guide
Painted shaker-front cabinets in soft sage, navy and cream with polished brass or nickel hardware, bringing understated country-house elegance to a bathroom…
Read the guide