

Best 30-Inch Bathroom Vanities (2026)
Bathroom Remodeling4.6
Thirty inches is the sweet spot between a cramped 24-inch vanity and a full 36-inch cabinet, giving a single-sink bathroom real drawer…
Read the guideFrom skipping permits to buying the wrong toilet, these are the costliest errors homeowners make during a bathroom renovation -- and the exact steps to sidestep every one of them.
The most common and costly bathroom remodel mistakes are skipping permits, underestimating the budget by 20-30%, choosing the wrong toilet rough-in, and ignoring ventilation. Plan your layout and fixture specs before demolition, and your project will run on time and within budget.
A bathroom remodel ranks among the highest-ROI home improvements -- Remodeling Magazine's 2025 Cost vs. Value report pegs the national average return at around 60-70% for a midrange bath remodel. But that ROI evaporates fast when homeowners make avoidable mistakes. Permits get skipped, toilets are ordered with the wrong rough-in, and ventilation fans are undersized. The result is cost overruns, failed inspections, and bathrooms that need to be torn apart a second time.
Below are the 12 most common bathroom remodel mistakes, drawn from contractor interviews, building code resources, and aggregated homeowner review data. Each section explains why the mistake happens, what it actually costs, and what to do instead.
Do you need a permit for a bathroom remodel? In most U.S. jurisdictions you need a permit for any work involving plumbing, electrical, or structural changes -- which covers the vast majority of bathroom renovations. Skipping the permit can mean fines of $500 to $5,000, forced removal of finished work for inspection, and complications when you sell the home since unpermitted work must be disclosed.
Contractors sometimes offer to skip permits to save time or keep costs down. This is a red flag. If inspectors discover unpermitted work later -- during an appraisal, a home sale, or a neighbor complaint -- you bear all the liability. The permit fee for a typical bathroom remodel is $150 to $500 in most municipalities. That is a small price compared to the cost of having a finished tile wall opened up for a plumbing inspection.
What to do: Call your local building department before demolition. Ask specifically whether your planned scope (plumbing relocation, electrical, tile, fixture replacement) requires a permit. In many areas, a simple cosmetic swap of a toilet or faucet without moving drain lines does not require a permit. Moving a drain line almost always does.
Building codes for bathrooms primarily protect occupants from moisture intrusion, electrical hazards, and structural compromise. The permit process exists to verify that licensed contractors are doing the work correctly. Homeowners who pull their own permits are taking on personal liability for code compliance -- that is not automatically bad, but it requires knowing the applicable codes for your jurisdiction.
How much does a bathroom remodel actually cost? According to the National Association of Realtors and Remodeling Magazine's 2025 data, a midrange full bathroom remodel in the U.S. averages $25,000 to $35,000, while an upscale remodel can exceed $75,000. Homeowners routinely underestimate by 20 to 30 percent because they forget labor, permits, tile waste factors, and the near-universal discovery of hidden water damage once walls open up.
The hidden-damage problem is real. A 2023 survey by the National Kitchen and Bath Association found that 67% of bathroom remodels uncovered at least one unexpected issue once demolition began -- most commonly subfloor rot, mold behind tiles, or outdated galvanized plumbing. Repairing subfloor rot alone can add $800 to $3,000 to a project.
What to do: Build a contingency of at least 15 to 20% into your budget before you start. Get three contractor quotes, not one. Ask each contractor to itemize labor, materials, permits, and disposal separately so you can compare apples to apples. If your budget is firm, define your scope accordingly rather than cutting the contingency.
What is toilet rough-in and why does it matter? Rough-in is the distance from the finished wall behind the toilet to the center of the drain pipe on the floor. The standard in the U.S. is 12 inches, but older homes frequently have 10-inch or 14-inch rough-ins. Buying a 12-inch toilet for a 10-inch rough-in means the tank will hit the wall or the toilet simply will not fit without moving the drain -- a plumbing job that adds $200 to $600.
This is one of the most common toilet-replacement mistakes. Measure your rough-in before ordering anything. Remove the toilet caps at the base and measure from the wall (not the baseboard) to the center of the bolt holes. Do this on both sides and use the smaller number if they differ.
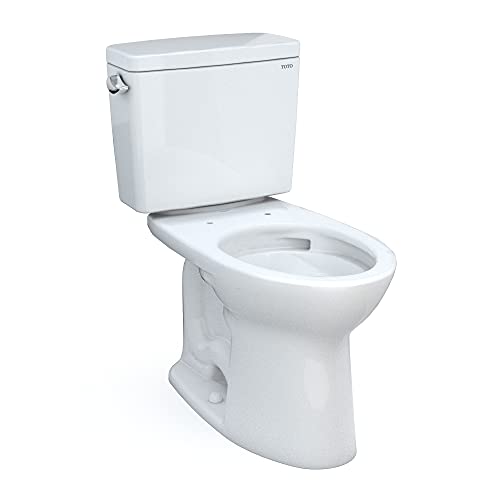
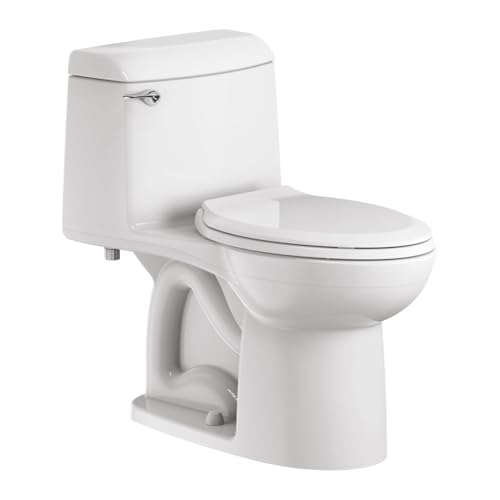
Major brands cover all three common rough-ins. The TOTO Drake is available in 10-inch, 12-inch, and 14-inch rough-ins. The American Standard Champion 4 and the Kohler Highline also offer 10-inch and 14-inch variants. Check the model number carefully -- the rough-in dimension is usually embedded in the SKU or listed in the product specifications.
For a comprehensive look at top-performing options, see our guide to the best flushing toilets across all rough-in sizes.
MaP (Maximum Performance) flush testing scores toilets on their ability to move bulk waste with a single flush. A toilet that scores 800 grams or higher is considered high-performing by MaP standards. The TOTO Drake II achieves 1,000 grams -- the maximum MaP test score -- while using only 1.28 gallons per flush. Choosing a high-MaP toilet is especially important when you are also trying to improve bathroom function, not just aesthetics.
What size exhaust fan does a bathroom need? The Home Ventilating Institute (HVI) recommends a minimum of 1 CFM (cubic feet per minute) per square foot of bathroom floor area, and at least 50 CFM total for any bathroom. For bathrooms over 100 square feet, calculate by fixture: 50 CFM per toilet, 50 CFM per shower or tub, and 100 CFM per jetted tub. Undersized ventilation leads to mold growth, peeling paint, and structural moisture damage within two to five years.
Many homeowners replace a bathroom fan with the cheapest available unit without checking the CFM rating. They also duct it into the attic rather than to an exterior vent, which simply moves moisture from one part of the house to another. Both errors are code violations in most jurisdictions. ENERGY STAR-certified fans are quieter (measured in sones), more efficient, and are required by code in some states.
What to do: Measure your bathroom square footage before buying a fan. For a 60-square-foot bathroom, a 60 CFM fan is the minimum. For a bathroom with a shower, tub, and toilet in 80 square feet, size up to 110-150 CFM. Verify the fan vents to the exterior -- through the roof or a gable wall, not into the attic or a soffit.
Why do bathroom floor tiles crack after remodeling? Tiles crack most commonly because the subfloor beneath them flexes or has voids. Ceramic and porcelain tile are rigid and cannot move with the floor; any deflection greater than L/360 of the span (a standard from the Tile Council of North America) will cause grout cracks or tile fractures within months. A compromised or undersized subfloor is the primary cause.
The Tile Council of North America (TCNA) publishes installation standards that specify minimum subfloor stiffness for tile. For most tile installations, the subfloor must be at least 1-1/8 inch thick (a combination of structural plywood plus cement backer board) and must not deflect more than 1/360 of the span between joists. A 16-inch joist spacing means the subfloor can deflect no more than 0.044 inches under load.
What to do: Before tiling, walk the existing floor and mark any soft spots. Probe with an awl to check for rot. If the subfloor is 3/4-inch plywood (common in homes built before 1990), add a 1/4-inch cement backer board layer. For bathroom floors, uncoupling membranes like Schluter-DITRA allow some subfloor flex without cracking the tile layer above -- a practical solution for older homes with some movement.
A bathroom remodel is a natural time to replace the toilet. Homeowners often pick a toilet based on color match or style, ignoring flush performance data. The result is a beautiful toilet that clogs regularly, uses more water than necessary, or requires constant maintenance.
MaP flush testing provides objective, independently verified performance data for nearly every toilet sold in North America. The test uses soybean paste to simulate waste bulk and measures the maximum grams a toilet can move in a single flush. Industry consensus holds that 500 grams is the minimum acceptable for residential use; 800 grams is good; 1,000 grams (the MaP maximum) is excellent.
EPA WaterSense certification means the toilet uses 1.28 GPF or less and has passed an independent flush performance test. WaterSense toilets are required in many states and qualify for utility rebates that can reduce the purchase price significantly.
High-MaP, WaterSense-certified models worth considering during a remodel include:
See also our best flushing toilets under $300 for budget-conscious remodel picks.
The TOTO Tornado Flush and American Standard VorMax technologies both increase rim coverage during flushing, reducing the cleaning surface area where waste can adhere. These technologies are particularly worth considering in a master bathroom remodel where hygiene expectations are highest. Both are available in WaterSense-certified 1.28 GPF configurations.
What electrical upgrades are required in a bathroom remodel? The National Electrical Code (NEC) requires GFCI protection for all outlets within 6 feet of a bathroom sink or water source. Any new circuit in a bathroom must be 20-amp and dedicated (no other rooms on the same circuit). Installing a heated floor, towel warmer, or new vanity lighting after tile is set can require opening finished walls -- so all electrical rough-in must happen before tile installation.
Sequencing is everything. The correct order for a full bathroom remodel is: demolition, rough-in plumbing, rough-in electrical, inspections, cement backer/waterproofing, tile, fixtures, finish plumbing, finish electrical. Homeowners who try to add a GFCI outlet or a recessed light after tile is set pay a significant premium for the repair of finished surfaces.
What to do: Walk through your planned lighting layout, outlet placement, and any heated elements before framing inspection. If you are planning a lighted mirror, a medicine cabinet with USB charging, or a bidet toilet seat (which requires a dedicated 120V outlet), rough-in the circuits now. The marginal cost of an extra electrical rough-in during the framing phase is minimal compared to cutting through finished tile later.
Grout is not a waterproof material. Unsanded grout, sanded grout, and epoxy grout all have different applications and maintenance requirements. Using sanded grout in joints narrower than 1/8 inch scratches polished stone tiles. Using unsanded grout in joints wider than 1/8 inch causes shrinkage cracks. And failing to seal cementitious grout in a wet area leads to staining and mold infiltration within a year.
The Tile Council of North America recommends epoxy grout for all wet areas in commercial applications. For residential bathrooms, epoxy grout is significantly more durable than cementitious grout but also more difficult to install. A practical middle ground for most homeowners is high-quality cementitious grout (such as Mapei Ultracolor Plus FA or Laticrete Permacolor Select) with a penetrating silane sealer applied every 12 to 18 months.
What to do: Match grout type to joint width and tile type. Seal all cementitious grout within 72 hours of installation. Plan to re-seal annually in high-use showers and every two years in lower-traffic tile areas. In shower floors, consider using a larger format tile with fewer grout joints -- fewer joints means less maintenance surface.
Shower niches (recessed shelf cutouts in shower walls) are among the most-requested features in bathroom remodels and among the most error-prone to execute. Common mistakes: cutting between studs without reinforcing the box, installing the niche too low (below shower head height, where it fills with spray), or placing it on an exterior wall where insulation and waterproofing become complex.
What to do: Standard niche dimensions are 12 x 24 inches or 12 x 36 inches, fitting neatly between 16-inch on-center studs. The niche should be positioned at shoulder height for the primary user. Interior walls are preferable for niche placement. Waterproof the niche box with a liquid membrane or prefabricated waterproof niche before tiling. Slope the niche floor slightly (1/4 inch per foot minimum) toward the shower to allow drainage.
ADA (Americans with Disabilities Act) clearance standards are not just for commercial or accessible builds. The clearances that allow a wheelchair user to approach a toilet -- 18 inches of side clearance and 21 inches of front clearance -- also improve usability for anyone aging in place, anyone with a temporary injury, or any bathroom caregiver situation. Future-proofing during a remodel costs very little if the bathroom is being gutted anyway.
The most impactful changes are: blocking the shower wall at 33-36 inches height for future grab bar installation (2x6 backing between studs, cost under $50 in materials), keeping the toilet centerline at least 18 inches from side walls and obstructions, and choosing a comfort-height toilet (16.5 to 18 inches seat height vs. the standard 15 inches).
For a full breakdown of accessible fixture requirements, see our ADA-compliant toilet guide.
Comfort-height toilets (sometimes called ADA-height or "right height" by manufacturers) have seat heights of 16.5 to 18 inches, compared to the standard 15 inches. For users over 5'8" or anyone with knee or hip joint issues, comfort height meaningfully reduces strain when sitting and standing. The TOTO Drake, Kohler Highline, and American Standard Cadet 3 all offer comfort-height versions and are among the most widely specified comfort-height models in the U.S.
Vanity shopping is one of the most enjoyable parts of planning a bathroom remodel. It is also one of the most common places where a mismatch occurs. A freestanding or pedestal vanity ordered before confirming the rough-in location for the drain and supply lines can require moving plumbing -- a job that adds $300 to $800 and delays the tile schedule.
What to do: Measure and mark the existing drain center and supply line locations before browsing vanities. Confirm the distance between supply lines (typically 8 inches for standard faucets, but some widespread faucet configurations require 8-16 inch spread). If you want a specific vanity, get the dimensions and rough-in requirements from the manufacturer's installation guide and compare to your existing rough-in before purchasing.
Double-sink vanities are particularly prone to rough-in conflicts. The drain centers for a 60-inch double vanity must align with the rough-in points in the floor (or accommodate a P-trap extension). Confirm this before ordering.
What is the correct way to waterproof a shower during a remodel? The Tile Council of North America Handbook specifies that shower pan liners and wall waterproofing membranes must extend at least 3 inches above the finished shower floor dam and at all curb-wall intersections. Modern best practice is a sheet or liquid waterproofing membrane applied to cement backer board before tile -- materials like Schluter-Kerdi, Laticrete Hydro Ban, or RedGard applied per manufacturer thickness specifications. Relying on grout and tile alone as the waterproofing layer is a code violation in most jurisdictions.
Shower leaks are the number-one cause of structural damage uncovered during bathroom remodels -- meaning the previous remodel did not waterproof correctly. Water infiltrates through grout joints, travels down the backer board, saturates the subfloor and framing, and causes rot and mold that may not be visible for years. By the time a homeowner notices a soft floor or a brown stain on the ceiling below, the damage can require $5,000 to $20,000 in structural repair.
What to do: Use a modern sheet membrane (Schluter-Kerdi is the industry benchmark) or a liquid-applied membrane (Laticrete Hydro Ban, RedGard, or similar) applied at the manufacturer's specified wet-film thickness -- typically two coats for liquid membranes. Flood-test the liner before tiling by plugging the drain and filling the pan with 2 inches of water for 24 hours. Any water loss indicates a leak to be fixed before tile goes down.
Uncoupling membranes like Schluter-DITRA serve dual purposes: they decouple the tile from the subfloor (preventing crack transmission) and provide a waterproofing layer. When used with the Schluter-Kerdi system for walls, the entire shower assembly is covered by a manufacturer's warranty that goes beyond material-only coverage. This system costs more upfront than traditional mortar-bed and felt liner methods, but significantly reduces callback rates and long-term leak risk.
| # | Mistake | Typical Cost If Not Caught | Prevention |
|---|---|---|---|
| 1 | Skipping permit | $500 to $5,000+ fine; forced re-inspection | Call local building dept. before demo |
| 2 | Budget underestimate | 20-30% average overrun | Add 15-20% contingency from day one |
| 3 | Wrong toilet rough-in | $200-$600 plumbing to move drain | Measure rough-in before ordering toilet |
| 4 | Undersized exhaust fan | Mold remediation: $1,500-$10,000 | 1 CFM per sq ft; vent to exterior |
| 5 | Tiling over bad subfloor | Full re-tile: $2,000-$8,000 | Inspect and reinforce subfloor first |
| 6 | Ignoring MaP flush data | Frequent clogs; toilet replacement | Choose MaP 800+ WaterSense model |
| 7 | Electrical after tile | $500-$2,000 to open finished walls | Rough-in all electrical before backer board |
| 8 | Wrong grout or no sealer | Grout replacement: $300-$1,500 | Match grout to joint; seal within 72 hours |
| 9 | Niche not waterproofed | Wall rot; full niche re-do | Liquid or sheet membrane inside niche |
| 10 | No ADA clearance planning | Future remodel to accommodate | Block walls now; add comfort-height toilet |
| 11 | Vanity/plumbing mismatch | $300-$800 plumbing adjustment | Confirm rough-in before ordering vanity |
| 12 | Poor shower waterproofing | $5,000-$20,000 structural repair | Sheet or liquid membrane; flood test liner |
What is the correct order of work for a bathroom remodel? The standard sequence is: demolition, rough-in plumbing, rough-in electrical, rough framing inspection, cement backer board and waterproofing membrane, tile floor and walls, fixture installation (toilet, vanity, shower door), finish plumbing (supply lines, drain trim), finish electrical (outlets, lighting, fan), and final trim and paint. Deviating from this order -- especially tiling before plumbing or electrical rough-in inspection -- is the root cause of most costly remodel mistakes.
The sequence matters because each trade depends on the previous one. Electrical rough-in cannot happen until framing is complete. Tile cannot go down until the subfloor is waterproofed and the rough-in inspection is passed. Fixtures cannot be set until tile is finished. Rushing any step to compress the schedule creates the conditions for every mistake on this list.
How do you choose a toilet during a bathroom remodel? Start with the rough-in dimension (10, 12, or 14 inches), then filter by MaP flush score (800 grams minimum, 1,000 grams preferred), then by water efficiency (1.28 GPF WaterSense certification for maximum utility rebate eligibility), and finally by style and height. One-piece toilets are easier to clean in a freshly tiled bathroom. Comfort-height models (16.5 to 18 inches) are worth the slight premium for most adult users.
The toilet choice also affects how the rest of the bathroom is designed. A skirted or concealed-trapway toilet (like the TOTO UltraMax II or the Woodbridge T-0001) has no exposed trapway at the base, making floor cleaning faster -- a real benefit in a new bathroom where you want to maintain the fresh look. Wall-hung toilets require a carrier frame roughed-in inside the wall during framing and are a significant but achievable upgrade in a full gut remodel.
For water savings, note that the EPA WaterSense program estimates that replacing an older 3.5 GPF toilet with a 1.28 GPF WaterSense model saves approximately 13,000 gallons of water per year for a family of four. Many utilities offer rebates of $50 to $200 per toilet for WaterSense installations -- check the EPA WaterSense rebate finder at epa.gov/watersense before purchasing.
See our guide to the best toilets for a bathroom remodel for model-by-model comparisons by rough-in size and style.
In most jurisdictions, swapping a toilet on an existing drain without relocating the rough-in does not require a permit. Moving the drain line almost always does. Check with your local building department -- rules vary significantly by city and state.
Remodeling Magazine's 2025 Cost vs. Value report puts the national average for a midrange full bathroom remodel at approximately $25,000 to $35,000 fully installed. Budget for a 15-20% contingency on top of your base estimate.
A full gut-and-replace bathroom remodel with a licensed contractor typically takes 2 to 4 weeks for a single bathroom when materials are pre-ordered. Delays in tile delivery, inspection scheduling, or hidden damage can extend this to 6 to 8 weeks.
Rough-in is the distance from the finished wall to the center of the floor drain. Remove the toilet bolt caps, measure from the wall face (not the baseboard) to the center of the hold-down bolt on each side, and use the smaller measurement. Standard is 12 inches; older homes often have 10-inch or 14-inch rough-ins.
Maximum Performance (MaP) testing is an independent third-party program that measures how many grams of simulated waste a toilet can flush in a single flush. Scores range from 0 to 1,000 grams. A score of 500+ is acceptable; 800+ is good; 1,000 is excellent. MaP data is freely available at map-testing.com.
EPA WaterSense is a voluntary labeling program. WaterSense-certified toilets use 1.28 GPF or less and have passed an independent flush performance test. They qualify for utility rebates in many regions and meet mandatory efficiency standards in California, Colorado, and other water-stressed states.
One-piece toilets are easier to clean (no gap between tank and bowl where moisture accumulates) and have a sleeker appearance in a newly tiled bathroom. Two-piece toilets are less expensive upfront and the tank is replaceable separately if damaged. Both perform equally well if MaP scores are comparable.
Comfort-height (also called ADA-height or "right height") toilets have seat heights of 16.5 to 18 inches from the finished floor. Standard toilets measure approximately 15 inches. Comfort height is easier for adults over 5'6" and for anyone with knee or hip mobility limitations.
Cement backer board (HardieBacker, Durock) requires a separate waterproofing membrane on top before tiling. Schluter-Kerdi sheet membrane can be applied to standard drywall and serves as both backer and waterproof barrier in one step, which reduces labor and error. Both methods are code-compliant when installed per manufacturer guidelines.
Press firmly on the tile surface -- soft or springy tile indicates saturated backer board or subfloor. Check the wall on the other side of the shower for stains. During demolition, probe the subfloor with an awl; it should resist penetration. Any soft spots indicate rot and must be repaired before new tile installation.
For a 70-square-foot bathroom with a toilet, sink, and shower, HVI recommends at least 70 CFM for the floor area plus 50 CFM for the shower, so a 110-120 CFM fan is appropriate. If the bathroom has a jetted tub, add 100 CFM to that calculation.
Standard drywall (gypsum board) is not appropriate in wet areas. In non-wet bathroom areas (far from the shower and above vanity height), moisture-resistant drywall (greenboard or purple board) is acceptable. In the shower surround and tub alcove, use cement backer board or a waterproof panel system rated for wet applications.
Cementitious grout in a shower should be sealed within 72 hours of installation and re-sealed every 12 to 18 months. Perform a water-bead test: pour a few drops of water on the grout; if it beads, the sealer is intact. If it absorbs, reseal. Epoxy grout does not require sealing.
Based on aggregated owner reviews and industry surveys, TOTO, Kohler, and American Standard consistently rank highest for long-term reliability. TOTO's Tornado Flush and Sanagloss glaze reduce rim maintenance. American Standard's EverClean glaze inhibits bacterial growth. Gerber is a contractor-preferred brand with strong reliability data and less brand recognition than the market leaders.
A skirted toilet has a smooth, flat panel covering the outside of the bowl from rim to floor, concealing the trapway. This eliminates the contoured exterior surface of traditional toilets where dust and grime accumulate. Models like the TOTO UltraMax II and Woodbridge T-0001 use this design. They require either a skirted-specific mounting kit or a SanaGloss-type floor anchor rather than standard bolt caps.
Dual-flush toilets offer a low-volume option (typically 0.8 to 1.0 GPF) for liquid waste and a full flush (1.28 to 1.6 GPF) for solids. For households with above-average water costs or in water-restricted regions, the savings can be meaningful. The tradeoff is that the flush mechanism is more complex than a single-flush design and may require more frequent maintenance. Brands like TOTO (Aquia IV) and American Standard (H2Option) offer reliable dual-flush options.
ADA standards (ANSI A117.1) require a minimum 60-inch wide clear floor space and 56 inches of depth in front of a wall-mounted toilet (60 inches for a floor-mounted toilet). For residential remodels, a practical target is at least 30 inches of clear space in front of the toilet face to allow comfortable use and future accessibility if needed.
A general contractor manages scheduling, coordination, and liability but charges a markup (typically 15 to 25% of project cost). Hiring subcontractors directly costs less but requires you to manage the schedule, coordinate inspections, and handle conflicts between trades. For a full gut remodel, most homeowners find the GC markup worthwhile. For a focused project (tile only, plumbing only), direct hiring is practical.
Larger floor tiles (12x12 or 12x24 inches) create fewer grout joints and make a small bathroom feel more open. However, any tile larger than 15 inches on a side requires a flatter subfloor (flatness tolerance of 1/8 inch in 10 feet per ANSI A108.02 for large-format tile). Mosaic tiles (2x2 or smaller) conform better to uneven surfaces but require significantly more grout maintenance over time.
Get three itemized quotes before starting. Pre-order all materials (tile, fixtures, vanity) before demolition -- supply chain delays are the most common cause of extended timelines and cost overruns. Build a 15-20% contingency into your budget from day one and treat it as spent money; anything unspent is a bonus, not a saving to redirect to upgrades.
The 12 bathroom remodel mistakes on this list share a common thread: they all result from decisions made too early (ordering before measuring), too late (electrical after tile), or not at all (skipping permits and waterproofing). The fix is sequencing discipline -- confirm rough-in dimensions, pull permits, complete inspections, and waterproof before any tile goes down. Choose your toilet based on MaP flush score and EPA WaterSense certification rather than appearance alone, and your remodeled bathroom will perform as well as it looks for decades.
Thirty inches is the sweet spot between a cramped 24-inch vanity and a full 36-inch cabinet, giving a single-sink bathroom real drawer…
Read the guide
Cast iron is the material homeowners choose when heat retention and permanence matter more than installation weight, and Kohler remains the brand…
Read the guideStep-by-step fixes for the bathroom vanity problems that show up most often, from misaligned drawers and doors to water damage at the…
Read the guide