People put off replacing a toilet because the fixture is heavy, the seal feels permanent and a mistake means water on the bathroom floor. In reality it is one of the most forgiving jobs in the house, because every connection is mechanical and you can inspect and test each one. The skills that matter are not strength or plumbing certifications, they are patience and order: scrape the old wax fully, fix the flange before anything else, set the new seal once, and tighten the bolts in slow alternating turns so the porcelain never cracks. Get those four things right and the rest of the replacement forgives small mistakes. Rush any of them and you create the wet base or the wobble that fills owner-review complaint threads.
We do not run a fixture-setting shop of our own. Everything below is built from manufacturer installation instructions, plumbing-code guidance, EPA WaterSense fixture data and the consistent patterns that surface across thousands of aggregated owner reviews about what goes wrong on replacement day. If you are still choosing the new fixture, our roundup of the best flushing toilets ranks the strongest models by MaP score, and the longer Toilet Buying Guide (2026): everything you need to know walks the specs that matter before you buy. Models referenced throughout include the TOTO Drake, Drake II and UltraMax II, Kohler Highline, Cimarron and Santa Rosa, American Standard Cadet 3 and Champion 4, Woodbridge T-0001, Swiss Madison St. Tropez and Gerber Viper.
Before you buy the new toilet
Measure the rough-in and confirm the bowl shape
The single biggest replacement-day surprise is a new toilet that does not fit the drain. Measure your rough-in, the distance from the finished wall to the center of the floor bolts, before you buy. Almost every home is 12 inches, but older houses sometimes use 10 or 14, and a toilet built for one will not seat on another. Confirm the bowl shape too, since an elongated bowl needs more clearance than a round one in a tight bathroom. Our guide to measuring toilet rough-in and our round vs elongated toilets comparison both help you pick a fixture that drops straight in.
Tools and materials you need to replace a toilet
The job needs almost nothing specialized. An adjustable wrench, a small hacksaw or bolt cutter, a putty knife or paint scraper, a level, a sponge and a bucket cover all the mechanics. For materials, gather a new wax ring (or a waxless rubber seal), a fresh pair of brass closet bolts, a flexible braided stainless supply line, a roll of plumber's tape and a tube of bathroom-grade silicone caulk. Brass bolts matter because the cheap steel ones rust and seize, turning the next removal into a fight. Buy a new soft-close seat too if your toilet does not include one, matched to the bowl shape.
Two optional upgrades pay for themselves on replacement day. A waxless rubber seal, sold under names like Fluidmaster or in the Korky Universal kit, can be set, lifted and reseated without ruining it, which removes the one-shot pressure of a traditional wax ring. A flange spacer or repair ring is worth buying ahead of time if your existing flange sits below the finished floor, a common problem after new tile is laid over an old floor. Having both on hand means a small surprise does not stop the project halfway through.
Step 1: Shut off the water and drain the old toilet
Find the supply valve on the wall behind or beside the toilet and turn it fully clockwise to shut it off. Flush the toilet and hold the lever down to drain as much tank water as possible. The bowl and tank will not empty completely, so use a sponge and bucket, or a cup, to bail out the rest. Getting the water out now keeps the next steps clean and stops a gallon of cold water from sloshing onto the floor when you lift the old bowl.
If the shutoff valve is old and will not fully close, or it weeps when you turn it, replace it with a new quarter-turn valve before you go any further. A reliable shutoff is the foundation of the whole job. Disconnect the supply line from the bottom of the tank with your wrench, and keep the bucket ready to catch the trickle that always remains in the line. This is also the easiest moment to swap an outdated multi-turn valve, since the tank is empty and out of your way.
Step 2: Remove the old toilet
Pop the plastic caps off the floor bolts at the base of the bowl and remove the nuts with your wrench. Decades-old nuts often seize to the bolt, so if one will not turn, cut the bolt with a hacksaw or mini bolt cutter rather than rounding off the nut. With the nuts off, the toilet is held only by the wax seal. Straddle the bowl, rock it gently side to side to break the wax, then lift straight up and set it on an old towel or flattened cardboard. A two-piece toilet is far lighter if you remove the tank first by undoing the two or three tank-to-bowl bolts inside the tank.
Once the toilet is out, stuff a rag into the open drain pipe to block sewer gas and stop anything from falling in. Do not skip this. A dropped bolt or rag in the drain becomes an expensive clog. The exposed floor is also your chance to inspect for soft spots or water damage that the old toilet may have been hiding, which is exactly when a slow seal leak from the previous install reveals itself.
Quick tip
Plug the drain the moment the toilet is out
A rag pushed into the open drain pipe does two jobs at once: it blocks sewer gas from filling the bathroom and it catches a dropped closet bolt or scraper before it disappears down the line. Anything that falls into the drain turns a clean replacement into a clog you cannot reach. Remove the rag only at the moment before you set the new bowl, never sooner.
Step 3: Scrape and inspect the closet flange
The closet flange is the round fitting that anchors the toilet to the drain pipe and floor. Scrape off every bit of old wax from the flange until the metal or plastic is clean and bare. Old wax left behind prevents the new ring from sealing, which is one of the most common causes of a slow base leak that shows up weeks after the replacement. Take your time here; a fully clean flange is half the battle for a watertight seal.
Now inspect the flange itself. It should sit flush with or slightly above the finished floor and be solidly screwed down. A cracked flange, a broken bolt slot or a flange sitting below floor level after new tile are the three problems that derail a replacement. A cracked or broken flange needs a repair ring; a sunken flange needs a spacer or extender stacked to floor height. Fix the flange before setting the new toilet, because no wax ring compensates for a flange that is loose or too low.
Worth knowing
A sunken flange is the number-one cause of replacement leaks
If your flange sits below the finished floor, a single wax ring cannot bridge the gap and the seal fails within weeks. Do not stack two wax rings as a shortcut, which is unreliable. Add a proper flange spacer or extender ring screwed down to bring the flange to floor level, then set one ring on top. This one fix prevents the majority of post-replacement base leaks that owners discover too late.
Step 4: Set new brass closet bolts
Slide the heads of the two new brass closet bolts into the slots on the flange and rotate them a quarter turn so they lock in place, pointing straight up. Position them at the three o'clock and nine o'clock points, exactly opposite each other and parallel to the wall, so the new bowl will sit square. Many bolts come with plastic retainer washers that slide down and hold the bolts upright, a small help that makes lowering the heavy bowl onto them far easier.
Measure from the wall to each bolt to confirm they are equal distances, which guarantees the toilet sits parallel to the wall rather than crooked. Always use fresh brass bolts on a replacement rather than reusing the old steel ones, which may already be corroded. Getting the bolts plumb and even now saves a frustrating lift-and-realign later, because once the bowl is on the wax you do not want to lift it off and reseat it with a traditional ring.
Step 5: Install the wax ring or waxless seal
For a traditional wax ring, press it firmly onto the underside of the new bowl around the horn (the short outlet), not onto the flange. Mounting it on the bowl gives you a clear view as you lower it onto the drain. If your flange sits at or slightly below floor level, a ring with a plastic funnel collar directs waste cleanly into the pipe and seals more reliably. For a waxless rubber seal, follow the kit instructions, which usually have you press the rubber gasket into the flange opening.
Remove the rag from the drain right before you set the bowl, and never reuse a wax ring that has been compressed. A traditional wax ring is a one-shot part: once squashed it will not seal again, which is why every replacement needs a fresh ring. This is exactly why first-time installers often prefer a waxless rubber seal, which can be lifted and reseated without ruining the seal if the bowl lands slightly off the mark.
Step 6: Set the new bowl and seat the seal
Lift the new bowl, line up the two holes in its base with the closet bolts, and lower it straight down in one controlled motion. Looking down through the bolt holes helps you guide them. Once the bowl touches, place your weight on it and gently rock it a little while pressing down to compress the wax and seat the bowl onto the flange. You want the bowl to settle until its base meets the floor with no gap.
Check that the toilet does not rock. A slight wobble means the floor is uneven, and the fix is a pair of plastic toilet shims slipped under the low side, trimmed flush after the bowl is bolted down. Never solve a wobble by overtightening the bolts, which is the fast way to crack the porcelain base of a brand-new fixture. Do the press-and-rock once and commit, because lifting the bowl back off to peek deforms a traditional wax ring and ruins the seal.
Step 7: Tighten the floor bolts in stages
Drop the metal washer and then the nut onto each closet bolt and hand-thread them down. Tighten with your wrench in small alternating turns, a little on one side, then a little on the other, working back and forth so the bowl draws down evenly. Snug is the target, not maximum force. The moment you feel firm resistance and the bowl no longer moves, stop. Porcelain is brittle, and the most common way to ruin a brand-new toilet is to crack the base by overtightening a bolt.
Once the bolts are snug, cut off the excess bolt length with a hacksaw if needed so the caps fit, then snap the plastic caps over the nuts. If you used shims, trim them flush with a utility knife now. The bowl should feel completely solid with no rock or shift when you push on it from any direction. This single step, done gently, separates a toilet that lasts a decade from one that cracks on day one.
Step 8: Mount the tank (two-piece toilets)
If you bought a two-piece toilet such as the TOTO Drake II, Kohler Cimarron or American Standard Cadet 3, the tank installs next. Set the large rubber tank-to-bowl gasket over the flush valve opening on the bottom of the tank, drop the tank bolts through with their rubber washers, and lower the tank onto the bowl so the bolts pass through the holes. Tighten the tank bolts by hand from inside the tank in alternating turns until the tank sits level and snug against the bowl, again resisting the urge to overtighten.
One-piece toilets like the TOTO UltraMax II or Kohler Santa Rosa skip this step entirely, since the tank and bowl arrive as one molded unit. That simplicity removes a connection that can leak and is part of why one-piece designs appeal to many buyers, though they are heavier to carry and set on the flange. Our breakdown of one piece vs two piece toilets: which is better? covers the trade-offs if you are still deciding which to put in.
Step 9: Connect the supply line and test for leaks
Attach a new flexible braided stainless supply line from the shutoff valve to the threaded fill-valve shank under the tank. Hand-tighten both ends, then give each a gentle quarter turn with the wrench, no more, since the seals are rubber and overtightening cracks the plastic fill-valve nut. Slowly open the shutoff valve and let the tank fill while you watch the supply connections and the base of the bowl for any drip.
Flush the toilet two or three full times and watch carefully. Check the base of the bowl for water seeping out, the tank-to-bowl bolts for drips and the supply connection for moisture. Press a dry paper towel around the base after the first flush to catch a slow leak you might not see. If everything stays dry through several flushes, the replacement is sound. Wait until you have confirmed no leaks before the final caulking step, since caulk would hide a seep you need to catch now.
Expert Take
If you do only two things right on a replacement, make them scraping the flange completely clean and tightening the bolts gently. Those two steps account for the overwhelming majority of failed installs in owner reports. A flange with old wax on it will leak no matter how good the new ring is, and a cracked base from an overtightened bolt means starting over with a new toilet. Go slow on both, and the rest of the job forgives small mistakes. The third thing worth doing is buying a waxless seal and a new quarter-turn shutoff valve before you start, because both remove the most stressful surprises on the day.
Caulk the base, and when to skip the bead
Once you have confirmed no leaks through several flushes, run a bead of bathroom-grade silicone caulk around the base of the toilet where it meets the floor, leaving a small gap at the very back unsealed. Caulk locks the bowl in place, keeps mop water and spills from collecting under the base and gives a finished look. The deliberate gap at the back is important: if the wax seal ever fails in the future, that opening lets water escape where you can see it rather than rotting the subfloor silently.
Some plumbers debate whether to caulk at all for this reason, but plumbing code in most areas requires caulking the base for sanitation, and leaving the rear gap satisfies both concerns. Smooth the bead with a wet fingertip for a clean line, and let it cure before heavy use. Skirted models, including many TOTO units and the Swiss Madison St. Tropez, have a smooth ceramic base that takes caulk especially cleanly and hides the bolt caps for a tidier finish.
How long replacing a toilet takes and when to call a pro
A straightforward swap, removing an old toilet and setting a new one on a good flange, takes most people one to two hours. Add 30 to 60 minutes if you have to replace the shutoff valve, repair the flange or fight seized bolts. The work itself is well within reach for anyone comfortable with a wrench, and the cost of materials is small compared with a plumber's visit. Choosing a widely stocked model like the TOTO Drake or American Standard Cadet 3 also means replacement seats and seals are easy to find.
Call a professional when the flange is broken and recessed in concrete, when the drain pipe is damaged, when the subfloor under the old toilet is rotted and spongy, or when you simply do not want to risk the seal. A professional replacement is inexpensive insurance against a hidden leak, and pairing it with a strong fixture from our list of strongest flushing toilets gets you a unit that performs as well as it is installed. If you are weighing fixture features before the swap, our guide on how to choose a toilet walks the height, shape and flush decisions in order.
Make it easy
Top recommendations
Three proven, easy-to-set models that pair a strong MaP flush with efficient 1.28 GPF water use. Each is widely stocked, so seats, seals and parts are easy to find when you replace.
Best Overall
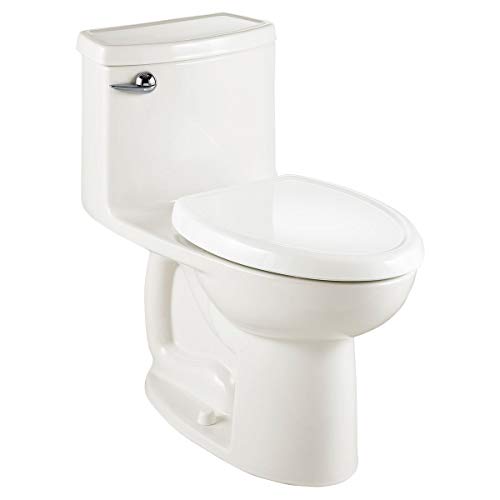
TOTO Drake II
The safe default for most homes
A perfect 1000 g MaP flush at 1.28 GPF with a glazed CeFiONtect trapway. A standard two-piece install with widely stocked seats and seals, so replacement day holds no surprises.
Check price on Amazon
Best Value
American Standard Cadet 3
Strong flush for the least money
A 1000 g MaP rating, 1.28 GPF flush and the stain-resistant EverClean surface. A light two-piece bowl that is easy to lift and set on the flange single-handed.
Check price on Amazon
Best One-Piece
TOTO UltraMax II
Seamless, no tank to mount
A one-piece body that skips the tank-mount step entirely and a 1000 g MaP flush at 1.28 GPF. Heavier to carry, but no tank bolts means one fewer place to leak.
Check price on Amazon
Common questions
How Long Does It Take to Replace a Toilet?
A standard toilet replacement takes most do-it-yourselfers one to two hours when the closet flange is in good condition. Add 30 to 60 minutes if you need to replace the shutoff valve, repair the flange or cut seized bolts. The actual steps are quick; most of the time goes into scraping the old wax, prepping the flange and testing several flushes for leaks before caulking.
Can I Replace a Toilet Myself Without a Plumber?
Yes. Replacing a toilet is a manageable do-it-yourself job for anyone comfortable with an adjustable wrench, because every connection is mechanical and visible with nothing glued or soldered. Call a plumber only when the flange is broken and set in concrete, the drain pipe is damaged, or the subfloor under the old toilet is rotted. Otherwise you can complete the swap with basic hand tools.
Why Does My New Toilet Leak at the Base?
A base leak after replacement almost always comes from a failed wax seal, caused by old wax left on the flange, a flange that sits below the finished floor, or lifting and reseating the bowl after the wax was compressed. The fix is a fully scraped flange, a spacer ring to bring a sunken flange to floor level, and setting the new bowl once with a single press-and-rock motion.
Should I Use a Wax Ring or a Waxless Seal When Replacing a Toilet?
Use a traditional wax ring for the cheapest, time-tested seal if you are confident the bowl will land right the first time, since wax is a one-shot part that cannot be reused once compressed. Choose a waxless rubber seal if you are replacing a toilet for the first time, because it can be lifted and reseated without ruining the seal, which removes the pressure of getting it perfect on the first try.
What Should I Replace While the Old Toilet Is Out?
While the old toilet is out, replace the closet bolts with fresh brass ones, fit a new wax or waxless seal, and swap a worn or multi-turn shutoff valve for a new quarter-turn valve. Add a new braided stainless supply line and a soft-close seat. These low-cost parts are the common failure points, and replacing them now is far easier than after the new bowl is set.
Putting the whole replacement together
Work the nine steps in order and the replacement becomes routine. Shut off and drain the water, unbolt and lift out the old toilet and plug the drain, scrape the flange clean and fix it if it is sunken or cracked, set fresh brass bolts, mount the new wax or rubber seal, lower the new bowl straight down with one press-and-rock, tighten the bolts gently in alternating turns, mount the tank, connect a new supply line, and test through several flushes before caulking the base. The two failure points to respect are a dirty or low flange and overtightened bolts. Avoid both and a quality toilet from TOTO, Kohler, American Standard, Woodbridge, Swiss Madison or Gerber will sit leak-free for fifteen years. If you want to read deeper on choosing the fixture itself, the full toilet buying guide covers flush systems, heights and certifications.
Expert Take
The upgrade we recommend to every first-time replacer is a waxless rubber seal and a new quarter-turn shutoff valve, bought before you start. The waxless seal removes the one-shot pressure of a wax ring, the single most stressful part of the job, and a fresh shutoff valve means you are never fighting an old valve that weeps the moment you turn it. Spend a little on those two parts and pair them with a high-MaP fixture like the TOTO Drake II, and the replacement goes from nerve-wracking to genuinely easy, with a flush that outperforms whatever you pulled out.
FAQ
Frequently asked questions
? Can I replace a toilet myself?
Yes. Replacing a toilet is a manageable do-it-yourself job for anyone comfortable with basic hand tools. Every connection is mechanical and visible, nothing is glued or soldered, and you can test the result with several flushes before trusting it. Going slow on flange prep and bolt tightening is what makes it succeed.
? What tools do I need to replace a toilet?
You need an adjustable wrench, a putty knife or scraper, a small hacksaw or bolt cutter, a level, a sponge and a bucket. For materials, gather a new wax ring or waxless seal, brass closet bolts, a braided stainless supply line, plumber's tape and bathroom silicone caulk. That covers a standard replacement.
? How long does it take to replace a toilet?
Most people finish a standard swap in one to two hours when the flange is in good shape. Replacing the shutoff valve, repairing the flange or cutting seized bolts can add 30 to 60 minutes. Most of the time goes into scraping old wax, prepping the flange and testing for leaks.
? Do I need to turn off the water before replacing a toilet?
Yes. Turn the supply valve fully clockwise, then flush and hold the lever to drain the tank. Sponge or bail out the water that remains in the tank and bowl before you lift the toilet. Removing the water now keeps the job clean and prevents a gallon spilling onto the floor.
? What is a closet flange and why does it matter?
The closet flange is the round fitting that anchors the toilet to the drain pipe and floor. It must sit flush with or slightly above the finished floor and be solidly screwed down. A cracked, loose or sunken flange is the leading cause of a base leak and must be repaired before you set the new bowl.
? Should I use one wax ring or two?
Use one. Stacking two wax rings to bridge a low flange is unreliable and a common source of leaks. If your flange sits below the finished floor, install a proper flange spacer or extender ring screwed down to floor level, then set a single wax ring on top of it.
? Can I reuse the old wax ring when replacing a toilet?
No. A traditional wax ring is a one-shot part. Once it is compressed by setting a bowl, it cannot seal again, so always use a fresh ring on every replacement. If you expect to lift and reseat the bowl, use a waxless rubber seal instead, which can be reused.
? Why is my new toilet rocking after I set it?
A rocking toilet means the floor under it is uneven, not that the bolts are too loose. Slip plastic toilet shims under the low side until the bowl sits solid, then trim them flush. Never fix a wobble by overtightening the bolts, which cracks the porcelain base.
? How tight should the floor bolts be?
Tighten only until snug and the bowl stops moving, alternating between sides in small turns. Stop at firm resistance. Overtightening is the most common way to crack a brand-new toilet, so reach for shims to stop a wobble rather than forcing the nuts down harder.
? Do I need to caulk around the base of the new toilet?
Yes, in most areas plumbing code requires it for sanitation. Run silicone caulk around the base where it meets the floor, but leave a small gap at the very back unsealed. That gap lets water escape visibly if the wax seal ever fails, rather than rotting the subfloor silently.
? What supply line should I use?
Use a new flexible braided stainless steel supply line. It resists kinks and bursts far better than old plastic or rigid lines. Hand-tighten both ends, then add only a gentle quarter turn with a wrench, since the rubber seals do the sealing and overtightening cracks the plastic fill-valve nut.
? How do I stop sewer gas while the toilet is off?
As soon as you remove the old toilet, stuff a clean rag into the open drain pipe. This blocks sewer gas from filling the room and stops bolts or debris from falling into the drain. Remove the rag only at the moment before you set the new bowl.
? Is a one-piece toilet harder to install than a two-piece?
Not harder, just heavier. A one-piece toilet like the TOTO UltraMax II skips the tank-mounting step entirely, which removes a connection that can leak, but the molded unit can exceed 100 pounds and is awkward to lower onto the flange. A two-piece toilet is lighter to carry in parts.
? What if the flange sits below the floor after new tile?
This is common after tiling over an old floor and is a top cause of leaks. Do not stack wax rings. Add a flange spacer or extender ring sized to your tile thickness, screw it down to bring the flange to floor level, then set a single wax ring on top.
? How do I test for leaks after replacing a toilet?
Open the shutoff slowly and watch the supply connections as the tank fills. Then flush two or three full times, checking the base of the bowl, the tank bolts and the supply line for drips. Press a dry paper towel around the base to catch a slow seep before you caulk.
? Should I replace the shutoff valve while replacing the toilet?
Yes, if the old valve will not fully close, weeps when turned, or is an outdated multi-turn type. A new quarter-turn valve is inexpensive and the foundation of a clean replacement. Swapping it now is far easier than after the new toilet is set and harder to work around.
? Does the new toilet come with everything I need?
Often not. Many premium two-piece models like the TOTO Drake sell the seat and sometimes the wax ring separately. Open the box and confirm you have tank bolts, floor bolts and a supply line, then buy a fresh wax ring or waxless seal and a soft-close seat to match the bowl shape.
? What rough-in do I need to check before buying a replacement?
Measure from the finished wall behind the toilet to the center of the floor bolts. Almost every home is 12 inches, but older houses sometimes use 10 or 14 inches, and a toilet built for one will not seat on another. Confirm the rough-in before you buy, not on replacement day.
? Can I upgrade to a stronger-flushing toilet during a replacement?
Yes, and a replacement is the ideal time. Choose a model with a 800 to 1000 g MaP score and a 1.28 GPF rating to gain flush power while saving water. The TOTO Drake II, American Standard Cadet 3 and TOTO UltraMax II all hit a 1000 g MaP, the top tier, while meeting EPA WaterSense efficiency.
? What is a good MaP score for a new toilet?
A MaP score of 600 grams clears most household waste reliably, 800 grams is strong, and 1000 grams is the highest tier and the best clog insurance. When you replace a toilet, choosing a high-MaP model from TOTO, Kohler or American Standard means far fewer second flushes and plunger sessions later.