A toilet that runs constantly, leaks into the bowl, refuses to flush completely, or doubles down with a second ghost flush almost always has a worn flush valve at the root. The flush valve is the large assembly at the center of the tank that controls the release of water into the bowl. Replacing it is a half-day DIY job, not a plumber call: you need a wrench, a sponge, and one or two hours of unhurried work. This guide walks the full replacement the way a licensed plumber sequences it, backed by published manufacturer specs and aggregated owner feedback across TOTO, Kohler, American Standard, Woodbridge, and Gerber tanks.
Quick Answer
Replace a toilet flush valve by draining the tank, unbolting it from the bowl, lifting the tank off, removing the spud nut, and pulling the old valve out. Drop in a matching tower-style flush valve, seat a new spud washer, bolt the tank back, reconnect the supply, and test. The entire job takes about ninety minutes and requires only basic hand tools -- no plumber needed.
The flush valve is the component that makes flushing happen. Every time you push the handle, the flush valve lifts and releases the stored water from the tank down into the bowl at high velocity, creating the siphon-driven clearing action. When the seal on the flush valve seat cracks, warps, or hardens, it can no longer hold water in the tank between flushes. The result is a toilet that silently drains, runs nonstop, or never delivers a full flush because the tank could not fill completely before water started leaking past the damaged seat.
This is distinct from a failing fill valve, which controls the water coming in rather than the water going out. Knowing which is which saves you from replacing the wrong part. This guide focuses on the flush valve specifically: what it is, how to diagnose a bad one, what to buy, and a step-by-step replacement that applies to nearly all gravity-flush two-piece toilets including the TOTO Drake, Kohler Cimarron, American Standard Cadet 3, and Woodbridge T-0001. One-piece toilets require a different sequence and are called out where the steps diverge.
Before you buy parts. Take the tank lid off and look. A bad flush valve seat almost always shows one of two signs: water draining slowly into the bowl between flushes (visible as a slight ripple or movement at the waterline) or a tank that can't hold its level for more than a few minutes. If you see water moving at the bottom of the tank toward the bowl even when nobody flushed, the flush valve seat is the prime suspect. Confirm it with the food-coloring test described below.
What Is a Toilet Flush Valve and How Do You Know It Is Bad?
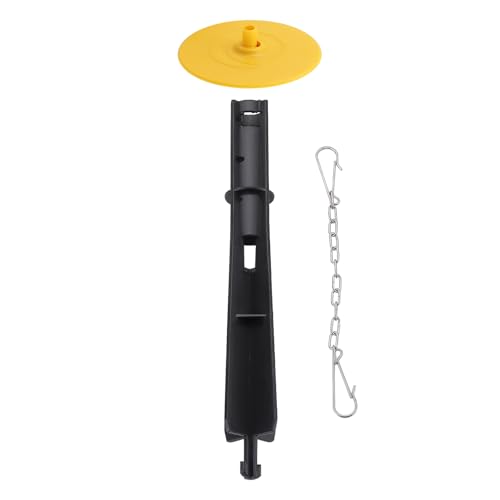
A toilet flush valve is the large tower-shaped assembly in the center of the tank. It has a hollow tube called the overflow pipe, a seat at the base, and a flapper or canister seal that lifts on each flush to release water. A flush valve is bad when water leaks past the seat into the bowl between flushes, the toilet runs constantly, the tank empties slowly on its own, or the flush is weak because the tank can never hold a full charge of water.
The flush valve assembly includes three main parts that can fail independently. The flapper or canister seal is the rubber disk that lifts on flush and resettles on the seat to seal the tank. The seat itself, which is the ring at the base of the overflow tube, can develop mineral deposits, cracks, or warping that prevent a clean seal. The overflow tube carries excess water directly into the bowl to prevent tank overflow. If any of these three components fail, you get a running toilet.
The distinction between a flapper failure and a full flush valve seat failure matters because the repair is different. A fresh flapper costs around five dollars and takes five minutes. A full flush valve replacement requires removing the tank, costs ten to thirty dollars in parts, and takes about ninety minutes. Use the food-coloring test to confirm before committing to the bigger job: drop a few dye tablets or food coloring drops into the tank and wait fifteen minutes without flushing. If color drifts into the bowl, something is leaking past the valve seat. If a new flapper alone stopped a prior leak but the problem has returned, and the seat looks pitted, scratched, or mineral-encrusted, the seat itself has failed and you need the full flush valve replacement.
If you have recently dealt with recurring toilet clogs or a toilet that is not flushing properly, a degraded flush valve can be a hidden contributor. Water that leaks out between flushes means the tank never delivers its full volume, so every flush is weaker than designed.
What Types of Flush Valves Are There and Which Do You Need?
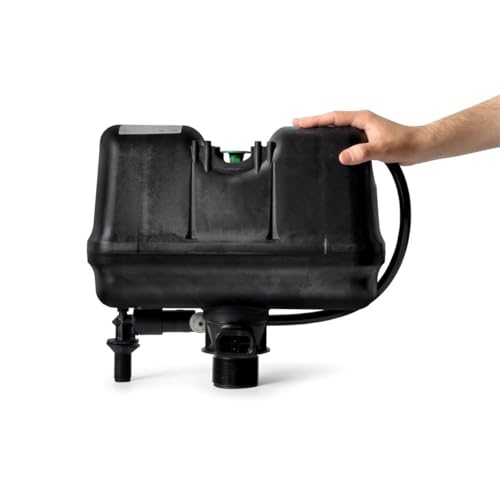
There are three main types of toilet flush valves: standard tower valves with rubber flappers (the most common type, used in TOTO Drake, Kohler Cimarron, and American Standard Cadet 3), canister or piston valves (used in many Kohler one-piece models like the Santa Rosa and Veil), and pressure-assist cartridges (used in Flushmate-equipped pressure-assist toilets). Identify which type is in your tank before buying a replacement.
Getting the right valve type is the most critical step of this repair, because the three types are not interchangeable and the replacement must match both the style and the tank opening size.
The seat opening measurement is the single most important spec to verify before you buy. A standard toilet uses a 2-inch seat opening, but high-flush-volume models like the American Standard Champion 4 and many Gerber and TOTO Entrada tanks use a 3-inch seat opening to move a larger volume of water faster. A 2-inch valve installed in a 3-inch seat opening will technically fit with an adapter but will restrict flow and weaken the flush. Measure the seat diameter at the base of your old overflow tube before ordering.
Measure first. Bring the old flush valve to the hardware store or photograph the seat opening with a ruler in frame before ordering online. A 2-inch and 3-inch tower look almost identical in product photos. Fluidmaster, Korky, and American Standard all sell both sizes separately, so the right measurement saves a return trip.
What Tools and Parts Do You Need to Replace a Flush Valve?
To replace a toilet flush valve you need a replacement flush valve matched to your tank opening size, an adjustable wrench or channel-lock pliers, a putty knife, a sponge and bucket, a new set of tank-to-bowl bolts and rubber washers, and a new spud washer (the large rubber gasket under the tank). Budget about ninety minutes and ten to thirty dollars in parts for a two-piece toilet.
The part list is short, but buying a complete rebuild kit rather than just the valve itself is almost always worth it. You are already removing the tank, so replacing the tank-to-bowl bolts and the spud washer at the same time eliminates two other common sources of leaks for very little extra cost.
Item
Why You Need It
Notes
Replacement flush valve
The core repair part
Match seat opening size (2 or 3 inch)
Spud washer (large tank gasket)
Seals the tank-to-bowl connection
Replace every time you remove the tank
Tank-to-bowl bolt set
Secure the tank to the bowl
Rubber washers must be soft; replace if hardened
Adjustable wrench or channel locks
Remove spud nut and tank bolts
Hold bolt head from inside tank simultaneously
Sponge and small bucket
Dry the tank before lifting
A dry tank is lighter and safer to handle
Putty knife or plastic scraper
Clean old gasket residue from tank bottom
Important for a leak-free new seal
Braided steel supply line
Replace aging hose while tank is off
Cheap insurance against future drips
How Do You Replace a Toilet Flush Valve Step by Step?
Replace a toilet flush valve by shutting off the water, flushing and sponging the tank dry, disconnecting the supply line, unbolting the tank from the bowl, lifting the tank off, unthreading the spud nut under the tank, removing the old valve, installing the new one with a fresh spud washer, rebolting the tank, and reconnecting the water. Test for leaks at every joint and adjust the water level before the job is done.
Work through these steps in order. A flush valve replacement takes longer than a fill valve swap because the tank must come off the bowl, but none of the individual steps require unusual strength or skill. The only tools in play are a wrench and a sponge.
Step 1: Shut off the water supply and drain the tank
Turn the shutoff valve on the wall or floor behind the toilet fully clockwise to close it. Flush and hold the handle down until the tank is as empty as the flush can make it. Then remove the tank lid, set it somewhere safe (porcelain lids crack easily), and use a sponge and bucket to remove the water remaining at the bottom of the tank. Wring the sponge out repeatedly until the tank bottom is dry. A dry tank weighs significantly less and is much easier to lift safely. If your shutoff valve does not fully close, turn off the home's main water supply instead.
Step 2: Disconnect the supply line
Use an adjustable wrench or channel-lock pliers to loosen the coupling nut where the supply hose connects to the underside of the tank, at the fill valve shank. Hold the fill valve shank steady inside the tank so it does not spin. Once loose, unthread the coupling nut by hand and move the supply line out of the way. Lay a towel beneath it for the small amount of residual water that will drain out. If the supply line is a rigid chrome or old vinyl tube, plan to replace it with a braided steel hose while the tank is off.
Step 3: Remove the tank from the bowl
Look under the back edge of the toilet bowl for two or three tank-to-bowl bolts. Each bolt passes through the tank bottom and bowl mounting flange, secured by a nut below. Use one hand (or a second helper) to hold the bolt head inside the tank with a screwdriver, and use the wrench below to loosen the nut. Unthread both nuts and remove the washers, setting them aside if they are soft and pliable or replacing them as part of this job. With the nuts off, lift the tank straight up and set it on the floor, resting it on its back edge on a folded towel to avoid cracking the porcelain.
Handle the tank carefully. A standard two-piece tank weighs seven to twelve pounds dry, but it is awkward and fragile. Set it on the floor on a soft towel rather than balancing it on the seat or setting it down on its side. Porcelain chips and cracks easily on hard surfaces. Have a second person hold the other end if the tank is heavy or you are working in a tight space.
Step 4: Remove the old flush valve
With the tank on the floor, look at the underside. The flush valve shank passes through a hole in the tank bottom, held in place by a large rubber spud washer and a spud nut (also called a locknut or spud coupling). The spud nut is a large plastic or brass nut threaded onto the valve shank from below. Grip it with large channel-lock pliers and turn counterclockwise to unthread it. Once the nut is off, the spud washer will slide off as well; set both aside and pull the old flush valve up and out of the tank from the inside. The valve will be in one piece with the overflow tube, the seat, and in many cases the flapper still attached.
Before installing the replacement, use a putty knife or plastic scraper to clean off any old gasket residue, mineral scale, or debris from the tank opening. A clean, flat seating surface is essential for the new spud washer to seal without leaking. For chronic hard water scale, a toilet-safe descaling product or white vinegar works well here. This also applies if you are replacing a flush valve because of a leak at the tank-to-bowl joint: the old spud washer material leaves a residue that prevents the new washer from seating correctly.
Step 5: Install the new flush valve
Drop the new flush valve into the same opening from inside the tank, with the overflow tube pointing upward and the seat at the bottom. Align the back of the valve so the overflow tube is roughly centered and the flapper mount faces toward the front of the tank. From underneath, slide the new spud washer up the shank with the tapered or beveled side facing the tank surface, then thread the spud nut onto the shank hand-tight. Tighten the nut with pliers an additional quarter to half turn, firmly but without cranking, until the valve sits secure and does not wobble or rotate. The rubber spud washer compresses to form the seal; overtightening can crack the tank.
Orient the flapper correctly. After tightening the spud nut, check that the flapper ears or chain attachment points are positioned so the flapper chain runs to the flush handle with slight slack. If the valve rotated during tightening, gently turn it back before the nut is fully set. A misaligned flapper that does not seat flat on the valve ring will leak from day one.
Step 6: Set the overflow tube height
Most universal flush valves include an adjustable overflow tube that can be cut or telescoped to the correct height. The correct height is one inch below the tank's critical water level, which is typically marked on the inside back wall of the tank. Water should stop filling at least one inch below the top of the overflow tube; if the fill valve is set correctly and the overflow tube is too short, water will constantly drain into the bowl. Most pre-made replacement valves come at a standard height that fits common tank depths, but if your tank is unusually shallow or deep, measure and cut or adjust accordingly before installation. Refer to the valve's included instructions for your specific model.
Step 7: Replace the tank-to-bowl bolts and washers
Before replacing the tank on the bowl, inspect the tank-to-bowl bolt set. The rubber or silicone washers under the bolt heads inside the tank and below the bowl mounting flange should be soft, flat, and pliable. If they are hard, cracked, or compressed into a permanent shape, they will not seal reliably. A new tank bolt set costs very little and removes a common source of tank-base drips. Feed the bolts down through the tank holes from inside, slide on the washers, and lower the tank back onto the bowl so the bolt holes align. Thread the nuts on loosely first, confirm the tank is sitting level and centered, then snug both nuts in alternating passes until the tank is secure without rocking. Again, no extreme torque: tighten until snug and stop.
Step 8: Reconnect the supply line and turn on the water
Thread the supply line coupling nut onto the fill valve shank by hand until snug, then a quarter turn with the wrench. Open the shutoff valve slowly and watch the tank fill. Check the spud washer joint between tank and bowl, the tank-to-bowl bolt areas, and the supply line connection for any drips as water pressure builds. If you see a weep at the spud washer joint, snug the spud nut slightly more from below. Once the tank fills, flush a few times and recheck all connection points. Adjust the fill valve float so water stops one inch below the top of the overflow tube, which ensures a full tank volume for each flush.
Editorial Take
The most common reason a flush valve replacement fails to fix the running toilet is a spud washer that was not seated flat or was not replaced at all. The spud washer is a ten-cent rubber ring, but it does the entire job of sealing the tank-to-bowl interface. When the tank is already off, skipping a fresh spud washer makes no sense. Buy the whole repair kit (valve, spud washer, tank bolts, flapper) rather than the valve alone, and you eliminate the four most common tank failure points in one job.
How Is a Flush Valve Replacement Different on a One-Piece Toilet?
On a one-piece toilet, the tank and bowl are a single molded unit, so you cannot remove the tank. Flush valve access on one-piece toilets is through the tank opening from the top, and the spud nut must be unthreaded from inside rather than from below. The job is technically possible but more difficult due to confined access, and many owners opt for a plumber when replacing a flush valve on a one-piece TOTO UltraMax II, Kohler San Raphael, or Swiss Madison St. Tropez.
The difficulty with one-piece toilets is pure geometry. On a two-piece toilet you can lift the tank off and work on it flat on the floor. On a TOTO UltraMax II, Kohler Veil, or Swiss Madison St. Tropez, the tank is fused to the bowl. You must reach through the tank opening from the top with your arm, grasp the spud nut from inside, and unthread it while angled awkwardly. A basin wrench, a specialized spud wrench, or a large channel-lock that can reach into the tank cavity makes this manageable. For a Kohler canister-style one-piece, the canister cartridge is accessed differently still: the canister lifts out from the top without removing any bolts, but the seat seal at the base may require the basin wrench for removal.
If the toilet is a TOTO Drake II or TOTO Vespin II, note that while TOTO markets these as having the Tornado Flush system, the flush valve is still a standard flapper-over-seat design in a two-piece tank. Replacement follows the standard two-piece procedure above. The TOTO UltraMax II (one-piece) requires the reach-in approach. For both, TOTO publishes parts diagrams on totousa.com that identify the correct replacement flush valve by model number, which is the safest way to confirm fit before buying.
Which Replacement Flush Valve Should You Buy?
For most two-piece gravity-flush toilets, the Fluidmaster 507AK or 507AKR (with flapper) is the most commonly cited universal replacement, fitting 2-inch seats. For 3-inch seat openings (Champion 4, Entrada, many Gerber models), the Fluidmaster 507AP or the American Standard 3-inch tower valve is the correct choice. Korky also makes a direct-fit 3-inch valve. OEM valves from TOTO, Kohler, or American Standard are recommended for dual-flush tanks to preserve button function.
Here are the top three replacement choices that cover the large majority of residential toilets.
Best Universal 2-Inch
Fluidmaster 507AKR Flush Valve
Standard 2-inch seat tanks
4.6
An adjustable-height tower valve with an included flapper, fitting the vast majority of two-piece tanks with 2-inch seat openings. Works on TOTO Drake, Kohler Cimarron and Highline, Woodbridge T-0001, and Gerber Viper tanks without modification.
The correct match for high-flow 3-inch seat tanks. Using a 2-inch valve in a 3-inch seat opening cuts flow and weakens the flush significantly. Measure the seat opening before ordering; if it is 3 inches, this is the part you need.
For American Standard H2Option, Woodbridge T-0019, and Swiss Madison dual-flush tanks, an OEM or manufacturer-matched kit preserves the button-actuated dual-flush function that a generic tower valve will not replicate.
How Do You Diagnose Whether the Flush Valve Seat Needs Replacing Versus Just the Flapper?
To tell whether the flush valve seat itself is damaged or just the flapper, install a new flapper and watch for twenty-four hours. If the new flapper still leaks (food-coloring test confirms), run your finger around the valve seat ring. A smooth, uniform surface means the seat is fine; pitting, scoring, mineral ridges, or cracks mean the seat is damaged and only a full flush valve replacement will stop the leak. Sandpaper or repair putty on a scored seat is a temporary fix that tends to fail within weeks.
Seat damage is more common than most people expect, particularly in homes with hard water. Calcium and magnesium deposits build up on the seat ring over years, and the constant cycling of the rubber flapper across the rough mineral surface abrades both the seat and the flapper. The flapper wears out first, is replaced, and the new flapper fails again in months rather than years because the damaged seat is the underlying cause. If you have replaced the flapper more than twice in three years on the same toilet, the seat is likely the issue, not the flapper brand or quality.
The same logic applies if the toilet is producing a weak or incomplete flush. A flush valve seat that is no longer holding a full tank means less water is available for each flush, reducing the hydraulic force that creates the siphon. Even if the running is subtle and intermittent, the cumulative loss of tank volume over a few hours means the next flush starts short. This is why some homeowners report that their toilet seems to flush better in the morning after the tank has had time to refill fully overnight, but underperforms when used frequently during the day: the seat is slowly leaking the tank down between uses.
What Is the Difference Between a Flush Valve and a Flapper?
The flapper is one component of the flush valve assembly. The flush valve is the entire assembly including the overflow tube, the seat ring at the base, and the flapper (or canister seal) that lifts and closes. When people say they are replacing the flapper, they mean only the rubber seal. When they say they are replacing the flush valve, they mean the entire tower including its seat, which requires removing the tank. A worn flapper is a five-minute swap; a worn valve seat is a ninety-minute job.
This distinction often creates confusion because retail packaging uses the terms loosely. A flapper kit from Korky or Fluidmaster replaces only the rubber disk. A flush valve replacement kit from the same brands includes the entire tower, seat, and a new flapper. When the product is labeled "flush valve" and contains only a rubber disk, that is a flapper, not a full valve assembly. Read the product description carefully and confirm the kit includes a plastic or resin tower body before ordering for a full replacement job.
For a toilet that is flushing weakly despite a full tank, the flush valve is rarely the culprit by itself. Weak flushing at a full tank points to rim jet blockage, trapway design limits, or a fill valve that is not letting the tank fully fill. The flush valve replacement fixes a running toilet, not a weak one, unless the running is the cause of reduced tank volume at the time of each flush.
Editorial Take
One thing consistently overlooked in flush valve replacement guides is the relationship between the flush valve seat height and the fill valve's float adjustment. After installing a new flush valve, always re-verify the fill valve's water level setting. The new overflow tube may sit at a slightly different height than the old one, especially if you installed a universal adjustable-height valve rather than an exact OEM replacement. If the fill valve float was calibrated to the old tube's height, the water level may now be too high, causing it to trickle into the new overflow continuously. This takes five seconds to check and five seconds to adjust once the tank is refilled, but it is easy to miss and produces the same symptom as the original problem.
What Are the Most Common Mistakes When Replacing a Flush Valve?
The five most common mistakes when replacing a toilet flush valve are: overtightening the spud nut and cracking the tank, reusing an old spud washer that fails to seal, buying the wrong seat opening size (2-inch versus 3-inch), not cleaning old gasket residue from the tank opening before installing, and failing to re-adjust the fill valve float after the new overflow tube is in place. Each of these mistakes causes the same symptoms as the original problem and leads to a second repair.
Each of those five mistakes is preventable with a few extra minutes of attention. Overtightening is the most serious because a cracked tank means replacing the entire toilet. Plastic tank bodies -- used on fiberglass and some composite toilets -- are more crack-prone than porcelain, but even porcelain can fracture if the spud nut is cranked down hard with an impact driver or long-handled wrench. The rubber cone washer on the spud nut is designed to compress and seal with modest force. Snug and a quarter turn with a standard pliers is the correct technique.
Reusing the spud washer is the second most frequent cause of a comeback leak. The old washer has been compressed into the shape of the old valve shank for years. When removed and reinstalled with a new shank, it does not return to a flat, uniform profile and leaves micro-gaps that seep. New spud washers cost under a dollar and come with most flush valve kits; there is no good reason to reuse the old one.
One more check before closing up. With the tank full and before replacing the lid, do a thirty-second leak check. Put a dry paper towel under the tank, press it against the tank-to-bowl bolts on both sides and against the spud washer area, and wait. Any moisture on the towel tells you exactly where a weep is starting. Catching it now costs thirty seconds; catching it after the lid is replaced and the bathroom floor is damp costs much more.
When Should You Replace the Whole Toilet Instead of Just the Flush Valve?
Replace the whole toilet instead of just the flush valve if the toilet is an older 3.5 GPF or 1.6 GPF model (pre-2005), if the flush performance has always been weak regardless of valve condition, if MaP testing scores for that model are below 500 grams, or if the tank or bowl has visible cracks or is a discontinued model with no replacement parts available. A new 1.28 GPF EPA WaterSense-certified toilet pays back its cost in water savings in two to four years in most households.
This is the most useful cost-benefit calculation this guide can offer. A flush valve replacement is worth doing on any toilet with a functional bowl, a full-sized trapway, and a reasonable MaP score. But if the toilet was manufactured before the 1992 National Energy Policy Act mandated 1.6 GPF limits, it is almost certainly a 3.5 GPF or higher model -- meaning it uses two to three times the water of a modern WaterSense-certified toilet. Replacing a flush valve on a 3.5 GPF toilet preserves a water-wasting appliance when a modern 1.28 GPF replacement would cut that fixture's water use by more than 60 percent.
Similarly, if MaP flush-testing scores for the toilet model are below 500 grams, the bowl geometry and trapway design limit its performance regardless of valve condition. The MaP test, published at map-testing.com, scores toilets by how many grams of solid waste they can clear in a single flush. A toilet scoring 500 grams or below will struggle with normal use even with a perfect valve and flapper. Modern high-performers like the TOTO Drake (800+ grams MaP), Kohler Cimarron (1,000 grams MaP), and American Standard Champion 4 (1,000 grams MaP) show how much room older designs leave on the table.
If a toilet replacement is on the horizon, our roundup of the best flushing toilets covers the top MaP-tested models across every category, including comfort height, elongated, one-piece, and compact formats.
FAQ
Frequently asked questions
? How long does it take to replace a toilet flush valve?
For a two-piece toilet, plan on ninety minutes to two hours for a first-time replacement. Most of that time is draining the tank, drying it out, removing and reinstalling the tank bolts, and adjusting the fill valve afterward. The actual flush valve swap itself takes about twenty minutes once the tank is off. Someone who has done it before can complete the whole job in an hour.
? What is the difference between a flush valve and a fill valve?
The flush valve is the large tower assembly in the center of the tank that releases water into the bowl when you flush. The fill valve is the taller, narrower assembly on the left side that refills the tank after each flush. A bad flush valve causes water to leak from the tank into the bowl constantly. A bad fill valve causes the tank to not refill properly or to overfill. Each has a distinct diagnosis and a different replacement procedure.
? How do I know if I need a 2-inch or 3-inch flush valve?
Measure the inside diameter of the seat opening at the base of your existing overflow tube with a ruler. A standard 2-inch measurement means you need a standard flush valve. A 3-inch measurement means you need a 3-inch high-flow valve. Common 3-inch models include the American Standard Champion 4, TOTO Entrada, and some Gerber tanks. Installing the wrong size will either not fit or will significantly weaken your flush.
? Can I replace a flush valve without removing the tank?
On a two-piece toilet, no. The spud nut that holds the flush valve in place is under the tank, and you cannot reach it without lifting the tank off the bowl. On a one-piece toilet, access is through the tank opening from the top using a basin wrench or long-reach channel locks, which is possible but difficult. For most one-piece toilets, the reach-in method is the only option since the tank cannot be separated from the bowl.
? Should I replace the flapper at the same time as the flush valve?
Yes, always. Most flush valve replacement kits include a new flapper. Even if the kit does not, a new flapper costs under five dollars and is the most logical thing to include in a job where the valve seat is already being replaced. Installing a new flapper on a fresh seat ensures you are not chasing a second drip from a worn flapper shortly after the repair.
? Do I need to replace the spud washer when replacing the flush valve?
Yes. The spud washer is the large rubber ring that seals the tank-to-bowl junction around the flush valve shank. Reusing an old spud washer that has been compressed for years against the old valve shank is one of the leading causes of a seep at the tank base after the repair. New spud washers cost under a dollar and come with most flush valve kits. Never skip it.
? Why is my toilet still running after I replaced the flush valve?
The most common causes after a new flush valve is installed are: the fill valve water level is set too high and water is trickling into the new overflow tube, the new flapper is not seating flat on the valve ring, or the refill tube from the fill valve is pushed too far into the overflow tube and is siphoning water out. Check all three before assuming the replacement part is defective.
? How tight should the spud nut be on a flush valve?
Hand-tight plus a half turn with large channel-lock pliers is sufficient. The rubber spud washer does the sealing work by compressing against the tank bottom; the nut just holds it in position. Overtightening the spud nut is the primary cause of cracked toilet tanks during this repair. Tighten until the valve does not move or wobble when you push on it, then stop. If it seeps after the water is on, add a quarter turn more.
? Can a bad flush valve cause a weak flush?
Indirectly, yes. A flush valve seat that leaks allows water to drain from the tank between flushes, so the tank may only be partially full at the time of the next flush. Less tank volume means less hydraulic force and a weaker flush. However, a fully functional tank with a bad flush valve that opens and closes correctly will not produce a weak flush by itself. If the tank is full and the flush is still weak, the bowl design, rim jets, or trapway size are the limiting factors.
? What is a flapper versus a canister flush valve?
A flapper is a rubber disk that lifts off a seat ring when you flush and resettles to seal it. It is the most common design, used on the TOTO Drake, Kohler Cimarron, American Standard Cadet 3, and most residential toilets. A canister or piston valve is a cylinder that lifts straight up off the seat rather than hinging open, used in Kohler Santa Rosa, San Raphael, and some one-piece models. Canister designs expose a 360-degree opening at flush, which can improve flush velocity, but they use proprietary parts and are not interchangeable with flapper-style valves.
? How long do toilet flush valves last?
A flush valve seat in a porcelain tank typically lasts ten to twenty years if the water is not highly mineralized. The flapper on the valve seat wears out faster, usually every three to seven years. In hard water areas, mineral deposits abrade the seat surface and wear the flapper more quickly, so both may need replacement sooner. Signs of a failing valve include a toilet that runs, a tank that slowly empties between flushes, or repeated new flappers that fail within months rather than years.
? Do I need a plumber to replace a toilet flush valve?
No, on a two-piece toilet. The tools are basic (adjustable wrench, channel locks, sponge, bucket), the parts are inexpensive and widely available, and no soldering, glue, or cutting is required. The job does require lifting the tank off the bowl, which is physical but not technically complex. The main risks are overtightening the spud nut and cracking the tank, which is avoided by not using power tools and following the hand-tight-plus-a-turn rule. A one-piece toilet with a confined-access tank is more difficult and a plumber call may make sense.
? Will any universal flush valve fit my TOTO or Kohler toilet?
For most two-piece TOTO and Kohler gravity-flush toilets, a universal 2-inch flush valve such as the Fluidmaster 507AKR fits without modification. Exceptions include Kohler canister-valve models (Santa Rosa, San Raphael, Veil) where a Kohler-specific replacement is required, and dual-flush models from Woodbridge and Swiss Madison that need a matched dual-flush valve to preserve the push-button function. Always confirm the valve type inside your tank before ordering.
? What happens if I install the wrong size flush valve?
A 2-inch valve in a 3-inch seat opening will fit with an adapter but will restrict the water opening to 2 inches, significantly reducing flush velocity and making the toilet more prone to incomplete flushes and clogs. A 3-inch valve in a 2-inch seat opening will not fit at all. The seat opening measurement is binary: measure it before buying, and you will get the right part on the first try.
? How much does it cost to replace a toilet flush valve?
The parts cost ten to thirty dollars for a standard universal flush valve kit including the spud washer, a new flapper, and tank bolt hardware. If you add a braided steel supply line to replace while the tank is off, the total parts budget is typically twenty-five to fifty dollars. A plumber doing the job typically charges one to two hours of labor on top of parts, making the DIY option particularly cost-effective here.
? My toilet flushes twice every time. Is that a flush valve problem?
Double flushing is typically caused by a flapper that closes too quickly, cutting off the flush before the bowl has fully cleared. The result is a second flush reflex to clear what remains. The fix is usually a flapper with a slightly longer open time, or an adjustable flapper that lets you tune the close speed. A full flush valve seat replacement is not typically needed for a double-flush problem unless the seat is also damaged. For more detail on this pattern, see our guide on how to improve toilet flush power.
? Is ghost flushing caused by the flush valve or the fill valve?
Ghost flushing (where the toilet refills on its own without anyone flushing) is almost always caused by a leaking flush valve seat or worn flapper allowing water to slowly drain from the tank into the bowl. When the water level drops enough to trigger the fill valve, it refills and the cycle repeats. The fill valve is responding normally to a low tank; the flush valve seat is the cause. Confirm with the food-coloring test and replace the flapper first, then the valve seat if the flapper alone does not stop it.
? Can I upgrade to a better flush valve when replacing mine?
Yes. If the current toilet has a 2-inch standard seat and adequate tank volume, a 3-inch seat valve retrofit is theoretically possible but requires a larger tank opening that cannot be drilled in porcelain. A better use of that energy is replacing the entire toilet with a high-MaP model if performance is the goal. For a like-for-like flush valve replacement, a quality universal flapper valve such as the Fluidmaster or Korky models will restore full factory flush performance reliably.
? Why does my toilet tank leak at the bottom after replacing the flush valve?
A leak at the tank base after a flush valve replacement is almost always the spud washer. Either it was reused and did not compress evenly, or it was installed with old gasket residue preventing a flat seat. Shut off the water, drain the tank, and remove it again. Clean the tank opening thoroughly, install a new spud washer, and tighten the spud nut to snug plus a half turn. If the leak is at the tank-to-bowl bolt, the rubber washers under those bolts need replacement.
Manufacturer published specifications (TOTO, Kohler, American Standard)
Our Verdict
Replacing a toilet flush valve is the correct repair when a running toilet persists after a new flapper, when the food-coloring test confirms a tank-to-bowl leak, or when the seat is visibly pitted or mineral-encrusted. The job requires lifting the tank off the bowl, replacing the spud washer and tank bolts alongside the valve, and resetting the fill valve float for the new overflow tube height. For a 2-inch seat, the Fluidmaster 507AKR is the go-to universal choice; for a 3-inch high-flow seat, use the Fluidmaster 507AP. Do it with patience on the spud nut, and the toilet will hold water cleanly and flush at full strength for another decade.
Derek researches plumbing specifications, installation requirements and parts availability, cross-checking manufacturer claims against owner-reported reliability. Rankings are based on documented data and real owner reports, never paid placement.
Updated August 2026 · Toilets
Keep reading
Related guides
Why Toilet Trapways Are Curved Like an S
Toilets
4.6
Learn why toilet trapways curve like an S, how each bend blocks sewer gas, and what the shape means for clogs and…