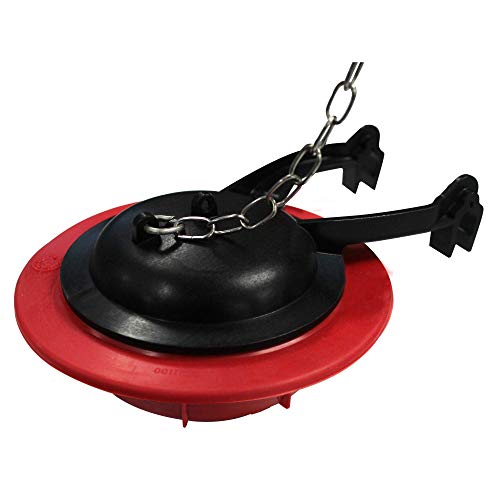
The flapper sits at the bottom center of the tank, directly over the flush valve opening that drains into the bowl. Its job is simple: when you press the handle, a lift chain raises the flapper, the tank water rushes through the valve to flush, and then the flapper falls back and seals the opening so the tank can refill and hold a full charge for the next flush. When the rubber hardens, warps, or grows a mineral crust, it stops sealing tightly. Water then leaks past it into the bowl, the tank level slowly drops, and the fill valve kicks on by itself to top it back up. That is the classic phantom flush, and over a day a leaking flapper can waste hundreds of gallons, which is real money on your water bill and a needless environmental cost.
This guide follows the way we research everything on this site. Rather than tearing toilets apart in a lab, we compare how the parts are engineered, the published flapper specs and sizing that predict a reliable seal, EPA WaterSense efficiency context, and the repair patterns that show up consistently across aggregated owner reviews and plumbing resources. The good news is that flappers are nearly universal and inexpensive: one correctly sized flapper fits the vast majority of two-piece and one-piece tanks, so you usually do not need a part matched to a specific TOTO Drake, Kohler Cimarron, or American Standard Cadet 3, though a handful of designs do need their own seal.
Start here. Before you buy anything, run the dye test so you replace the right part. Add a few drops of food coloring to the tank water, then wait fifteen minutes without flushing. If color seeps into the bowl, the flapper is leaking and this is your repair. If the tank level drops with no color reaching the bowl, the problem is the fill valve or overflow instead, and a new flapper will not fix it.
What does a toilet flapper do, and how do you know it is bad?
A toilet flapper is the rubber or silicone seal at the bottom of the tank that lifts to release water for a flush and drops back to hold water afterward. You know it is failing when the toilet runs on its own, refills in random bursts (a phantom flush), drains slowly into the bowl, or needs the handle held down to complete a flush. Most flappers wear out in three to five years.
Understanding the symptom points you to the right repair, because a flapper and a fill valve produce overlapping complaints. The flapper controls water leaving the tank into the bowl; the fill valve controls water coming into the tank. If the toilet runs because water silently slips past the bottom of the tank into the bowl, that is the flapper. If the toilet runs because you can hear water continually entering the tank that never quite shuts off, that is the fill valve. The dye test settles it: color in the bowl after fifteen minutes means a flapper leak, while a tank that drops with no color in the bowl points to the fill valve. A flapper that has gone soft, slimy, brittle, or curled at the edges, or one that you have to jiggle the handle to seat, is past its service life. For the broader diagnosis of running and weak-flush behavior, our guide on how to fix a toilet that is not flushing properly and the recurring-problem walkthrough in why your toilet keeps clogging are useful companions.
What tools and parts do you need to replace a flapper?
To replace a toilet flapper you mainly need the correct replacement flapper, which is either a 2-inch or a 3-inch size, plus a sponge and towel and a pair of household gloves. No wrench, glue, or soldering is required because the flapper hooks on and off by hand. Optional extras are scissors to trim the chain and a soft brush to clean the flush valve seat.
This is the lowest-tooling repair in plumbing, which is part of why it is the most common DIY fix homeowners attempt. The short list below covers everything, with notes on the one decision that actually matters, which is flapper size.
A note on size, because this is the one thing people get wrong. Most older toilets use a 2-inch flapper, sized to a flush valve opening about the diameter of a baseball. Many newer high-efficiency and tower-style toilets use a 3-inch flapper for a faster, more forceful flush. The quickest way to tell is to flush, watch the opening the flapper covers, and compare it to the flapper packaging, or simply take a photo of your old flapper to the store. Buying the wrong size is the leading cause of a flapper that will not seal afterward, so confirm 2-inch versus 3-inch before anything else.
How do you replace a toilet flapper step by step?
Replace a toilet flapper by shutting off the supply valve, flushing to empty the tank, and unhooking the old flapper from the overflow tube pegs and the chain from the handle arm. Clean the valve seat, snap the new matching flapper onto the pegs, and attach the chain to the handle with about a half inch of slack. Turn the water back on and test. The full sequence takes under fifteen minutes.
Work through these steps in order. None of them require force or tools, and the only judgment call is chain slack at the end, which you fine-tune by flushing and watching.
Step 1: Shut off the water and empty the tank
Find the shutoff valve on the wall or floor behind the toilet and turn it fully clockwise to close it. Then flush and hold the handle down to drain as much water from the tank as possible. The flush empties most of it, but an inch or two stays at the bottom; soak that up with a sponge wrung into a bucket, or lay a towel in the tank, until the area around the flapper is mostly dry. You do not need the tank bone dry the way you would for a fill valve swap, but draining it lets you see the pegs and chain clearly and keeps the job clean. If your shutoff valve will not fully close, the flapper can still be changed with the water off at the home's main supply.
Tip. Snap a phone photo of the old flapper still in place, showing how the chain connects to the handle arm and which hole it uses. That photo is the fastest reference for setting up the new flapper the same way, and it captures the chain length so you can match the slack on the first try.
Step 2: Unhook the old flapper
Lift the old flapper off its mounting points. Most flappers have two small ears or a ring that slide onto the two pegs on either side of the overflow tube, or hook around the base of the overflow tube itself. Slide or pop the ears off the pegs, then unclip the lift chain from the toilet handle arm at the top. Pull the whole flapper and chain assembly out. Expect the old rubber to feel slimy or sticky, which is exactly why it stopped sealing, and have your bucket ready for the residual water it holds.
Step 3: Clean the flush valve seat
With the flapper out, look at the flush valve seat, the round rim the flapper rests against. Run a fingertip or a soft rag around it. Mineral scale, slime, or grit on this rim will hold even a brand-new flapper open a fraction and let water seep through. Wipe and gently scrub the seat clean and smooth; avoid anything abrasive that could scratch the sealing surface. A clean, smooth seat is the difference between a flapper that seals on the first try and one that keeps trickling no matter what you replace.
Avoid this mistake. Do not skip cleaning the valve seat. A large share of repeat running-toilet complaints after a flapper swap trace back to a crusty or pitted seat that the new flapper cannot seal against. If the seat is corroded or pitted beyond cleaning, a thin universal seat-repair ring that glues over the old rim restores a smooth sealing surface without replacing the whole flush valve.
Step 4: Match and install the new flapper
Hold your new flapper next to the opening and confirm the size matches, 2-inch or 3-inch, before installing. Slide its ears onto the same two pegs the old one used, or hook the ring around the base of the overflow tube, exactly as the original was mounted. The flapper should sit flat and centered over the valve opening, hinging freely so it lifts when the handle is pressed and falls straight back down to seal. If your new flapper has an adjustable dial or float for flush volume, leave it at the factory middle setting for now and fine-tune later.
Step 5: Connect and set the lift chain
Clip the lift chain to the toilet handle arm. The correct chain length is the most important adjustment on this job. You want about a half inch of slack when the flapper is closed: enough that the chain is not holding the flapper open, but not so much that it tangles under the flapper or fails to lift it fully. Too tight, and the flapper never fully seals, so the toilet runs. Too loose, and the chain can slip under the flapper or the flush is weak. Pick the chain hole on the handle arm that gives that slight slack, then snip off excess chain with scissors so a long tail cannot foul the flapper.
Step 6: Turn on the water and test
Open the shutoff valve slowly and let the tank refill to its normal level, about an inch below the top of the overflow tube. Flush several times and watch the flapper: it should lift cleanly when you press the handle and drop fully closed afterward, with no water trickling into the bowl. Listen for the fill valve cycling on by itself in the minutes after the tank settles, which would signal a continuing leak. Run the dye test one more time to confirm the seal. If it holds, the repair is done; if it seeps, recheck the chain slack and the cleanliness of the valve seat.
Expert Take
The single highest-value habit on this job is matching the flapper to the toilet rather than grabbing the cheapest rubber one off the shelf. We see a recurring pattern in owner reports: someone installs a generic flapper on a TOTO or a modern 3-inch tower toilet, it seals for a few weeks, then the new rubber distorts and the running comes back. A silicone flapper or the brand-matched part holds its shape far longer in chlorinated and hard water, and on TOTO toilets in particular the factory flapper preserves the original flush timing. Spend a little more on the right seal and you fix the leak once instead of three times.
Which flapper should you buy as a replacement?
For most toilets the best replacement is a correctly sized universal flapper, either 2-inch or 3-inch, in a chlorine-resistant rubber or silicone such as the Korky 2-inch Universal or the Fluidmaster PerforMAX adjustable flapper. For TOTO toilets, the factory-matched flapper preserves the original flush, and for 3-inch tower designs, choose a 3-inch model. Match the size and the brand, not just the price.
Because flappers are standardized by size, you have a small set of reliable choices rather than a model-specific hunt. These three cover almost every situation, and each carries a deep, positive owner track record across hardware and plumbing retailers.
Most Universal
Korky 2-Inch Universal Flapper
Fits nearly every standard tank
The default replacement for a reason: a chlorine-resistant rubber flapper that fits the vast majority of 2-inch two-piece and one-piece tanks, mounts in seconds, and is sold everywhere with a long, durable track record.
Check price on Amazon
Adjustable Flush
Fluidmaster PerforMAX Adjustable
Dialing in flush volume
A universal flapper with an adjustable dial that lets you tune how much water each flush releases, useful for trimming water use or strengthening a weak flush without swapping parts again.
Check price on Amazon
Best For TOTO Tanks
TOTO 3-Inch Flapper Assembly
Exact fit on TOTO toilets
On a TOTO Drake, UltraMax II, or other 3-inch tower toilet, the factory-matched flapper preserves the original flush timing and force, which is worth it when a generic seal does not hold its shape.
Check price on Amazon
How do the common flapper options compare?
If you want to weigh the choices on the things that actually matter for a tank seal, the table below lines them up. The Korky 2-inch Universal is marked as the overall winner for fit and value together, but the right pick depends on your toilet's size and brand.
For the large majority of homes, a correctly sized universal Korky or Fluidmaster flapper is the practical choice and saves you from chasing a brand-specific part. The exception is brands and models with a unique seal, where a matched OEM part keeps the original flush behavior intact. TOTO toilets such as the Drake and UltraMax II famously use a 3-inch flapper or a captive seal, and some Kohler models, including certain Cimarron and Santa Rosa tanks, use a canister-style flush valve with no traditional flapper at all. A tank on a Woodbridge T-0001, Swiss Madison St. Tropez, or Gerber Viper typically takes a standard universal flapper without issue, but always confirm the 2-inch versus 3-inch size first.
How do you set the chain length so the flapper seals correctly?
Set the lift chain so there is about a half inch of slack when the flapper is closed, just enough that the chain does not hold the flapper open but still lifts it fully on a flush. Too little slack keeps the flapper cracked open so the toilet runs; too much lets the chain slip under the flapper or weakens the flush. Adjust the chain hole on the handle arm and trim excess length.
Getting the chain right is what turns a successful part swap into a toilet that seals perfectly and flushes at full strength. Too little slack, and the flapper sits a hair open and the tank slowly leaks into the bowl, recreating the exact running problem you just repaired. Too much slack, and the loose chain can fall under the flapper and prop it open, or the handle may not lift the flapper high enough for a complete flush, producing the soft, partial flush we cover in our weak toilet flush fix guide. Move the chain one link at a time, flush, watch the flapper drop fully closed, and recheck for trickling until it seats cleanly. If you find yourself needing to hold the handle down for a full flush even after adjusting, the chain is too long or the flush volume dial needs to open further, both of which tie into the broader fixes in our walkthrough on how to improve toilet flush power.
Expert Take
Our honest take on when to replace versus repair the rest of the toilet: a new flapper is always worth it if the tank, bowl, and fill valve are otherwise sound, because it ends running-water waste for very little money and under fifteen minutes of work. But if you are already inside an old, low-MaP toilet replacing the flapper for the third time, and the bowl flushes weakly even with a full tank, you are maintaining a fundamentally weak design. At that point the smarter long-term move is a high-MaP 1.28 GPF replacement such as the TOTO Drake or Kohler Cimarron, which ends both the running and the weak-flush problems at once while lowering your water bill through EPA WaterSense efficiency.
Putting it all together
Replacing a toilet flapper is the easiest, fastest, and cheapest plumbing fix in the house, and the payoff is immediate: the phantom flushing stops, the running stops, and the water bill drops. Shut off the supply, drain the tank, unhook the old flapper from the pegs and the chain from the handle, clean the valve seat, snap on a correctly sized replacement, set about a half inch of chain slack, and turn the water back on. Confirm the size before you buy, clean the seat before you install, and run the dye test to verify the seal, and you will have a quiet, water-tight, full-strength toilet in well under fifteen minutes.
Keep reading
Related guides
FAQ
Frequently asked questions
? How long does it take to replace a toilet flapper?
For most people the job takes ten to fifteen minutes, including shutting off the water, draining the tank, unhooking the old flapper, cleaning the seat, and setting the new one. It is the fastest plumbing repair in the house because no tools are required and the flapper snaps on and off by hand. The only time-consuming part is adjusting the chain slack and running a dye test to confirm the seal.
? Are toilet flappers universal?
Mostly within a size class. A 2-inch universal flapper such as the Korky 2-inch fits the vast majority of older standard tanks, and a 3-inch universal flapper fits most modern tower toilets. The catch is matching that 2-inch versus 3-inch size correctly. Some designs, including certain TOTO seals and Kohler canister flush valves, use a unique part rather than a traditional flapper, so confirm your toilet's style first.
? How do I know if my flapper or fill valve is bad?
Do the food-coloring dye test. Add a few drops to the tank and wait fifteen minutes without flushing. If color appears in the bowl, the flapper is leaking and needs replacing. If the tank level drops or water trickles into the overflow with no color reaching the bowl, the fill valve is the problem instead. A flapper that is brittle, slimy, or curled is also a clear sign it has failed.
? What size flapper do I need, 2-inch or 3-inch?
Measure the flush valve opening the flapper covers, or compare your old flapper to the packaging. Most toilets made before the mid-2000s use a 2-inch flapper, sized about like a baseball. Many newer high-efficiency and tower-style toilets, including TOTO models, use a 3-inch flapper for a faster flush. Buying the wrong size is the top reason a new flapper will not seal, so confirm size first.
? Do I need to turn off the water to replace a flapper?
It is strongly recommended. Close the shutoff valve behind the toilet and flush to drain the tank so you can work on a dry, visible valve seat. Technically you can change a flapper with the water on because it sits below the waterline, but draining the tank keeps the job clean, lets you clean the seat properly, and prevents the fill valve from cycling while you work.
? Why does my toilet still run after I replaced the flapper?
The most common causes are a chain set too tight so it holds the flapper slightly open, a dirty or pitted valve seat the new flapper cannot seal against, or the wrong flapper size. Check that the chain has about a half inch of slack, clean the valve seat thoroughly, and confirm you installed the correct 2-inch or 3-inch flapper. Our companion guide on a toilet that runs after a flapper replacement covers this in detail.
? How much chain slack should a flapper have?
About a half inch when the flapper is closed. The chain should be just taut enough that it lifts the flapper fully when you press the handle, but loose enough that it is not holding the flapper open even slightly. Too tight and the toilet runs; too loose and the chain can slip under the flapper or the flush is weak. Adjust one link at a time and trim the excess.
? How often do toilet flappers need to be replaced?
A typical rubber flapper lasts about three to five years before chlorine, minerals, and constant flexing harden or warp it and it stops sealing. Toilet cleaning tablets that sit in the tank can shorten that lifespan dramatically by degrading the rubber. Silicone flappers and chlorine-resistant models last longer. When the toilet starts phantom flushing, replacement is cheap and quick enough that nursing an old flapper rarely makes sense.
? Can I replace a flapper myself without a plumber?
Yes, it is the most DIY-friendly plumbing repair there is. No tools, glue, or skills are required in most cases because the flapper hooks on and off by hand and the chain clips to the handle. The only judgment calls are buying the correct size and setting the chain slack, both of which this guide covers. A first-timer can complete it in about fifteen minutes.
? Why is my flapper closing too early and cutting the flush short?
An early-closing flapper produces a weak, partial flush. The usual causes are too much chain slack so the flapper drops before the tank empties, a flapper that is too buoyant or set to a low flush-volume dial, or a flapper that does not stay up long enough for your toilet's design. Tighten the chain slightly, raise the adjustable flush dial, or choose a flapper rated to hold open longer.
? Should I clean the flush valve seat before installing a new flapper?
Always. Mineral scale, slime, or grit on the round valve seat the flapper rests against will hold even a brand-new flapper open a fraction and cause a slow leak. Wipe and gently scrub the seat smooth before installing, avoiding anything abrasive. If the seat is corroded or pitted beyond cleaning, a glue-on seat-repair ring restores a smooth sealing surface without replacing the whole flush valve.
? Do flappers work on TOTO and Kohler toilets the same way?
Not always. Many TOTO toilets use a 3-inch flapper or a specific captive seal, so a generic 2-inch flapper will not fit a TOTO Drake or UltraMax II. Some Kohler models, including certain Cimarron and Santa Rosa tanks, use a canister-style flush valve with no traditional flapper at all, requiring a canister seal kit instead. Identify your flush valve type before buying a replacement.
? Will a new flapper make my toilet flush stronger?
Indirectly, if the old flapper was leaking and leaving the tank underfilled, or closing too early and cutting the flush short. A flapper that seals fully lets the tank hold and release its complete designed volume, restoring a full-strength flush. But the flapper does not change the bowl or trapway design, so a fundamentally weak toilet will still flush weakly. For that, see our guide on improving flush power or consider a high-MaP upgrade.
? Do toilet cleaning tablets damage the flapper?
In-tank chlorine and bleach tablets are a leading cause of premature flapper failure. They keep harsh chemicals in constant contact with the rubber, hardening and warping it within months instead of years. If you want a tank cleaner, use a model designed to sit in the bowl or overflow rather than the tank water, and consider a chlorine-resistant or silicone flapper to extend its life.
? Does a running toilet from a bad flapper waste much water?
Yes. According to EPA WaterSense, a continuously running or phantom-flushing toilet can waste hundreds of gallons a day and add significantly to a water bill. A worn flapper that lets water seep into the bowl is one of the most common causes. Because the part costs little and installs in minutes, fixing a leaking flapper promptly pays for itself quickly through lower water use.
? Is it worth replacing the fill valve at the same time as the flapper?
Often yes. The fill valve is the second most common cause of a running toilet, and both parts are inexpensive, so swapping both while the tank is open spares you a repeat repair. A combined fill valve and flapper repair kit is widely sold for exactly this reason. If only the flapper failed the dye test, though, you can replace it alone and leave a healthy fill valve in place.
? What is a flapper seat repair ring and when do I need one?
A seat repair ring is a thin self-adhesive ring that glues over a corroded or pitted flush valve seat to give a new flapper a smooth surface to seal against. You need it when the valve seat is too rough or scaled to clean smooth and a new flapper still leaks. It is far cheaper and easier than replacing the entire flush valve, which would require removing the tank.
? Why does my toilet flush only when I hold the handle down?
That symptom usually means the chain is too long, so a quick press does not lift the flapper high enough to hold open through the full flush. Shorten the chain until a normal press lifts the flapper fully and lets it stay up until the tank empties. A flapper that is too buoyant or set to drop early can cause the same issue, so check both the chain length and the flush-volume setting.
Sources
- EPA WaterSense, epa.gov/watersense
- MaP (Maximum Performance) flush testing, map-testing.com
- Manufacturer published specifications (TOTO, Kohler, American Standard)
Our Verdict
Replacing a toilet flapper is a sub-fifteen-minute, no-tools repair that ends phantom flushing, running water, and wasted gallons. Shut off the supply, drain the tank, unhook the old flapper, clean the valve seat, and snap on a correctly sized replacement with about a half inch of chain slack. For most homes the Korky 2-inch Universal is the right pick, with the Fluidmaster PerforMAX for adjustable flush volume and a 3-inch or OEM flapper for TOTO and tower toilets. Confirm the size, clean the seat, run the dye test, and you are done.