Caulking a toilet base is one of those small bathroom tasks that most owners skip until something goes wrong. A dry, clean, well-bonded bead of silicone caulk around the base of the toilet closes the gap between the porcelain and the floor, blocking mop water, cleaning chemicals, and bathroom humidity from pooling in a space that rarely dries out. The result is a tidier joint, reduced odor, a more secure toilet, and a floor that lasts longer. The job costs a few dollars and one afternoon and requires no plumbing knowledge at all.
Before caulking, it is worth confirming the toilet itself is in good order: it should not rock, should not leak at the base, and the wax ring seal should be intact. Caulking over a rocking toilet or a leaking wax ring traps the problem underneath and makes it worse. This guide covers the caulk selection, the surface preparation that determines whether the bead lasts, the application technique, and the placement of the one intentional gap that protects your floor. For the wider context on toilet maintenance and upgrade, our guide to the best flushing toilets covers the engineering and specifications that make a toilet low-maintenance from the start.
Check this first. Before applying any caulk, confirm the toilet does not rock and the wax ring is not leaking. Grip both sides of the bowl and try to move it front to back and side to side. A toilet that shifts even slightly will break a caulk bead within days. If the toilet rocks, shim and level it before caulking. If you see any water at the base after flushing, see our step-by-step guide on
fixing a toilet leaking at the base before you pick up the caulk gun.
What type of caulk should you use around a toilet base?
Use 100 percent silicone caulk or a siliconized latex caulk labeled "kitchen and bath" for caulking around a toilet base. Pure silicone is the most durable and the most waterproof choice, lasting 10 to 20 years with no cracking or mold, but it requires mineral spirits for cleanup and is less forgiving to apply. Siliconized latex cleans up with water, is easier to tool and smooth, and performs well in a bathroom environment, making it the preferred choice for most homeowners.
Walk the caulk aisle and you will see three broad categories: pure silicone, siliconized latex (also labeled "acrylic with silicone"), and plain acrylic or latex. Plain acrylic and latex caulks are designed for painted wood and drywall joints, not wet floors. They absorb water, mold easily, and fail within a year in a bathroom. Do not use them at the toilet base.
Pure 100 percent silicone caulk is the top performer. It does not absorb moisture, resists mold and mildew, remains flexible as the floor shifts slightly with temperature and humidity, and routinely lasts over a decade without peeling or cracking. The trade-off is application: silicone moves fast, is sticky, and requires mineral spirits or a specialized tool cleaner to remove from surfaces and skin. Cleanup must happen before it cures. Most manufacturers, including GE Sealants, Gorilla Glue, and DAP, label their best bathroom silicone explicitly as "100% silicone" or "bathroom silicone."
Siliconized latex combines a silicone modifier with an acrylic base, giving most of the flexibility and water resistance of silicone with much easier application and water cleanup. For a toilet base, it is an excellent practical choice. Look for products specifically rated for kitchen and bath use with mold-and-mildew-resistant additives in the formula. DAP Kwik Seal Plus, GE Advanced Silicone 2, and similar products in this class perform well in aggregated owner reviews and installer reports for bathroom floor joints.
Choose white for white porcelain or a clear bead if you want the joint to disappear visually against tile. Almond or biscuit are available to match older bathroom fixtures. Avoid colored caulks in a wet bathroom unless they are explicitly rated for wet immersion, because pigments can fade unevenly in constant moisture.
One tube is enough. A standard 10.1 oz tube of caulk is far more than you need for a single toilet base. The joint is small and the bead should be narrow, roughly 1/4 inch wide. A partial tube stored with the tip sealed using a nail or the included cap is good for months, useful for touch-up work if the bead ever chips.
What you need before you start
Having everything within reach before you open the caulk tube avoids the rushed application that causes uneven beads and messy joints. Silicone especially moves fast, so stopping to hunt for a tool mid-job is a recipe for a lumpy finish.
Is it code-required to caulk around a toilet base?
Yes, the International Plumbing Code (IPC) Section 405.5 requires that floor-mounted toilets be secured to the floor and that the joint between the toilet base and the floor be sealed. Most local building codes adopt the IPC or equivalent language. A caulk bead at the base satisfies this requirement. The only exception is a situation where caulk would trap a wax ring leak, which is addressed by leaving a small gap at the back.
Understanding the code context answers the debate you may have seen online about whether caulk belongs at the toilet base at all. A segment of plumbing forums argues against caulking because it can hide a wax ring leak. That concern is valid but has a simple solution: leave an intentional 1-inch gap unsealed at the very back of the toilet, centered on the drain. If the wax ring ever fails, flush water will exit through that gap and be visible on the floor before it soaks into the subfloor. The front and sides are sealed, satisfying code and stopping moisture intrusion from mop water and cleaning. The small rear gap is the early warning system. This approach is the consensus position in plumbing trade resources and is the same method used in the step by step instructions below.
How to caulk around a toilet base: the complete step by step
These steps are ordered to produce the cleanest, most durable result. Preparation takes longer than the actual caulk application, and that is correct: a joint that fails in months almost always failed because the surface was not clean and dry enough before the bead went down.
Step 1: Remove all old caulk and grout
Old caulk is the most common reason a new bead fails early. New caulk does not bond reliably to old caulk, especially to old silicone, and any old bead with mold or mildew underneath will compromise the adhesion of the fresh material. Use a utility knife or a dedicated caulk remover hook to cut along both edges of the old bead and peel or scrape it away completely. Work slowly around curves and do not gouge the tile or porcelain. A stiff plastic scraper works well for the flat tile areas without scratching.
If there is grout between the toilet base and the floor tiles, decide whether to leave it or remove it. Grout is rigid and will crack as the toilet flexes even slightly, so professional tilers typically leave a 1/8 inch gap between porcelain fixtures and the tile field for a flexible caulk joint rather than filling it with grout. If your toilet has a cracked grout joint at the base, this is the right time to scrape it clean and replace it with caulk, which is what the industry calls an "expansion joint" and the reason kitchen and bath caulk exists in the first place.
Step 2: Clean the surface with isopropyl alcohol
Caulk adhesion is almost entirely about surface cleanliness. Soap film, cleaning product residue, floor wax, and body oils all prevent the caulk from bonding to the tile and porcelain. Scrub the floor joint and the bottom edge of the toilet base with a paper towel dampened with 70 percent or higher isopropyl alcohol, going around the entire circumference. Let it evaporate completely before moving on, which takes about one to two minutes in a ventilated bathroom.
Do not use dish soap or an all-purpose cleaner here. Both leave a film that interferes with adhesion, particularly with silicone, which bonds only to a chemically clean, dry surface. Alcohol is the correct choice because it degreases without leaving residue. If the tile has any wax coating or floor polish applied recently, wipe it down twice with fresh alcohol to ensure the surface is bare.
Step 3: Let the surface dry completely
This step is easy to rush and should not be. Silicone and siliconized latex caulk do not bond well to damp surfaces, and a bathroom floor near the toilet base holds more moisture than it appears to from a surface wipe. After cleaning with alcohol, open the bathroom window or run the exhaust fan and wait at least 15 to 30 minutes for the surface to fully dry. If the toilet has been used recently, wait longer, since the base of the porcelain traps condensation.
You can use a hair dryer set to low heat to accelerate the drying along the floor joint, moving it slowly around the base without lingering in one spot. Run your finger along the joint afterward: if the tile or porcelain feels cold or damp, it is not ready. The surface should feel room temperature and completely dry to the touch before tape or caulk goes down.
Step 4: Apply painter's tape on both sides of the joint
Painter's tape transforms a difficult application into a clean, professional-looking bead. Run a strip of low-tack blue or green tape along the tile floor parallel to the toilet base, about 1/4 inch away from the porcelain edge. Run a second strip along the bottom edge of the toilet itself, also about 1/4 inch from the floor. The gap between the two strips of tape defines where the caulk bead will sit. This two-tape approach keeps the silicone off the tile and porcelain surfaces outside the joint, making cleanup unnecessary and producing a straight, consistent edge.
At the very back of the toilet, directly behind the drain, stop the tape and leave a 1-inch gap on both sides of the drain center. This is the intentional leak-detection gap described in the code section above. The tape makes this easy to execute cleanly. Press the tape edges down firmly so caulk does not bleed underneath and create the jagged edge that tape was meant to prevent.
Step 5: Cut the caulk tube tip and load the gun
Cut the tip of the caulk tube at a 45-degree angle, starting with a very small opening about 3/16 inch in diameter. A smaller opening gives better control and produces a neater, narrower bead. You can always go over a thin bead a second time, but a bead that is too wide is hard to correct before it cures. Pierce the inner foil seal with the puncture tool on the caulk gun or a long nail before inserting the tube. Load the tube into the gun, advance the plunger until it contacts the tube end, and do a quick test on a piece of cardboard to confirm the bead size and flow rate before moving to the toilet.
Hold the gun at roughly a 45-degree angle to the joint, pointing the tip into the gap rather than away from it. Pulling the gun toward you while squeezing tends to produce a more consistent bead than pushing it away, since you can see what you are depositing and correct your speed. A steady walking pace around the toilet keeps the bead uniform. Stop squeezing the trigger about an inch before the end of each run so the residual pressure in the tube does not blob at the corner. Release the pressure rod on the gun immediately when you stop to prevent dripping.
Step 6: Apply the caulk bead in one continuous run
Start at one side of the back gap where you stopped the tape and move continuously around the front and sides until you reach the other side of the back gap. Work quickly but smoothly. Silicone in particular begins skinning over within minutes of application, so the entire bead needs to go down before you tool and smooth it. If you lose your pace or the bead gets lumpy, do not try to fix individual sections as you go; tool the whole bead first, then address problems.
Keep an even, moderate squeeze on the trigger throughout. Too much pressure produces a fat bead that slumps and is difficult to tool; too little leaves a thin, discontinuous bead with voids. Watch the tape lines as you go: the bead should contact both tape edges and sit slightly proud of the joint, since tooling will press it into the gap and reduce its height. One smooth run is always cleaner than multiple passes.
Step 7: Tool and smooth the bead
Within two to four minutes of laying down the bead, put on a latex glove or dip your index finger in a small bowl of soapy water (water only for silicone, which does not tool with dry fingers). Run your finger firmly along the entire bead in one continuous stroke, pressing the caulk into the joint and curving it into a slightly concave or flat profile. A concave profile sheds water better than a rounded one and looks more finished. The tape edges will define the outer boundaries of the stroke, keeping the bead within the lines.
Work quickly and do not go back over sections already tooled, since silicone and fast-setting siliconized latex begin to set during this window. One smooth pass produces a far better result than multiple reworked passes. Have a paper towel in your other hand to wipe the caulk off your finger between any repositioning, and keep the soapy water close for re-wetting the finger if the bead starts dragging. This step is where the professional result is either made or lost, so it is worth moving at a deliberate pace rather than rushing.
Step 8: Remove the tape immediately
Remove both strips of painter's tape before the caulk skins over, which for most silicone products means within five to ten minutes of tooling. Lift the tape at a 45-degree angle, pulling it back over itself rather than straight up, to produce a clean edge without tearing the wet bead. If the tape was applied with too much pressure and the edge tears slightly, you can re-wet your gloved finger and smooth that section again before it cures.
Do not wait until the caulk is fully cured to remove the tape. Tape pulled off cured silicone tears the edges and can pull the bead partially away from the surface, undoing the preparation work. The window for clean tape removal is narrow: after tooling and before the surface skin forms. If you feel resistance when you lift the tape and see it beginning to drag the bead, stop and use a utility knife to score along the tape edge before peeling further.
Step 9: Let the caulk cure fully before using the toilet or wetting the area
Most 100 percent silicone bathroom caulks require 24 hours of cure time before exposure to water, and many manufacturers recommend 48 hours for full strength. Siliconized latex products vary: some are waterproof in as little as 2 hours, but 24 hours is the safe standard for a floor joint that will see regular wet mopping. Check the specific product label for the manufacturer's stated cure time, since formulas differ between brands.
Keep the bathroom ventilated during curing to accelerate the process. Silicone cures by reacting with moisture in the air, so a ventilated room speeds cure, while a sealed, cold room slows it. Do not try to speed curing by applying heat directly from a hair dryer, which can cause the surface to skin over before the interior is set, trapping un-cured material and producing a bead that looks done but is soft underneath. Normal bathroom temperature and adequate air movement is the right condition.
Expert Take
The single most common caulk failure we see in bathroom DIY work is applying a new bead over an old one, usually because scraping the old caulk looked tedious. Silicone does not bond to cured silicone, so a bead applied over a weathered old joint will peel within weeks regardless of how carefully the new bead was applied. Spend the 20 minutes scraping the old material and cleaning with alcohol first, and the new bead bonds to the clean porcelain and tile directly, lasting years. It is not the caulk that fails in those situations; it is the preparation.
What happens if you skip caulking the toilet base?
Without caulk at the toilet base, mop water, cleaning chemicals, and bathroom humidity collect in the gap between the porcelain and the floor and slowly soften the subfloor, promote mold growth in the grout lines, and produce musty odors that are hard to trace. Over time, an unsealed base also allows the toilet to shift slightly during use, which can work the wax ring loose and create a much larger repair. Most plumbing codes require the joint to be sealed.
The gap under most toilet bases is roughly 1/8 to 1/4 inch wide and barely visible, so it looks harmless. In practice, water that enters that gap from mopping, cleaning spray, or a splashed tub has nowhere to go except into the flooring. On a wood subfloor the result is softening and eventually rot. On a concrete slab the result is mold growth in the grout lines and under the toilet base, which produces the persistent bathroom odor that no amount of cleaning at the surface can address. The toilet can also shift incrementally in an unsealed base, since the gap allows small lateral movements that a caulked joint would prevent, and those shifts compress and distort the wax ring over time, eventually opening a base leak.
The cost of not caulking is front-loaded: nothing noticeable for a year or two, then the floor softening or the persistent mold odor begins. At that point the repair involves not just a new wax ring but potentially floor repair as well. A single inexpensive tube of silicone and 30 minutes at installation prevents all of it. This is also why the best-engineered toilets, such as those in the TOTO Drake and TOTO UltraMax II lines, include installation guidance that specifies sealing the base joint as part of proper installation, not as an optional finishing touch.
Should you caulk all the way around or leave a gap?
Leave a 1-inch gap unsealed at the very back of the toilet base, centered on the drain. Seal all other sides fully. This gap is the standard plumbing recommendation because it lets any water from a future wax ring failure appear on the visible floor rather than being trapped under the toilet where it silently rots the subfloor. A fully sealed base hides base leaks until the floor or ceiling below shows serious damage.
The debate over caulking the toilet base entirely versus leaving a gap has been settled in most plumbing trade guidance: seal the front and sides, leave the rear gap. The concern is real. If the wax ring develops a slow leak and the base is completely sealed with caulk, the escaping water has no exit point and spreads under the toilet into the subfloor in every direction. The leak can continue for weeks or months before the floor softens enough to feel it underfoot. A homeowner who sealed the base entirely might wonder for a long time why their bathroom smells musty before connecting it to the toilet.
The rear gap at the back center addresses this precisely. Wax ring leaks exit at the drain, directly behind the toilet, which is exactly where the gap is. If water from a flush escapes the wax seal, it tracks out through that rear gap onto the visible floor, giving an early, obvious warning while the subfloor damage is still minor and cheap to fix. For the rest of the base, the sealed bead keeps mop water and cleaning products out of the joint. This approach provides both benefits: moisture protection on three sides and leak detection on the fourth.
How often does toilet base caulk need to be replaced?
High-quality 100 percent silicone caulk at a toilet base typically lasts 10 to 20 years without cracking or peeling when applied over a clean, dry surface. Siliconized latex caulk lasts 5 to 10 years in the same conditions. Replace it earlier if you see cracking, peeling, discoloration, or mold growth that cannot be cleaned away, any of which indicate the bead has lost its seal or adhesion.
The life of a caulk bead at the toilet base depends primarily on whether it was applied over a properly cleaned surface and whether the toilet beneath it is stable. A bead applied over a clean, dry, grease-free surface and over a toilet that does not rock can last the working life of the toilet itself, especially with 100 percent silicone. A bead applied over a damp surface, over old caulk, or over a toilet that shifts even slightly will delaminate in months and will need replacement.
Visual inspection tells you when replacement is needed. A bead that is still fully bonded, flexible, and smooth with no cracks along either edge does not need to be replaced even if it is several years old. A bead that shows any of these signs should be stripped and replaced: cracking along the edges where it meets the tile or porcelain, a pulling-away or bridging appearance where the center is off the surface, discoloration to yellow or gray throughout the bead, or mold growth that returns within a week or two of cleaning. If you notice musty odors but the bead looks intact, probe it gently with a fingernail: if it compresses without resistance or pulls away from the surface, it has lost its bond.
Top toilet recommendations if you are due for an upgrade
Applying fresh caulk around a toilet is also a good moment to evaluate whether the toilet itself is worth keeping. A toilet that requires regular caulk repair because it rocks, or one that still uses 1.6 GPF or higher and clogs frequently, may cost more in ongoing maintenance than a modern 1.28 GPF EPA WaterSense-certified replacement. These three models combine flat, stable bases that hold a caulk joint well, high MaP flush scores, and broad parts availability.
Most Reliable
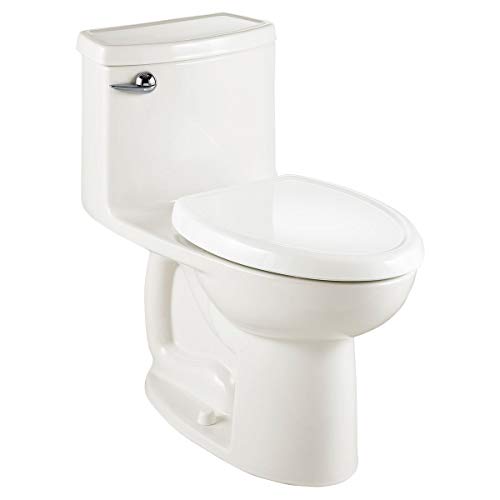
TOTO Drake
Flat, stable base, proven long-term reliability
A 1,000 gram MaP score, a 3-inch flush valve, and a well-cast flat base that accepts a caulk bead cleanly and seats on the wax ring without rocking, with widely available replacement parts and a limited lifetime warranty.
Check price on Amazon
Easy to Caulk
Kohler Cimarron
Skirted base, cleaner caulk line
The Cimarron's concealed-trapway skirted base is smooth and uninterrupted at floor level, which makes applying and maintaining a caulk bead straightforward, paired with a Class Five flush at 1.28 GPF and a sturdy mounting system.
Check price on Amazon
Best Value
American Standard Cadet 3
Affordable, dependable base for DIY install
A solid, well-anchored base with EverClean surface technology accepts caulk cleanly and resists mold at the floor joint, combined with a 1.28 GPF WaterSense rating and a no-clog PowerWash rim flush system.
Check price on Amazon
How to remove old caulk from around a toilet base
Remove old toilet base caulk by scoring both edges with a utility knife or caulk remover hook, then peeling the bead away in strips. For stubborn silicone residue, apply a commercial silicone remover such as Goo Gone or a 3M caulk remover, let it soak for 30 to 60 minutes, and scrape with a plastic scraper. Clean the surface with isopropyl alcohol after removal to eliminate any residue before applying new caulk.
Old caulk comes off in one of two ways: either it lifts cleanly as one piece after the knife scores release both edges, or it crumbles into small chunks that require more scraping. Both scenarios are normal, and the approach is the same. Score along the tile side of the bead first, then along the porcelain side, cutting through the adhesion bond at each interface. Once both edges are cut, grip the bead with your fingers or a pair of needle-nose pliers and pull along the joint. Old silicone tends to come off in satisfying long strips if it is not too degraded; old acrylic caulk breaks into pieces and requires more scraping.
After the bulk of the old bead is off, residue remains on both surfaces. On tile, a stiff plastic scraper removes most of it without scratching. On the porcelain base, a plastic scraper or a non-scratching scrub pad with alcohol cuts through silicone residue effectively. Commercial silicone remover products accelerate this step significantly: apply, wait the specified time, and the residue peels or wipes off. Do not use metal scrapers on porcelain or glazed tile, since they scratch the finish and create surface roughness that makes the new caulk joint look rough rather than smooth. When every trace of the old material is gone, clean both surfaces with isopropyl alcohol and allow them to dry fully before applying new caulk.
Common caulking mistakes and how to avoid them
Expert Take
The one question we see most often about this job is whether the toilet needs to be removed before caulking. The answer is no, not for a caulk application. The caulk goes on the outside of the base where it contacts the floor, and you never need to disturb the toilet itself. The only reason to pull the toilet first would be to correct a wax ring leak or a rocking problem, which must be fixed before caulking anyway. If you are doing a full reseat after replacing the wax ring, caulk is the last step of that job, applied after the flush test comes up dry and before you button up the bathroom. In every other situation, caulk the toilet in place without moving it at all.
How to fix a caulk bead that cracked or peeled
A caulk bead at the toilet base that cracks or peels does not repair itself with a patch over the top. The correct fix is the same as the initial application: remove the old material completely, clean the surface with alcohol, let it dry, and apply a new bead over bare tile and porcelain. Applying fresh caulk over a cracked or peeling bead adds another layer of material that will fail at the adhesion point of the old bead underneath, just as quickly. The repair time is identical to the original application, typically 30 minutes of active work plus curing time, and the result from a clean surface is identical to a first-time application on a new install.
Before reapplying, investigate why the bead failed. If the toilet was caulked while it rocked, the cracking will recur unless the rock is fixed first. If the bead is peeling cleanly off one surface but bonded to the other, the surface that de-bonded was either damp or contaminated when the caulk was applied. Identifying and correcting the root cause before the next bead goes down is what makes it last. A caulk bead that fails within 3 to 6 months almost always traces to one of the mistakes in the table above, not to a product defect.
For persistent mold growth at a toilet base, check whether the toilet is in a bathroom with poor ventilation. Mold on the caulk surface does not always indicate a failed bead; it can indicate an environment where the joint stays damp between cleanings. Replacing the bead with a product specifically formulated with higher mold inhibitors, such as those labeled for tile and bath in high-humidity environments, combined with improved exhaust fan use, usually resolves the problem without any other changes. Our guide on how to improve toilet flush power covers ventilation and related bathroom maintenance together.
If you notice water under the toilet after completing the new bead and allowing it to cure, this is the leak-detection gap working as intended. Check the toilet with the dry-and-flush test: dry everything, flush several times, and watch whether water exits through the rear gap. If it does, the wax ring is leaking and must be replaced before the caulk is addressed. See our guides on a toilet not flushing properly and a weak toilet flush for related diagnostic steps that often accompany a failing toilet seal, and our guide on why a toilet keeps clogging if partial clogs appear alongside the maintenance work.
Sources
- EPA WaterSense, epa.gov/watersense
- MaP (Maximum Performance) flush testing, map-testing.com
- Manufacturer published specifications (TOTO, Kohler, American Standard)
- International Plumbing Code Section 405.5, toilet installation and sealing requirements
- DAP, GE Sealants, Gorilla Glue product specifications for silicone and siliconized latex caulk
Our Verdict
Caulking around a toilet base is a 30-minute job that prevents years of floor damage and satisfies plumbing code. Strip all old caulk, clean with isopropyl alcohol, let the surface dry completely, apply painter's tape on both sides of the joint, run a narrow bead of 100 percent silicone or siliconized latex kitchen-and-bath caulk, tool it smooth with a wet finger, remove the tape immediately, and leave a 1-inch unsealed gap at the rear center for leak detection. Done correctly on a stable, non-rocking toilet, a silicone bead lasts 10 years or more. If the toilet rocks, leaks, or is a worn-out old model anyway, a high-MaP EPA WaterSense toilet from TOTO, Kohler, American Standard, Woodbridge, Swiss Madison, or Gerber gives you a flat, stable base to caulk and decades of reliable, efficient flushing from the start.
FAQ
Frequently asked questions
? Do you have to caulk around the base of a toilet?
The International Plumbing Code requires the joint between the toilet base and the floor to be sealed, and most local codes adopt equivalent language. Beyond the code requirement, caulk prevents mop water, cleaning products, and bathroom humidity from collecting in the gap and softening the subfloor or promoting mold growth. Leave a small rear gap for leak detection and seal the rest.
? What is the best caulk to use around a toilet base?
100 percent silicone caulk rated for kitchen and bath use is the most durable choice, lasting 10 to 20 years in a bathroom environment without cracking or peeling. Siliconized latex caulk labeled for kitchen and bath is easier to apply and cleans up with water, lasting 5 to 10 years. Do not use plain acrylic or latex caulk at a toilet base; it absorbs moisture and molds quickly.
? Should you caulk all the way around the toilet?
No. Seal the front and both sides of the toilet base, but leave a 1-inch gap unsealed at the very back, centered on the drain. This gap allows any water from a wax ring failure to appear on the visible floor as an early warning instead of being trapped under the toilet, where it silently rots the subfloor before anyone notices. This is the standard plumbing recommendation for toilet base caulking.
? How long does toilet base caulk last?
Applied over a clean, dry surface on a stable toilet, 100 percent silicone caulk at a toilet base typically lasts 10 to 20 years. Siliconized latex lasts 5 to 10 years. Caulk fails early if it was applied over a damp or contaminated surface, over old caulk, or over a toilet that rocks during use. Inspect the bead annually; replace it when cracks, peeling, or mold that cannot be cleaned away appear.
? Can you caulk a toilet base without removing the toilet?
Yes, in almost every situation. The caulk bead goes on the exterior joint between the toilet base and the floor, and the toilet does not need to be moved. You would only remove the toilet first if you were also replacing the wax ring or correcting a rocking problem, both of which should be done before caulking regardless. For a routine caulk application on a solid toilet, caulk it in place.
? How long does caulk need to cure before using the toilet?
Most 100 percent silicone bathroom caulks require 24 hours before water exposure, and 48 hours for full structural cure. Siliconized latex products often specify a shorter waterproof window but 24 hours is the safe standard for a floor joint. Check the product label for the manufacturer's specific cure time, since formulas vary by brand. Do not mop or wet the area during this period.
? What happens if you caulk a rocking toilet?
The caulk bead will crack and peel within weeks because the movement of the toilet during use breaks the adhesion bond repeatedly. A rocking toilet must be shimmed level and solid before any caulk is applied. Slide plastic shims under the base at the gap points until the toilet does not move at all, tighten the closet bolts evenly, trim the shims flush, and then proceed with caulking.
? Can you put new caulk over old caulk around a toilet?
No, and this is the most common reason toilet base caulk fails quickly after being redone. Silicone does not bond to cured silicone, and siliconized latex applied over an old caulk bead relies on the adhesion of the old bead to the surface rather than its own bond. Remove all old material with a utility knife or caulk remover, clean with isopropyl alcohol, and apply the new bead directly to bare tile and porcelain.
? How do you get a smooth caulk line around a toilet?
Apply painter's tape on both sides of the joint about 1/4 inch from the gap, run the caulk bead, and immediately smooth it with a wet gloved finger or a finger dipped in soapy water in one continuous stroke. Remove the tape within 5 to 10 minutes of smoothing, before the surface skins over. The tape defines the edges and the wet-finger tool produces the smooth, slightly concave profile that looks professional and sheds water well.
? Is silicone or siliconized latex caulk easier to apply around a toilet?
Siliconized latex is generally easier for homeowners because it moves more slowly than pure silicone, cleans up with water, and is more forgiving during the tooling step. Pure silicone is more durable and waterproof but skins over quickly, requires mineral spirits for cleanup, and is less forgiving if you need to reposition a section. For a first-time application, siliconized latex produces a cleaner result with less stress.
? My caulk around the toilet keeps getting moldy. What should I do?
Persistent mold on toilet base caulk usually signals a bathroom ventilation problem rather than a product failure. If the exhaust fan is undersized or the bathroom rarely gets ventilated, the joint stays damp enough between cleanings to support mold growth. Remove the existing bead completely, clean with alcohol, and apply a replacement product specifically labeled as mold and mildew resistant for high-humidity environments. Run the exhaust fan during and for 15 minutes after every shower to reduce ambient humidity.
? Why is water coming out the back of my toilet after caulking?
Water appearing at the rear gap after caulking is the leak-detection gap working as designed. It is almost certainly a wax ring leak rather than a caulk failure. Dry the floor, flush several times, and watch whether the water appears during or after flushing. If it does, the wax ring seal is broken and the toilet must be reseated with a new wax ring. Do not seal the rear gap until the leak is repaired.
? How do you remove silicone caulk from around a toilet base?
Score both edges of the silicone bead with a utility knife or caulk remover hook, then peel it away in strips. For residue, apply a commercial silicone remover or Goo Gone, let it soak for 30 to 60 minutes, and scrape with a plastic scraper. Clean the surfaces with isopropyl alcohol after all residue is gone to prepare for fresh caulk. Avoid metal scrapers on porcelain or glazed tile, since they scratch the surface.
? Does caulk replace a wax ring?
No. Caulk and the wax ring serve completely different functions. The wax ring seals the drain connection inside the plumbing stack, preventing flush water and sewer gas from escaping under the toilet between the porcelain horn and the closet flange. Caulk seals only the exterior joint between the toilet base and the floor surface. Removing caulk has no effect on the wax ring, and replacing the wax ring does not affect the caulk bead.
? Can caulk hide a toilet leak?
Yes, if applied completely around the toilet base with no rear gap, caulk can trap a wax ring leak and prevent it from appearing on the floor. This is why plumbing guidance universally recommends leaving an unsealed gap at the rear center of the base. Properly applied with that gap, caulk does not hide leaks: any wax ring failure exits through the rear gap and is visible on the floor before serious damage occurs.
? What size caulk bead is right for a toilet base?
A bead of about 1/4 inch wide is correct for the joint between a toilet base and the floor. Cut the caulk tube tip to produce an opening of about 3/16 inch in diameter, which gives a bead that fills the joint without excess material pooling at the sides. A smaller bead is easier to tool smoothly and looks neater than an oversized one. You can always apply a second pass if the bead is too thin after tooling.
? What color caulk should I use around the toilet base?
White caulk is the correct choice for white porcelain toilets and matches most ceramic and porcelain tile grout in bathrooms. Clear silicone is an option when you want the joint to be visually unobtrusive against any floor color. Almond or biscuit caulk is available for matching older off-white fixtures. Avoid novelty colors unless specifically labeled for wet immersion, since pigments in standard caulk can fade unevenly in a bathroom environment.
? Can I use grout instead of caulk around the toilet base?
No. Grout is rigid and does not flex with the minor movements of a toilet during use, so it cracks at the joint within months. The joint between a porcelain fixture and the floor tile is classified in tile industry standards as a "movement joint" that should be filled with a flexible material, specifically caulk, rather than grout. If your existing joint is filled with grout and is cracking, remove it and replace it with siliconized latex or silicone caulk.
? How do plumbers recommend caulking around a toilet?
Plumbers and tile installers consistently recommend the same approach: clean and dry the surfaces, apply painter's tape on both sides of the joint, run a bead of 100 percent silicone or siliconized latex caulk, tool it smooth immediately, remove the tape before it skins over, and leave an intentional unsealed gap of about 1 inch at the rear center for wax ring leak detection. This method satisfies code, protects the floor, and provides an early warning system for future wax ring failures.
? Does caulking around a toilet help with odors?
Yes. An unsealed gap at the toilet base traps organic material from mop water, cleaning residue, and bathroom humidity, which produces a persistent musty or sour odor that is difficult to eliminate by surface cleaning alone. A sealed caulk bead closes that reservoir, making the base of the toilet far easier to keep clean and eliminating the odor source. If the odor is sulfurous rather than musty, it may indicate a wax ring failure venting sewer gas, which caulk does not fix and which requires reseating the toilet.
Keep reading
Related guides