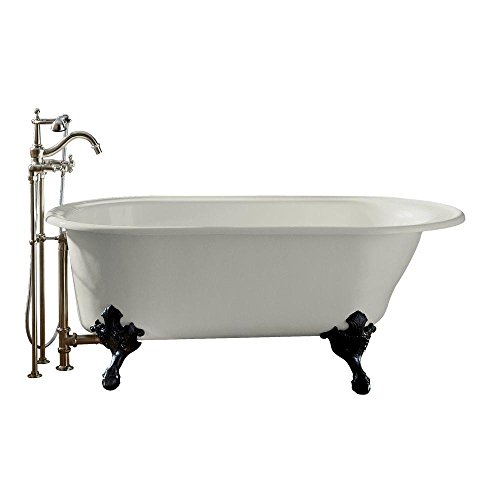
Best Victorian Bathtubs (2026)
Bathroom Remodeling4.6
High-relief clawfoot and roll-top silhouettes, aged brass and bronze feet, and cast iron construction that carry an authentic 19th-century look without giving…
Read the guideA visible gap between a new vanity's side panel and the wall is usually not a defective cabinet. It is a wall that is not perfectly flat, plumb, or square, which is the norm rather than the exception in most homes. The fix is to make the cabinet follow the wall's actual contour, not to force the wall to match the cabinet.
Research updated July 2026.
A gap between a vanity and the wall almost always comes from wall irregularity, not a manufacturing defect. Small gaps (roughly a quarter inch or less) are best closed with flexible caulk. Larger or uneven gaps need the cabinet's side panel scribed to match the wall's actual contour, or a trim piece installed to bridge the space cleanly. Forcing the cabinet tight against an uneven wall by overtightening mounting screws can crack the cabinet frame or throw the doors out of alignment.
Homeowners installing a new vanity often expect the side panel to sit flush against the wall the way it appeared to in the showroom. In practice, very few bathroom walls are perfectly flat, plumb, and square, especially in older homes, and even new construction routinely has enough drywall waviness, corner bump-out, or baseboard thickness to create a visible gap on one or both sides of a vanity cabinet.
This is a normal, well-understood installation issue with established fixes, not a sign the vanity was manufactured incorrectly or measured wrong. The right fix depends on how large the gap is and whether it stays consistent top to bottom or tapers.
The most common cause is simply an out-of-plumb or wavy wall. Drywall installation, framing lumber that has shifted over time, and joint compound buildup at corners all create small variations that a rigid, flat cabinet side panel cannot follow. A second common cause is baseboard trim: if the vanity is installed against existing baseboard, its thickness pushes the cabinet away from the wall face, creating a gap that is actually the baseboard profile rather than a wall flaw.
A third cause is an out-of-square corner where two walls meet. If the vanity sits in a corner or alcove, even an individually flat wall can create a wedge-shaped gap if the corner angle is not a true 90 degrees, which is common in older homes. The gap in this case is typically wider at one end than the other, rather than a consistent width.
How you fix the gap depends heavily on its size and shape. Take these measurements before deciding on an approach:
| Gap Type | Most Likely Cause | Recommended Fix | Difficulty |
|---|---|---|---|
| Small, consistent gap (under a quarter inch) | Minor wall waviness | Flexible paintable caulk bead | Very easy |
| Consistent gap, wider than a quarter inch | Baseboard thickness or textured wall finish | Cabinet filler strip or trim molding | Easy |
| Tapered or wedge-shaped gap | Out-of-plumb wall or out-of-square corner | Scribe the side panel to match the contour | Moderate |
| Gap on one side only | Cabinet shifted during leveling | Re-shim the low side, then re-check both gaps | Easy |
| Gap behind the vanity backsplash area | Wall not flat at the specific mounting points | Shim behind the cabinet at attachment points, not just the front | Moderate |
For gaps under roughly a quarter inch that stay reasonably consistent in width, a flexible, paintable caulk bead is the fastest and most common fix. Unlike rigid wood filler, flexible caulk formulated for trim and molding can accommodate the small seasonal movement that occurs as wood cabinetry and drywall expand and contract with humidity changes, which is especially relevant in a bathroom. Apply a thin, continuous bead, tool it smooth with a wet finger, and paint to match once cured if the side panel is painted rather than wood-finished.
For gaps wider than a quarter inch, caulk alone tends to look sloppy and can crack or pull away since it is not designed to span a large open space. A cabinet filler strip, a thin, paintable or stainable wood strip sized to bridge the gap, gives a cleaner appearance and is a standard technique borrowed from kitchen cabinet installation, where filler strips between cabinets and walls are routine.
Cabinet installers generally caution against trying to close a gap by simply pulling the cabinet tighter to the wall with longer mounting screws or extra force. Bathroom vanities are typically secured through the back panel into wall studs, and forcing a rigid cabinet frame against an uneven wall surface transmits that unevenness into the cabinet itself, which can rack the frame slightly out of square and throw previously well-aligned doors and drawers out of alignment. It is almost always better to let the gap exist and close it cosmetically than to distort the cabinet trying to eliminate it structurally.
Scribing is the standard cabinetmaking technique for fitting a flat panel against an irregular wall surface, and it works well on larger or tapered gaps where caulk and simple filler strips would look uneven or fail to close the full gap. The process involves tracing the wall's actual contour onto the cabinet's side panel using a compass or a scribe tool, then trimming the panel along that traced line so its edge mirrors the wall's shape precisely.
This is more involved than caulking or adding a filler strip and works best on cabinets with an exposed finished side panel designed to be scribed, which most manufacturers anticipate and build with slightly extra material specifically for this purpose. Attempting to scribe a panel that has no extra material to remove will simply reduce the cabinet's width unnecessarily.
| Product | Best For | Notes | Check Price |
|---|---|---|---|
| Flexible Trim and Molding Caulk | Small, consistent gaps | Accommodates seasonal wood and drywall movement | Check price |
| Unfinished Cabinet Filler Strip | Gaps wider than a quarter inch | Trim, finish, and attach to the cabinet side panel | Check price |
| Cabinet Scribing Compass Tool | Tracing an uneven wall contour | Adjustable width for consistent gap tracing | Check price |
| Cedar Shim Pack | Leveling and squaring the cabinet before scribing | Standard tapered shims used behind cabinet mounting points | Check price |
| Quarter Round Trim Molding | Covering a gap where scribing is not practical | Flexible option for irregular or curved wall sections | Check price |
Scribing produces the cleanest result but requires cutting into the cabinet's finished side panel, which not every homeowner is comfortable doing on a higher-end vanity. A lower-risk alternative is a small quarter-round or flexible trim molding along the seam. Flexible trim can bend slightly to follow minor wall waviness without custom-fitting the way a scribed panel needs, and it is easier to remove and adjust if the fit is not right the first time. This works best on moderate, not severely tapered, gaps, since flexible trim has limits on how much variation it can absorb while still looking straight.
Before caulking, scribing, or adding trim, confirm the vanity itself is level and plumb, since an unlevel cabinet can create or worsen a wall gap independent of the wall's actual condition. Use a level across the top and face of the cabinet, and shim behind it at stud locations as needed to correct any tilt. Only after the cabinet is properly leveled and secured should you address the remaining wall gap, since shimming afterward can change its width and shape.
If the vanity sits against existing baseboard rather than a bare wall, part or all of the visible gap may simply be the baseboard's profile pushing the cabinet away from the wall face. Often the cleanest fix is notching the cabinet's side or back panel to fit around the baseboard profile, rather than trying to close the resulting gap with caulk or trim, since a notched fit sits the cabinet directly against the wall as intended. This requires more precise cutting than the other fixes here and is a reasonable point to bring in a carpenter if you are not comfortable notching a finished panel yourself.
Most wall-to-vanity gaps are cosmetic and purely about wall irregularity. Occasionally, though, a large or worsening gap points to something else worth checking before you finish the cosmetic fix:
A gap between a bathroom vanity and the wall is a normal consequence of real-world walls rarely being perfectly flat, plumb, or square, not evidence of a defective cabinet or a measuring mistake. Measure the gap's size and shape first, then choose caulk for small consistent gaps, a filler strip or trim for moderate gaps, or scribing for larger tapered gaps against genuinely uneven walls. Avoid the temptation to force the cabinet tight against the wall with extra screws or brute force, since that risks distorting the cabinet frame far more than a visible gap ever would.
Almost never. The overwhelming majority of vanity-to-wall gaps come from the wall itself not being perfectly flat, plumb, or square, which is extremely common in both older and newer homes. A well-manufactured cabinet with straight, flat side panels will still show a gap against an uneven wall.
There is no strict universal standard, but gaps under a quarter inch are common enough that many installers close them with caulk as a matter of routine rather than treating them as a problem. Gaps wider than that, especially if they taper noticeably, usually warrant a filler strip or scribing for a clean finished look.
Use a flexible, paintable caulk formulated for trim and molding rather than rigid wood filler. Caulk can accommodate the small amount of seasonal expansion and contraction that occurs in wood cabinetry and drywall, particularly in a humid bathroom environment, while rigid filler can crack under that same movement.
Scribing means tracing the actual contour of an uneven wall onto the flat edge of a cabinet's side panel, then trimming the panel along that line so it mirrors the wall's shape precisely. It is a standard cabinetmaking technique for achieving a tight fit against an irregular wall surface.
This is not recommended. Forcing a rigid cabinet frame against an uneven wall surface by overtightening mounting screws can distort the cabinet frame slightly, which may throw previously aligned doors and drawers out of alignment. It is generally better to close a gap cosmetically than to force the cabinet structurally.
A filler strip is a thin, finishable wood strip installed between a cabinet's side panel and the wall to bridge a gap too wide for caulk alone to close cleanly. It is a standard technique borrowed from kitchen cabinet installation and is a reasonable option for gaps wider than roughly a quarter inch.
A gap that tapers from top to bottom usually indicates the wall is out of plumb, meaning it leans slightly rather than running perfectly vertical, or that a nearby corner is not a true 90-degree angle. This is common in older homes and requires a scribed panel or tapered filler strip rather than a uniform-width fix.
Yes, if the vanity is installed against existing baseboard rather than a bare wall, the baseboard's thickness can push the cabinet's back or side panel away from the wall face, creating a gap that reflects the trim profile rather than wall unevenness. Notching the panel to fit around the baseboard is often the cleanest fix.
Yes. A small quarter-round or flexible trim molding along the seam is a lower-risk alternative to scribing, since it does not require cutting into the cabinet's finished panel. It works best for moderate, relatively consistent gaps rather than severely tapered ones.
Level and secure the vanity first. An unlevel cabinet can create or worsen a wall gap on its own, independent of the wall's actual condition. Address the remaining gap only after the cabinet is properly leveled and shimmed, since leveling afterward can change the gap's width and shape.
A gap that increases noticeably over several months, rather than staying constant since installation, can indicate the cabinet is settling or a mounting screw has pulled loose from the wall stud. This is worth investigating rather than simply re-caulking, since re-caulking over a loose mount will fail again quickly.
Not all of them. Many manufacturers build finished end panels with slightly extra material specifically so installers can scribe and trim them to fit, but budget or flat-pack vanities may not have this extra margin. Check with the manufacturer or a close inspection of the panel edge before attempting to scribe a cabinet that may not be designed for it.
How we rank & our data sources
We do not run physical lab tests. Rankings are built from published, verifiable data and real owner feedback, never paid placement.
Researched by admin · Last updated July 9, 2026 · Our review method
High-relief clawfoot and roll-top silhouettes, aged brass and bronze feet, and cast iron construction that carry an authentic 19th-century look without giving…
Read the guide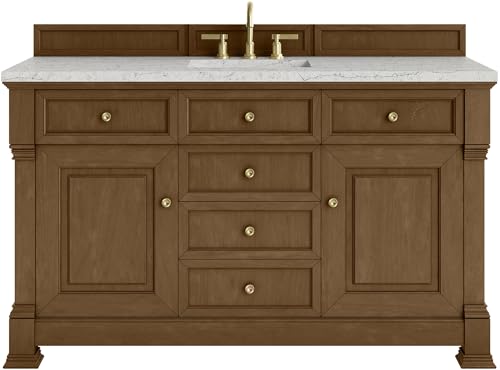
Solid-wood vanities with exposed joinery, flat-panel doors and straight tapered legs that bring genuine Arts and Crafts character without excess ornamentation.
Read the guideA vanity door or drawer that slams shut instead of easing closed almost never means the whole hinge or slide has failed.…
Read the guide