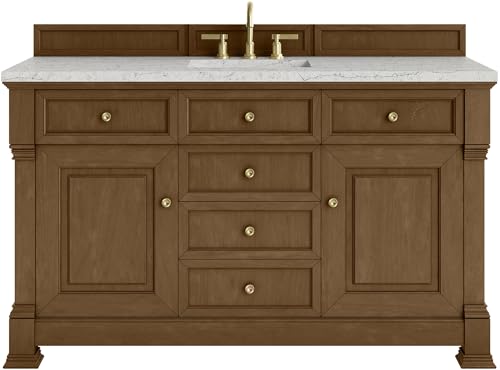
Best Victorian Bathroom Vanities (2026)
Bathroom Remodeling4.6
A curated ranking of furniture-style bathroom vanities with carved corbels, turned legs and raised-panel doors that pair authentic 19th-century looks with real…
Read the guideCrooked, uneven, or misaligned vanity doors are almost never a sign the cabinet needs replacing. Nearly every modern vanity uses concealed hinges with built-in adjustment screws for up-down, in-out, and side-to-side movement, and a few small turns with a screwdriver typically restore even, flush-fitting doors in under ten minutes per hinge.
Research updated July 2026.
Modern concealed cabinet hinges have three separate adjustment screws that move the door up and down, in and out, and left and right. Misaligned doors, uneven gaps, or doors that catch on the cabinet frame are corrected by turning these screws in small increments, testing after each adjustment, rather than by forcing the door or reinstalling the hinge from scratch. Adjust one hinge at a time and recheck the whole door before moving to the next.
Bathroom vanity doors that sit crooked, hang unevenly next to their neighbor, or rub against the cabinet frame are one of the most common cabinetry complaints, and one of the easiest to fix once you understand what each adjustment screw actually controls. Nearly all modern vanities use concealed European-style hinges, sometimes called cup hinges, mounted inside the cabinet rather than the visible strap hinges found on older furniture. These hinges are specifically designed to be fine-tuned after installation, since even a well-built cabinet will show minor misalignment from manufacturing tolerances, settling, or repeated use over time.
The key to fixing alignment issues efficiently is knowing which of the three adjustment screws controls which direction of movement, since turning the wrong screw wastes time and can make the problem harder to diagnose. This guide walks through each adjustment type, how to identify which one you need, and a logical order to work through them.
Concealed hinges typically offer three independent adjustments, each controlled by its own screw. The height adjustment (up and down) moves the door vertically relative to the cabinet frame and is usually the screw that runs vertically through the mounting plate, the part of the hinge attached to the inside of the cabinet frame rather than the door itself. The depth adjustment (in and out) controls how far the door sits away from or into the cabinet frame, affecting how flush the door face sits against the frame edge. The side adjustment (left and right) controls how much the door overlaps the cabinet frame or an adjacent door, and is usually the screw located on the hinge arm itself, closer to the door side of the hinge.
Not every hinge brand places these screws in exactly the same position, and higher-end hinges from brands like Blum and Salice sometimes combine two adjustments into a single cam-style screw. Before making any adjustment, open the door fully and visually locate all the screws on the hinge, then turn each one slightly by hand (with the door supported) to observe which direction it moves the door before committing to a full adjustment.
| Symptom | Adjustment Needed | Typical Direction to Turn | Difficulty |
|---|---|---|---|
| Door sits higher or lower than its neighbor | Height (up/down) | Turn the vertical mounting plate screw | Easy |
| Door protrudes or sits recessed vs. the frame | Depth (in/out) | Turn the depth screw on the mounting plate | Easy |
| Uneven gap between two doors, wider top or bottom | Side (left/right) | Turn the side screw on the hinge arm | Easy |
| Door rubs or catches on the frame | Side and depth combined | Small adjustments to both, testing between each | Moderate |
| Door will not stay closed or pops open | Not an alignment issue | Check the soft-close dampener or catch instead | Easy |
Work on one hinge at a time, and make small adjustments, generally a quarter turn or less per attempt, closing the door to check the result before turning the screw further. Most concealed hinges have a moderate amount of adjustment range, typically a few millimeters in each direction, which is more than enough to correct normal installation and settling issues but will not compensate for a door that is warped or a cabinet frame that is significantly out of square.
If a vanity has two or more doors that need to align with each other, adjust the reference door first (often the one that already looks correctly positioned relative to the cabinet frame), then adjust the neighboring door to match it, rather than trying to adjust both simultaneously toward some assumed correct position.
Cabinet installers commonly note that homeowners tend to over-adjust in large turns when a small quarter-turn would have solved the problem, which then requires backing out the adjustment and starting over. The adjustment screws on most concealed hinges have a fine thread specifically so small turns produce small, predictable movements. Working slowly with frequent checks is faster in total time than making large adjustments and repeatedly overshooting the target position.
If a door still will not sit correctly after working through all three adjustments, the issue is usually not the hinge adjustment range but something else entirely. A warped door panel, more common on humid bathroom cabinetry than on kitchen cabinets, cannot be corrected by hinge adjustment alone, since the panel itself is no longer flat. A cabinet frame that has racked out of square, sometimes from being installed against an uneven wall or floor without proper shimming, can also exceed what hinge adjustment alone can compensate for.
A loose mounting plate is another common cause that mimics an alignment problem. If the screws holding the hinge's mounting plate to the cabinet frame have loosened, the door can shift position on its own even after a correct adjustment, making the fix seem temporary. Tighten the mounting plate screws first, or reinforce the screw holes with wood glue and toothpicks or a wood filler if the holes have stripped out from repeated use.
| Product | Best For | Notes | Check Price |
|---|---|---|---|
| Precision Screwdriver Set | Fine hinge adjustment screws | Small tips reduce the risk of stripping soft screw heads | Check price |
| Blum Clip Top Concealed Hinge | Full hinge replacement | Common OEM equivalent for many vanity brands | Check price |
| Salice Concealed Cabinet Hinge | Full hinge replacement | Alternative brand with similar three-way adjustment | Check price |
| Wood Repair Glue and Filler Kit | Stripped hinge mounting screw holes | Reinforces the hole so the screw bites again | Check price |
Adjustment solves the majority of alignment complaints, but a full hinge replacement is the right call when:
Vanity door alignment can drift gradually as a household uses the cabinet daily, screws experience minor vibration loosening, and humidity cycles slightly swell and shrink the wood or MDF door panels. A quick seasonal check, especially after the first few months in a newly installed vanity, catches minor drift before it becomes noticeable enough to bother fixing. Tightening all visible hinge screws lightly once or twice a year, without over-tightening into softwood or MDF, is a reasonable low-effort maintenance habit that keeps adjustments from being needed as frequently.
Misaligned vanity doors are one of the most fixable cabinetry problems homeowners encounter, precisely because concealed hinges are engineered with adjustment built in for exactly this purpose. Work through height, side, and depth adjustments in small increments, one hinge at a time, and the vast majority of uneven, crooked, or rubbing doors resolve without any hardware replacement. Reserve replacement for hinges with physical damage, stripped screws, or a mounting position that has genuinely exhausted its adjustment range.
The height adjustment is typically controlled by a vertical screw on the mounting plate, the part of the hinge attached to the inside of the cabinet frame. Turning it moves the entire door up or down relative to the cabinet, and is the correct fix when a door sits higher or lower than its neighbor.
An uneven gap, wider at the top or bottom than the rest, points to a side (left-right) adjustment issue. Locate the side adjustment screw on the hinge arm, near the door side of the hinge, and make small turns while checking the gap after each adjustment.
Rubbing usually indicates the door needs a depth adjustment (in/out), a side adjustment, or both, since the door is sitting too close to the frame at the point of contact. Make small adjustments to each and test by opening and closing the door slowly to see if the rubbing stops.
Most concealed hinges offer a few millimeters of movement in each of the three directions (height, depth, and side), which is enough to correct typical manufacturing tolerances, minor settling, and normal wear. It is not enough to compensate for a significantly warped door or a cabinet frame that is badly out of square.
This is usually a loose mounting plate rather than a failed adjustment. If the screws securing the hinge's mounting plate to the cabinet frame have loosened, the door can shift position even after a correct adjustment. Tighten the mounting plate screws first, and repair any stripped screw holes with wood glue and toothpick slivers before readjusting.
Yes. All three standard adjustments (height, depth, and side) are designed to be made with the door still mounted on the hinges, using a screwdriver through access points on the hinge arm and mounting plate. There is no need to remove the door from the cabinet for routine alignment adjustments.
If the door still will not sit correctly after working through height, depth, and side adjustments, check for a warped door panel, a cabinet frame that has racked out of square, or a mounting plate that has loosened. These issues fall outside what hinge adjustment alone can fix and need a different repair.
Most concealed hinges have the manufacturer's name or logo stamped directly on the hinge cup or arm, visible when the door is open. If no marking is visible, comparing the hinge's shape and screw placement to manufacturer catalogs, or bringing a photo to a hardware store, usually identifies the brand.
Yes, to a degree. Daily use, minor vibration loosening of screws, and humidity-driven expansion and contraction of wood or MDF panels can cause gradual alignment drift over months or years. A quick seasonal check and light re-tightening of hinge screws is a reasonable maintenance habit, especially in the months after a new vanity is installed.
Mild warping can sometimes be partially compensated for by adjusting the hinges to the far end of their range in the opposing direction, though this is a workaround rather than a true fix. Moderate to severe warping, common in humid bathrooms with lower-quality MDF doors, typically requires a replacement door panel from the manufacturer.
No. Most modern vanities use concealed European-style cup hinges with three-way adjustment, but some budget or traditional-style vanities use exposed decorative hinges with no adjustment feature at all. If your vanity has visible, non-adjustable hinges, alignment issues typically require reshimming the door or replacing the hinge rather than turning adjustment screws.
Most concealed hinges use a standard Phillips head screwdriver for all three adjustments, though a smaller precision screwdriver can make fine adjustments easier to control without slipping and marring the screw head. No specialty tools are required for routine adjustment on the vast majority of cabinet hinge brands.
How we rank & our data sources
We do not run physical lab tests. Rankings are built from published, verifiable data and real owner feedback, never paid placement.
Researched by admin · Last updated July 10, 2026 · Our review method
A curated ranking of furniture-style bathroom vanities with carved corbels, turned legs and raised-panel doors that pair authentic 19th-century looks with real…
Read the guide
Chinese-influenced bathroom vanities favor rich lacquered dark-wood-adjacent finishes, ornate symmetrical cabinet detailing, and deep red or gold hardware accents. This guide ranks…
Read the guide
A curated ranking of pedestal, console and vitreous china sinks with ornate, high-relief period-correct shapes for a true 19th-century bathroom.
Read the guide