What Is a Faucet Cartridge and What Does It Do?
A faucet cartridge is a self-contained valve mechanism that controls water flow and temperature by aligning internal ports as you rotate or lift the handle. When the cartridge wears out, the seals fail and water slips past, creating the familiar drip or the inability to shut the flow off completely. Cartridge-style faucets are the most common residential type sold today, found in single-handle and double-handle configurations from brands including Moen, Delta, Kohler, and American Standard.
Inside every cartridge-type faucet is a cylindrical or disc-shaped assembly containing rubber O-rings, ceramic discs or rubber seals, and a rotating or sliding stem. When you move the handle, the stem shifts or rotates to open or close ports that allow hot water, cold water, or a blend to reach the spout. Over years of daily use, the O-rings harden and crack, ceramic discs develop micro-fractures, and mineral deposits from hard water fuse moving parts in place. The result is a faucet that drips, requires excessive force, or mixes temperatures erratically.
The EPA estimates that a single dripping faucet at one drip per second wastes more than 3,000 gallons annually. Across the average household with multiple faucets, cartridge wear is one of the largest preventable sources of indoor water waste. Because cartridge replacement restores the faucet to factory performance rather than simply patching a symptom, plumbing professionals consistently recommend it over short-term fixes like tightening the packing nut or applying sealant tape.
Expert Take
Most major faucet brands design their cartridges to be owner-replaceable. Moen, for example, offers a lifetime warranty that covers cartridges and will ship a replacement at no charge. Kohler and Delta provide similar coverage. Before purchasing a replacement, check your faucet brand and series number because cartridges are model-specific and are not interchangeable between brands or even between different series within the same brand.
How Do You Know When a Faucet Cartridge Needs Replacing?
The clearest sign is a faucet that drips from the spout even when the handle is fully in the off position, which means the cartridge seals can no longer block water flow. Additional symptoms include a handle that has become stiff or requires unusual force to operate, water that leaks around the handle base rather than from the spout (indicating O-ring failure), or hot and cold water that mix inconsistently regardless of handle position.
Homeowners often attempt to stop drips by turning the handle harder, but this accelerates wear and can strip the valve seat or crack the cartridge body. If tightening makes no lasting difference, the cartridge is the correct replacement target. Below is a reference table of symptoms and their most likely causes to help you diagnose before purchasing parts.
What Tools and Parts Do You Need for a Faucet Cartridge Replacement?
The essential tools are a cartridge puller (a specialty tool that grips and extracts the cartridge without damaging the valve body), adjustable pliers, a flathead and Phillips screwdriver, and a utility knife or pick for removing O-rings. Parts required include the brand-specific replacement cartridge, a set of appropriately sized O-rings, and plumber's grease to lubricate the new cartridge before installation.
Cartridge pullers are inexpensive (typically $8 to $20) and are sold at most hardware stores and home centers. Some brands include a puller tool with the replacement cartridge. Using pliers directly on the cartridge body risks cracking it or gouging the valve seat, which turns a simple swap into a more involved repair. Investing in the correct tool is always the better call.
Expert Take
Before buying a replacement cartridge, photograph the old cartridge after removing it and note any stamped part numbers on the cartridge body. Bring the old cartridge to the hardware store or use the manufacturer's website to cross-reference. Many faucet brands update cartridge designs across generations, so visual confirmation prevents purchasing an incompatible part. Moen's 1222 and 1225 cartridges, for example, are physically similar but not interchangeable.
How Do You Replace a Faucet Cartridge Step by Step?
Start by shutting off the water supply valves under the sink and opening the faucet to release pressure. Remove the handle by prying off the decorative cap, unscrewing the handle screw, and pulling the handle straight up or forward. Extract the retaining clip with needle-nose pliers, then use a cartridge puller to draw the cartridge straight out of the valve body. Insert the new cartridge in the same orientation, replace the clip, reassemble the handle, and restore water supply to test.
The following step-by-step procedure covers the most common single-handle cartridge faucets, including popular configurations from Moen, Kohler, Delta, and American Standard. Thermostatic shower cartridges follow a similar sequence but may involve additional anti-scald limit stops; consult the manufacturer's installation sheet for those units.
Step 1: Shut Off the Water Supply
Locate the hot and cold supply valves under the sink. Turn each clockwise until fully closed. Open the faucet handle to the full-on position to drain pressure and allow remaining water in the supply lines to flow out. Place a bucket or towel under the work area because a small amount of residual water will drip when you remove the cartridge.
Step 2: Remove the Handle
Look for a decorative cap on top of or behind the handle. Most caps snap in and lift off with a small flathead screwdriver. Beneath it is a Phillips or hex screw. Remove that screw and set it aside. Pull the handle straight up or slide it forward depending on design. Some handles require a slight wiggle to break loose mineral bonding; do not force them sideways as this can crack the cartridge stem.
Step 3: Remove the Retaining Clip
Most single-handle cartridge faucets use a horseshoe-shaped or U-clip retainer visible at the top of the valve body after the handle is off. Grip the clip with needle-nose pliers and pull it straight up. Keep the clip because you will reuse it with the new cartridge. Some Kohler and American Standard models use a threaded packing nut instead of a clip; unscrew it counterclockwise with pliers.
Step 4: Extract the Old Cartridge
Thread the cartridge puller onto the cartridge stem per the tool's instructions. Pull straight up with steady, even force. Moen cartridges typically release cleanly; older Delta ball-style units may bind if mineral scale has built up. If resistance is significant, soak a cloth in white vinegar and wrap it around the valve body for 20 minutes to dissolve deposits before retrying. Once the cartridge is out, inspect the valve body interior for debris and wipe it clean.
Step 5: Note the Cartridge Orientation
This is the most critical step. Cartridges have a front and a back, and installing the new one upside down or rotated 180 degrees reverses your hot and cold supply, meaning pulling the handle to hot delivers cold water and vice versa. Note which side of the cartridge faces the front of the sink, or mark it with a marker before removing. Most cartridges have an alignment tab or flat that engages a slot in the valve body to ensure correct orientation.
Step 6: Prepare and Insert the New Cartridge
Apply a thin coat of silicone-based plumber's grease to all rubber O-rings on the new cartridge. Do not use petroleum jelly (Vaseline) because it degrades rubber over time. Align the new cartridge with the valve body slot and press it firmly straight down until it seats fully. The retaining clip holes on the cartridge should line up with the slots on the valve body when seated correctly.
Step 7: Replace the Retaining Clip and Reassemble
Slide the U-clip or horseshoe clip back into its groove until it locks in place. Reposition the handle over the cartridge stem, making sure the stem engages the handle socket. Replace and tighten the handle screw (do not overtighten on plastic stems), then snap the decorative cap back on.
Step 8: Restore Water and Test
Slowly open the supply valves counterclockwise. Turn on the faucet and run water for 30 to 60 seconds to flush any air or debris from the line. Check for drips from the spout and leaks around the handle base. Verify that hot and cold are on the correct sides by testing each position. If the handle is reversed, shut off the supply, remove the cartridge, rotate it 180 degrees, and reinstall.
Expert Take
After replacing a cartridge in a faucet supplied by high-mineral or hard water, consider installing an under-sink water filter or treating the supply with a magnetic descaler. Hard water with dissolved calcium and magnesium is the single largest driver of premature cartridge failure. Households in areas with water hardness above 7 grains per gallon (gpg) typically replace cartridges two to three times more often than households on soft water systems, according to plumbing service industry data.
Which Faucet Brands Have the Most Reliable Cartridges?
Moen's 1222 and 1225 cartridges carry a lifetime warranty and are among the most widely available replacement parts in the industry. Delta's ceramic disc cartridges used in their Monitor series are similarly durable and backed by a lifetime coverage guarantee. Kohler's ceramic disc valves rated at 500,000 cycle lifespans are among the most robust in the premium segment, while American Standard and Gerber offer solid mid-range performance with widely available OEM parts.
Cartridge durability is not solely a brand question. EPA WaterSense certified faucets are independently tested for flow performance but not specifically for cartridge lifespan. The more useful metric is the number of operational cycles a valve is rated for. Premium ceramic disc cartridges from established brands typically carry ratings of 200,000 to 500,000 cycles. Budget faucets using rubber-seal cartridges may carry no published cycle rating and fail noticeably faster in hard-water environments.
When pairing a new faucet with a bathroom renovation, TOTO and Kohler offer cohesive collections that match their toilet lines, which is worth considering for homeowners upgrading a full bath. Our best flushing toilets guide covers how to match plumbing fixtures for a coordinated bathroom design. For sink-specific guidance, our bathroom faucet buying guide details which brands offer the most user-serviceable designs.
Can You Replace a Faucet Cartridge Without Turning Off the Main Water Line?
Yes, in nearly all cases you only need to close the individual supply stop valves directly beneath the sink, not the home's main shutoff. If the stop valves are older, corroded, or seized and cannot fully close, you will need to shut off the main water supply or the branch shutoff for that bathroom to proceed safely. Always verify the supply valves are fully closed before starting by opening the faucet and confirming no water flows.
A critical safety note: if your shutoff valves are more than 15 to 20 years old and have not been operated recently, they may leak or fail when you try to close them. In older homes, it is worth exercising the shutoff valves once a year by turning them fully closed and then reopening them. A seized or failing shutoff valve found during a repair can add significant complexity to what was a straightforward job. If a shutoff valve is soft, leaking, or will not fully close, replace it before attempting the cartridge swap.
Identifying Common Cartridge Types by Brand
Not all cartridges are pulled straight out. Delta ball faucets use a different mechanism entirely: a hollow rotating ball controls flow through ports in the valve seat. While technically not a cartridge, the ball, springs, seats, and O-rings all wear together and are sold as a repair kit rather than a single cartridge. Knowing your faucet type before purchasing parts prevents buying the wrong repair kit.
Water Efficiency Considerations After Cartridge Replacement
A properly sealing cartridge is the foundation of water efficiency, but the aerator also plays a major role. EPA WaterSense certified bathroom faucets flow at 1.5 GPM (gallons per minute) or less at 60 PSI, compared to the federal maximum of 2.2 GPM. If you are replacing an older faucet entirely, choosing an EPA WaterSense labeled model ensures it has been independently tested and verified to use at least 30 percent less water without sacrificing performance.
The aerator screws onto the faucet spout end and is a separate maintenance item from the cartridge. Clogged aerators cause reduced flow and are often misdiagnosed as cartridge failure. Before concluding that a cartridge replacement is needed, unscrew the aerator, flush it with water, and soak it in white vinegar overnight to dissolve mineral buildup. If flow returns to normal, the cartridge was not the problem. For related bathroom maintenance, see our guides on what to look for when buying a bathroom faucet and how to clean bathroom drains.
Thermostatic Cartridges in Shower Valves
Shower valve cartridges work on the same principle as sink cartridges but carry additional responsibility: they contain anti-scald components required by most building codes. The ASSE 1016 standard mandates that shower valves limit hot water delivery to a maximum of 120 degrees Fahrenheit to prevent scalding injuries, which are a documented safety hazard particularly for children and elderly users.
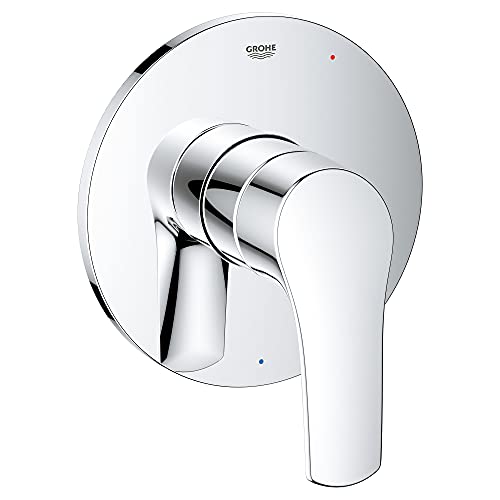
Pressure-balancing cartridges (such as the Moen Posi-Temp and Kohler Rite-Temp) protect against sudden pressure shifts caused by toilet flushes or dishwasher cycles. Thermostatic cartridges (found in premium shower systems) maintain a preset temperature even as supply pressures fluctuate. When replacing a shower cartridge, always reinstall or recalibrate the anti-scald limit stop to ensure the maximum temperature setting has not shifted. A cartridge replaced without verifying the limit stop can deliver scalding water if the stop was at a low position and the new cartridge defaults to a higher range. See our guide on bathroom faucet buying for a full overview of shower valve types.
Expert Take
When a cartridge swap does not stop a faucet drip, the valve seat may be corroded or pitted. The valve seat is the metal surface the cartridge seals against inside the valve body. If this surface is damaged, a new cartridge cannot form a watertight seal regardless of its condition. A valve seat grinder tool can resurface mild damage, but severely corroded seats require replacing the entire faucet body. This situation is most common in homes over 40 years old with copper or galvanized steel plumbing that has seen decades of mineral-rich water flow.
How Long Does a Faucet Cartridge Last?
Under average residential use, a quality cartridge from a major brand lasts 10 to 20 years. Factors that shorten lifespan include water hardness above 7 gpg, high system pressure (above 80 PSI, which is above the EPA recommended maximum), chlorinated water at high concentrations, and frequent on-off cycling such as in commercial or high-traffic settings. Water softeners or whole-house filters can meaningfully extend cartridge life in hard-water regions.
A faucet used roughly 5 times per day accumulates approximately 1,825 cycles per year. At that rate, a cartridge rated for 200,000 cycles has a theoretical service life of over 100 years under ideal conditions. Real-world factors like water chemistry and operating pressure bring that figure down considerably, but it illustrates why water quality is the dominant variable in cartridge longevity rather than cycle count alone.